Introducción
Usa esta guía para remplazar correctamente las tiras adhesivas que sujetan la batería en su lugar en cualquiera de los últimos modelos del iPhone. Cada vez que remuevas la batería, estas tiras adhesivas deben ser remplazadas. Las tiras adhesivas pueden dañarse fácilmente si no se aplican correctamente. Como sugerencia es buena idea tener un par de tiras adhesivas de repuesto si estas siguiendo esta guía por primera vez.
Los modelos más grandes de iPhone "Plus", usan 3 tiras en vez de dos, pero el procedimiento es el mismo.
Antes de comenzar, deberías haber retirado la batería siguiendo una de las guías de abajo. Nota: Los iPhone 5 y modelos más viejos no usan tiras adhesivas.
- Reemplazo batería iPhone 6
- Reemplazo batería iPhone 6 Plus
- Reemplazo batería iPhone 6s
- Reemplazo batería iPhone 6s Plus
- Reemplazo batería iPhone 7
- Reemplazo batería iPhone 7 Plus
Para reemplazar los adhesivos de la batería en diferentes modelos de iPhone, utiliza una de las siguientes guías:
Qué necesitas
Resumen del Video
-
-
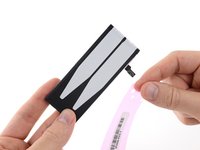
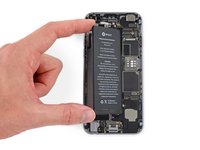
Si tu nueva batería viene con tiras adhesivas ya incluidas, pasa al paso 7.
-
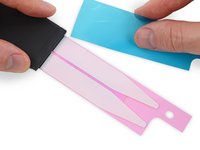
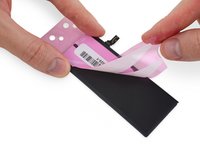
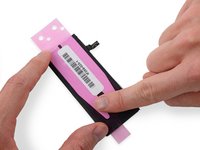
Por otra parte: Si está presente, retira las pequeñas películas de plástico que cubren los extremos planos de las tiras adhesivas.
-
-
-
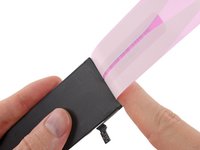
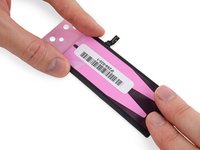
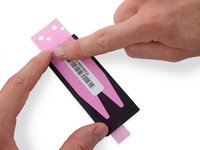
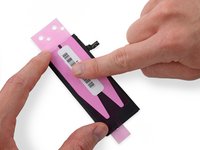
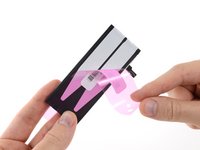
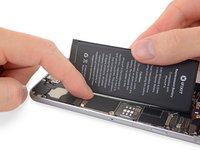
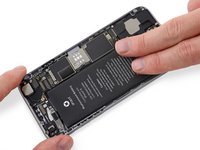
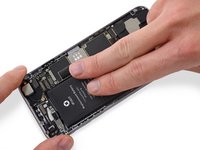
Coloca la batería boca abajo sobre una superficie plana.
-
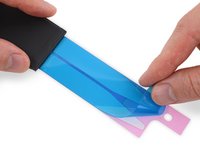
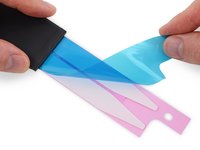
Comenzando en el extremo puntiagudo de las tiras adhesivas, despega la gran película azul que cubre las tiras.
-
Si te sucede esto y obtuviste tus tiras de iFixit, contáctanos aquí y te enviaremos un reemplazo de inmediato.
-
Mientras tanto, puedes volver a armar tu iPhone temporalmente con un poco de cinta de doble cara para sostener la batería.
-
-


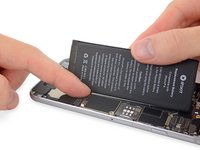


Para volver a ensamblar tu iPhone, vuelve a la guía que utilizaste para remover la batería y sigue los pasos en orden inverso.
Recuerda llevar tu batería gastada a un centro de reciclaje certificado.
Para volver a ensamblar tu iPhone, vuelve a la guía que utilizaste para remover la batería y sigue los pasos en orden inverso.
Recuerda llevar tu batería gastada a un centro de reciclaje certificado.
Cancelar: No complete esta guía.
1622 personas más completaron esta guía.
Un agradecimiento especial a estos traductores:
100%


Estos traductores nos están ayudando a reparar el mundo! ¿Quieres contribuir?
Empezar a traducir ›


68 comentarios
I had to read these directions thoroughly three times before proceeding as I didn't want to screw it up on the adhesive. Went slow and it worked just fine
I would say jus watch out as you go from step 4 to step 5 - the white adhesive can become slightly detached from the backing as you push it onto the edge of the battery and then around to the back side. Extreme care here! Very good guide and equipment. Galaxy class!
All was good, aside from the adhesive bunched up when I removed the blue backing and it started to separate from the pink backing. I had to just gingerly make sure it was all straight and kept steady like a heart surgeon until I had it smoothed down as best as possible. It all went well, but I was worried I'd end up with a big stuck ball of white adhesive in the middle of the battery plate, making it all uneven and stupid looking.
What happens if I use a different adhesive than this one?
The iPhone adhesive strips we sell (and the original Apple ones) are special since they have very strong adhesion, but they can be removed easily by pulling on the tabs on the lower edge of the battery. People have had success with our 3M double-sided sticky tape (aka sticker tape), but standard plastic double-sided tape may not have enough strength to hold the battery in place. If you want the strongest adhesive possible, you should use iPhone adhesive strips mentioned above, but if your phone isn't subject to lots of movement, you could get by with some sticker tape.