
Nokia G42 5G Screen Assembly Replacement

Introducción
Ir al paso 1Use this guide to replace a broken screen on your Nokia G42 5G.
This guide is written for the genuine Nokia G42 5G screen assembly. The assembly consists of the screen and midframe together as one part. Make sure you have the correct part before you begin this repair.
Note: This procedure requires transferring your phone's internals into the new assembly.
For your safety, turn on your phone and allow the battery to discharge below 25% before starting this procedure. This reduces the risk of fire if the battery is accidentally damaged during the repair. If your battery looks puffy or swollen, take extra precautions.
Qué necesitas
Kits de reparación
Este kit contiene todas las piezas y herramientas necesarias para completar esta guía.

Partes


Herramientas


Ver más…
-
-
Power down your phone and unplug any cables.
-
Insert a SIM eject tool, bit, or a straightened paper clip into the small hole on the SIM card tray on the upper left edge of the phone.
-
Press firmly to eject the tray.
-
-
-
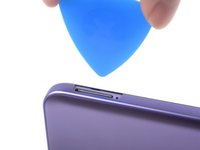
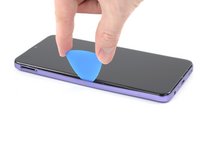
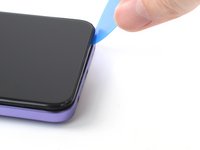
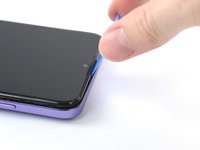
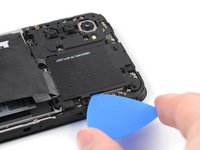
Insert an opening pick under the small notch in the SIM card tray slot.
Don't try to fully remove the back cover just yet, as it's still connected with a cable.
-
-
-
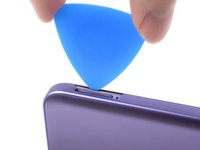
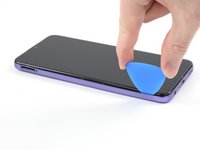
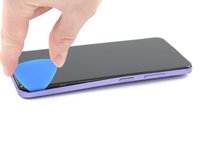
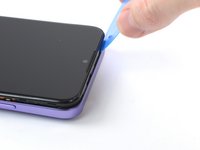
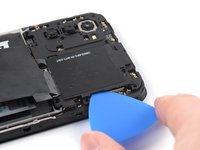
Position the opening pick at a steep downward angle between the back cover and the screen assembly.
-
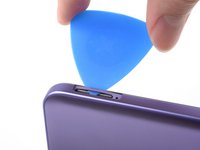
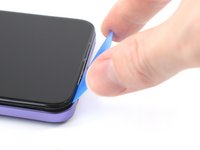
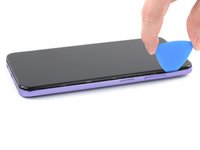
Slide the opening pick down the left edge of the phone to release the plastic clips.
-
-
-
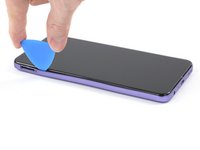
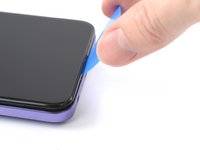
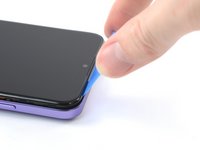
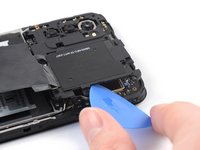
Slide the opening pick up the right edge to continue releasing the plastic clips.
-
-
-
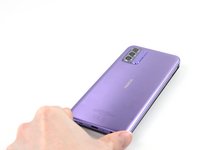
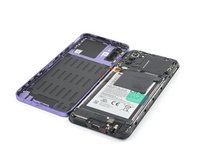
With the phone laying screen-side down, carefully lift the right edge of the back cover, opening it like a book.
-
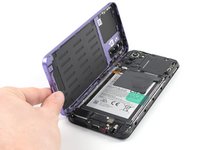
Lay the back cover next to the phone.
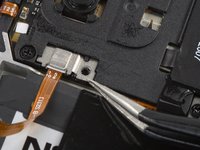
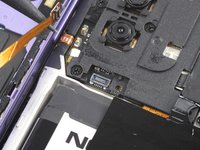
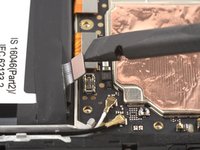
Das ist nicht das Kabel für den Fingerabdrucksensor, sondern für den Ein-/Ausschalter und der Schalter hat sich bei mir gelöst und es hat mir einige Nerven gekostet das Maleur wieder zu beheben. Der Schalter ist nur sehr lose eingeclipst und muss dann zum Drehen und befestigen des Kabels am Motherboard mit dem Vorderteil gedreht werden.
-
-
-
Use a Phillips screwdriver to remove the 3.8 mm‑long screw securing the fingerprint reader bracket.
-
-
Herramienta utilizada en este paso:Tweezers$4.99
-
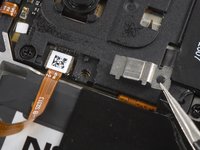
Use a pair of tweezers or your fingers to remove the fingerprint reader bracket.
-
-
-
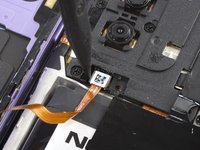
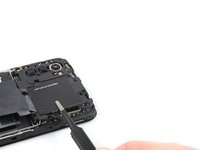
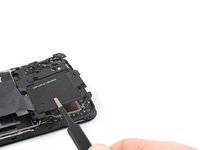
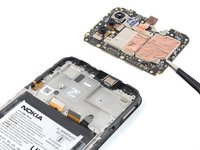
Use the pointed end of a spudger to disconnect the fingerprint reader by prying the connector straight up from its socket.
-
Remove the back cover.
-
-
-
Use a Phillips screwdriver to remove the ten 3.8 mm-long screws securing the motherboard cover.
-
-
-
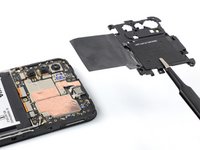
Insert an opening pick under the right edge of the motherboard cover.
-
Twist the opening pick to release the plastic clips.
-
-
-
-
Use a pair of tweezers or your fingers to remove the motherboard cover.
-
-
-
Use the flat end of a spudger to disconnect the battery cable by prying the connector straight up from its socket.
-
-
-
Use a Phillips screwdriver to remove the eight 3.8 mm-long screws securing the loudspeaker.
-
-
-
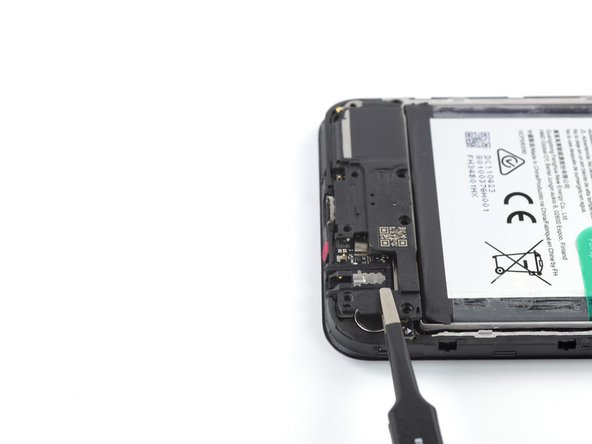
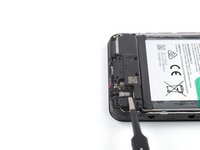
Insert an opening pick underneath the top right edge of the loudspeaker.
-
Twist the opening pick to release loudspeaker from the plastic clips holding it in place.
-
-
-
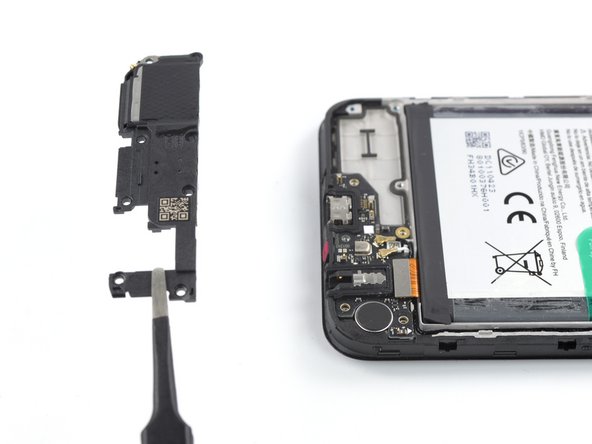
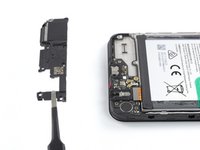
Use a pair of tweezers or your fingers to remove the loudspeaker.
-
-
-
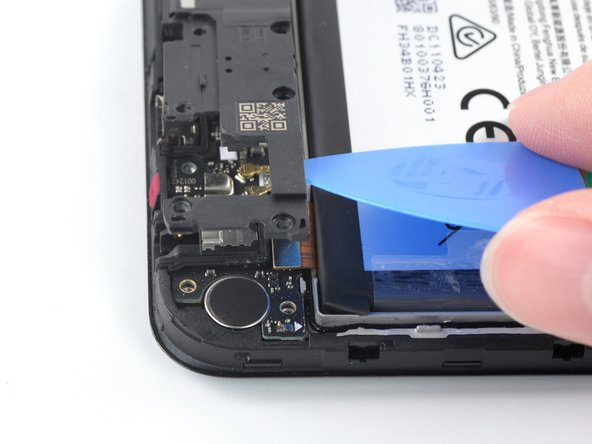
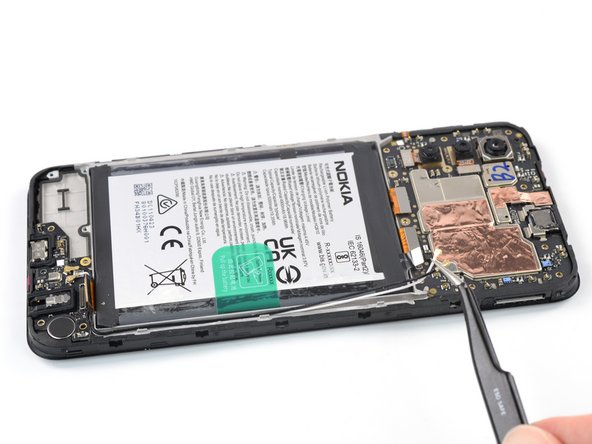
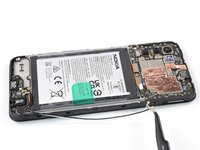
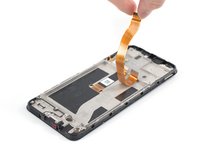
Use the flat end of a spudger to disconnect the interconnect cable by prying the connector straight up from its socket.
Hello there, I have damaged the interconnect cable during the screen replacement process, do you offer replacement cables for sale?
Hello Oliver, unfortunately we currently do not have interconnect replacement cables available in the iFixit store. In this case, please reach out to Nokia Phones support!
-
-
-
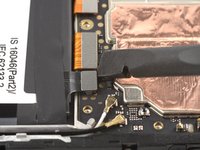
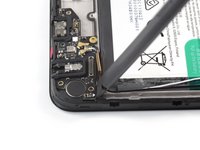
Use a spudger to disconnect both antenna cables by prying their connectors straight up from the sockets on the motherboard.
-
-
Herramienta utilizada en este paso:Tweezers$4.99
-
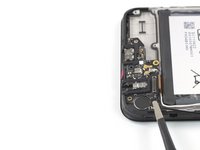
Use a pair of tweezers or your fingers to lift the antenna cables out of their recess in the frame.
-
-
-
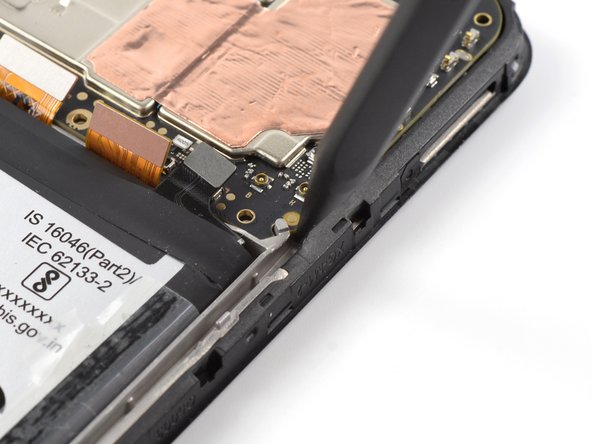
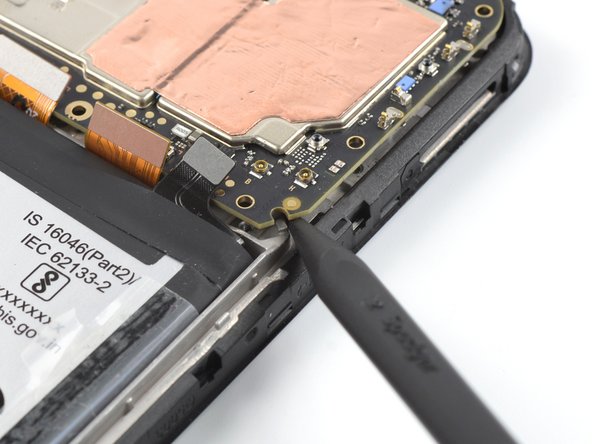
Insert the flat end of a spudger underneath the top right edge of the charging port assembly.
-
Pivot the charging port assembly up until you can grip it with your fingers.
-
-
-
Use a pair of tweezers or your fingers to remove the charging port assembly.
-
-
Herramienta utilizada en este paso:Tesa 61395 Tape$5.99
-
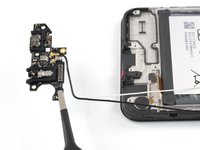
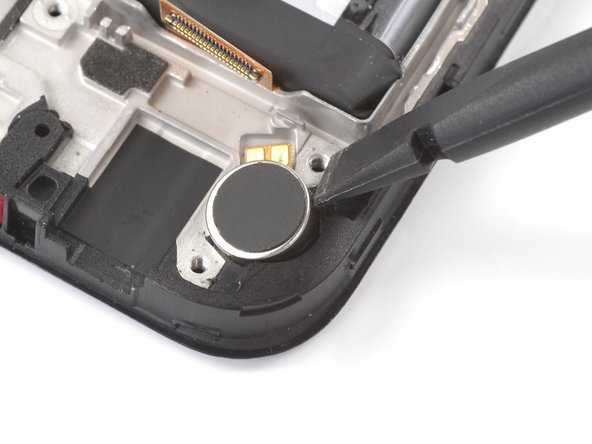
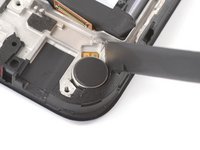
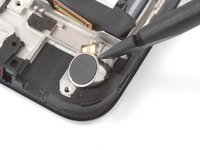
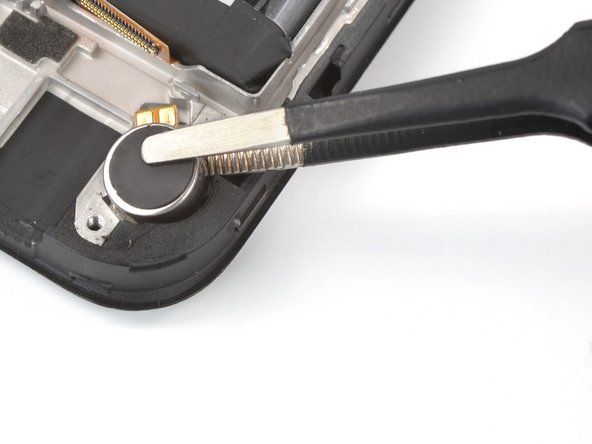
Insert the flat end of a spudger into the small recess on the upper right side of the vibration motor.
-
Pivot the spudger up to pry up the vibration motor off of the adhesive securing it underneath.
I could not insert the flat end of the spudger into the small recess to remove the vibration motor. In the end I used a very small flat screwdriver to lift it up.
J'ai du utiliser une lame fine la spatule ne rentre pas
-
-
-
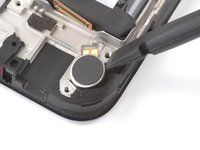
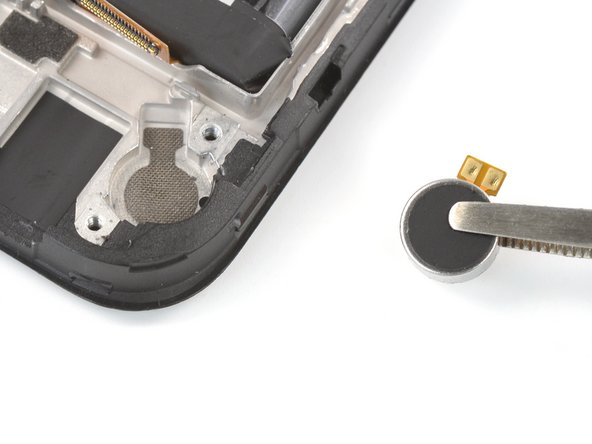
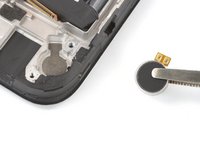
Use a pair of tweezers or your fingers to remove the vibration motor.
-
-
-
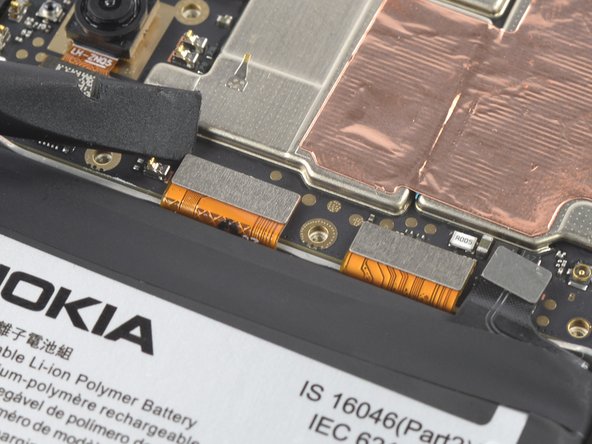
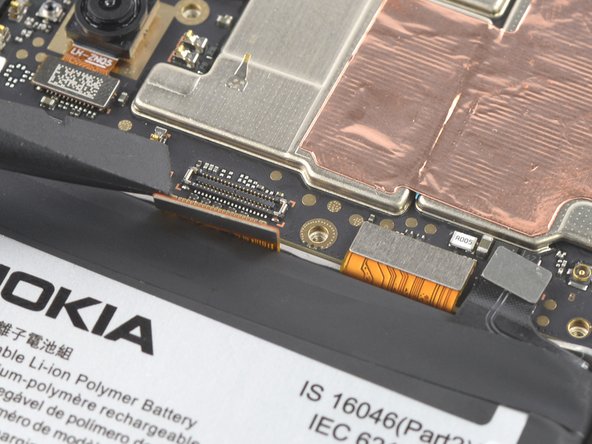
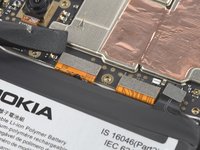
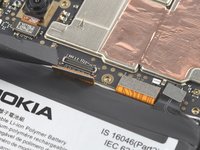
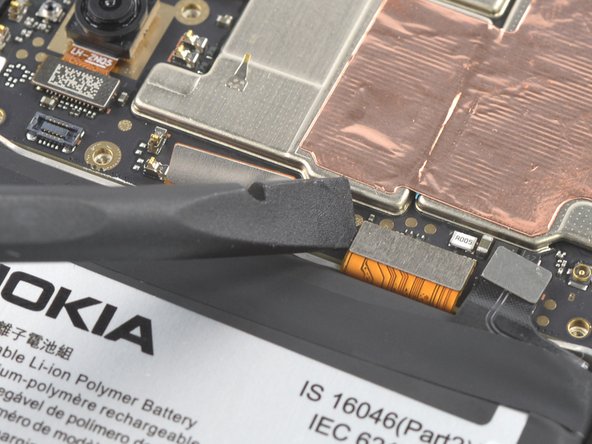
Use the flat end of a spudger to disconnect the display cable by prying the connector straight up from its socket.
Upon re-assembly the display cable of the new assembly was somewhat longer than the old assembly, I could not reconnect it because there was a little bit too much strain on the cable while bending it. I had to remove the battery again (fortunately I had not applied pressure yet to glue it in place), so I recommend to install the battery after attaching the display cable.
-
-
-
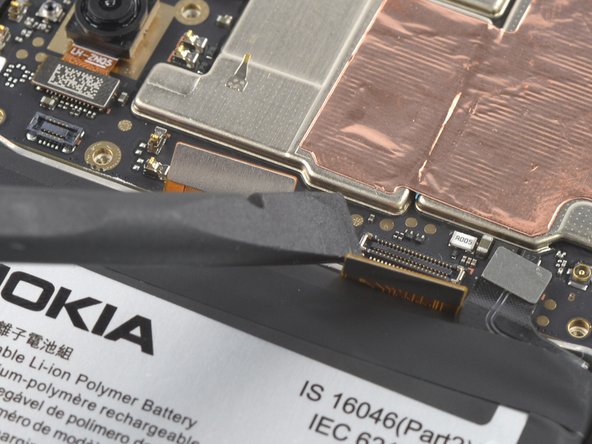
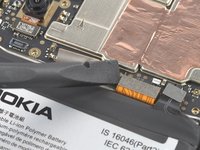
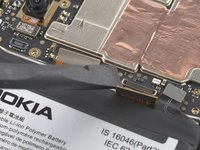
Use the flat end of a spudger to disconnect the interconnect cable by prying the connector straight up from its socket.
-
-
-
Use a Phillips screwdriver to remove the single 2.8 mm‑long screw securing the motherboard.
please do not use red circles when the board is green. I actually missed the screw almost.
-
-
-
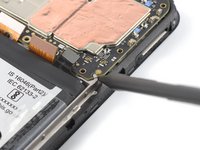
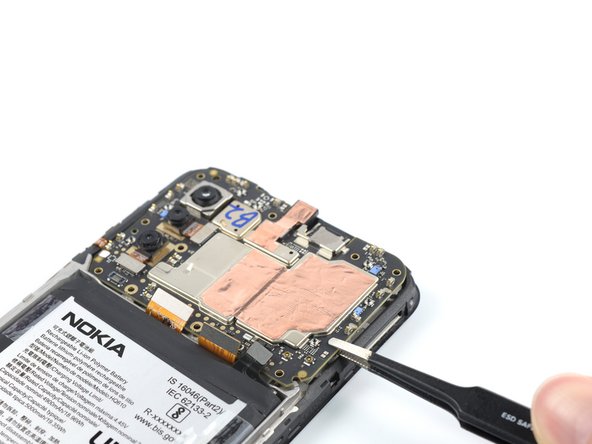
Insert the pointed end of a spudger underneath the bottom right corner of the motherboard.
-
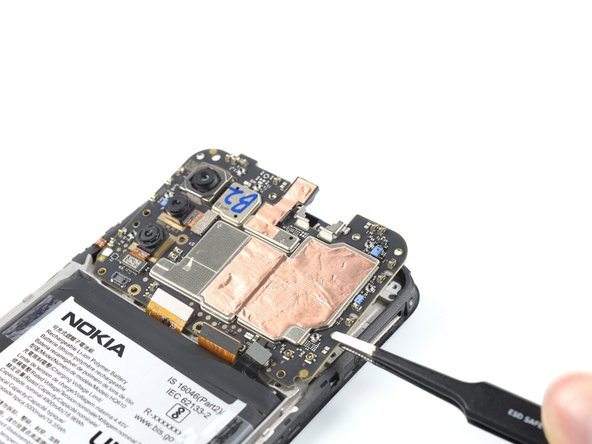
Pry the motherboard up until you can grip it with your fingers.
There is a clip near the top right screw that the motherboard fits under. When re-assembling, make sure you fit this corner in under the clip first, or the motherboard sits on top of it and the screw ill not engage with the threads in the hole - the motherboard will sit proud by about 1mm.
-
-
-
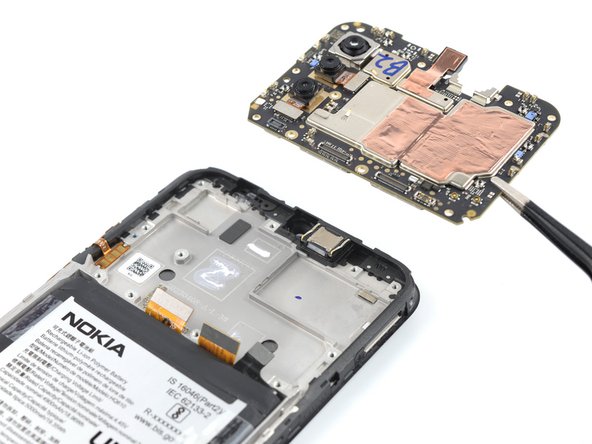
Grip the motherboard on the right edge using a pair of tweezers or your fingers.
-
Remove the motherboard.
-
-
-
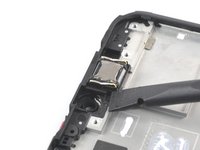
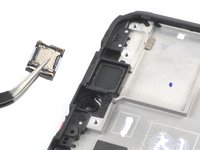
Insert the flat end of a spudger underneath the bottom left corner of the earpiece speaker and pry it out of its recess.
-
Remove the earpiece speaker.
-
-
-
Use your fingers to peel the two outer adhesive tabs off of the battery.
Please see also step 26: Upon re-assembly the display cable of the new assembly was somewhat longer than the old assembly, I could not reconnect it because there was a little bit too much strain on the cable while bending it. I had to remove the battery again (fortunately I had not applied pressure yet to glue it in place), so I recommend to re-install the battery after attaching the display cable.
-
-
-
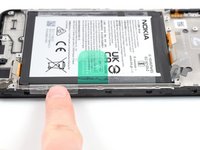
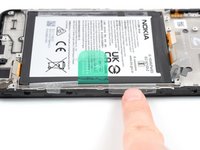
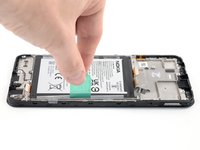
Use your fingers to peel the center green pull tab off of the battery.
-
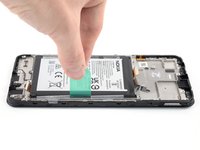
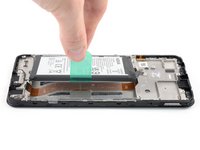
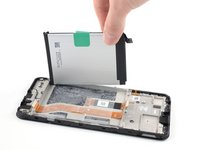
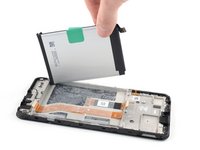
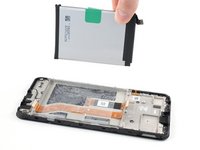
Using one hand to hold the phone steady, use your other hand to slowly and steadily lift the center green pull tab up to separate the adhesive securing the battery underneath.
-
If you have any difficulties with stubborn battery adhesive, you can contact Nokia's phones support.
-
-
-
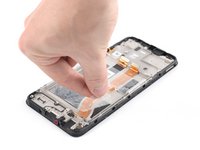
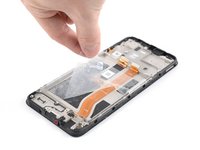
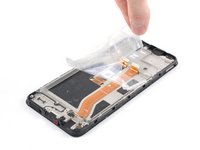
Grab the bottom right edge of the leftover adhesive film and pull it towards the top of the phone with steady force to remove it.
-
Remove the battery adhesive film from its liners and apply it to the battery.
-
Align the bottom edge of the battery (the edge without adhesive) with the bottom edge of the recess.
-
Lower the battery down and press firmly to secure it in place.
-
-
-
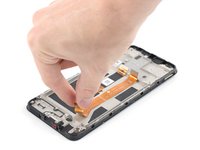
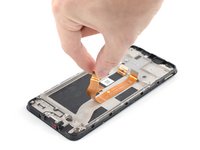
Grab the bottom of the interconnect cable and peel it up towards the top of the phone to remove it.
Please see also step 26: re-install the battery after you have reconnected the interconnect cable to the motherboard.
-
-
-
Only the screen assembly remains.
-
If your part comes with battery adhesive pre-installed, remove its plastic liners before continuing to the previous step.
-
If your part has no battery adhesive, remove the clear liner on the pre-cut battery adhesive and apply the sticky section to the battery well. Remove the opaque liner before continuing to the previous step.
After replacing the screen myself, the phone stopped receiving the network. I had to throw it away and buy a new phone. Waste of money for screen
Hello Igor, sorry to hear that you experienced issues following your repair. It sounds like the issue might have been caused by the antenna cable being damaged or disconnected. In these cases, we recommend physically reseating the connectors of the antenna cable on both motherboard and daughterboard as well as checking the cable and connectors for signs of damage. If this doesn't help, you can contact Nokia's phones support to get further support.
This worked like a charm! It wasn’t too frustrating and my phone is as good as new!
how can i remove the assemble, i broke my screen and cant find a guide on how to remove and replace the screen
Hi there! The replacement part in this case is the screen assembly, so not just the screen but the midframe and buttons. Therefore, the repair consists in moving the components to the new screen assembly without removing / replacing the screen itself. Hope this helps!
I ordered a screen + frame kit off Amazon but the new frame does not come with the power and volume buttons connector attached. Your guide does not show how to remove this part from the old frame and place it on a new one. Is this possible or should I buy a screen-only kit and attempt to attach it to the old frame?
Hi Daniel! The genuine replacement part available in the iFixit Store should include pre-installed buttons. Transferring the buttons is pretty finnicky and not generally recommended, but definitely possible. The buttons are held in place by adhesive that can potentially be reused for the new frame. Doing a screen-only repair would require a different procedure and application of heat and suction to remove the old screen.
Indeed, had the same issue. The buttons are mildly glued, so you can gently pull them off. Used a needle for it, there are small indents you can use.
jos -
-


To reassemble your device, follow these instructions in reverse order.
Take your e-waste to an R2 or e-Stewards certified recycler.
Repair didn’t go as planned? Try some basic troubleshooting, or ask our Answers community for help.
To reassemble your device, follow these instructions in reverse order.
Take your e-waste to an R2 or e-Stewards certified recycler.
Repair didn’t go as planned? Try some basic troubleshooting, or ask our Answers community for help.
Cancelar: No complete esta guía.
8 personas más completaron esta guía.


43 comentarios
followed all your rules and snapped the inside of my phone thank you
Hi Lee, sorry to hear that you experienced issues during your repair. Could you provide me with additional information about which step / action caused this? If you assume the repair is not salvageable, please contact Nokia's phones support to get further support.
Pretty straightforward. Followed instructions to the letter - everything went back together fine.
I followed the Instructions and it worked perfectly. Ready in under 1h.
Unacceptable..., screen assembly parts are out of stock.
Could you make it more friendly to users?
Hi Wang, Shou-Cheng,
Good news: screen assembly parts are back in stock again! Additionally, we offer a notification option so you'll get an info email as soon when the item is restocked. Hope this helps!
Bought replacement screen and was sent just screen with digitizer no frame like all repair shown no frame so sat to replace now its in bit and uable to complete it
Hi Chris Bryant,
Unfortunately, we weren't able to match your information with an order. Did you buy the replacement part from iFixit? If so, please contact our customer support (eustore@ifixit.com for EU orders or support@ifixit.com for Non-EU orders), so we can help you get the issue sorted out! Thanks!
The disassembly was fine, but the instructions for reassembly (i..e. NONE) were disappointing. Some guidance on how to align and re-connect the interconnect cable would have been helpful. I now have a phone with a beautiful new screen, but I can't use it because there is no sound and I can't charge it. I'm assuming because the interconnector was damaged in all my attempts to line it up. Of course, you can't buy this cable.... so now I get to throw away the phone AND the new screen
Hi Caroline,
sorry to hear about your problems during reassembly. We will add a reassembly note for the interconnect cable based on your feedback. Have you checked whether the cable connecting to the charging port assembly is seated properly? Please also note our basic troubleshooting information. If you assume the repair is not salvageable or in order to get guidance on a replacement interconnect cable, please reach out to Nokia phones support.
Just exactly the same thing happened to me. I was so excited about fixing my phone, everything was so easy and clear until the moment of re-connecting the interconnect cable. I was struggling few hours and then I realised that the speaker doesn't work and the phone is not charging. Caroline, did you manage to do something with it?
How and where can I buy this cable?
Hi Monika Marchlińska,
I'm sorry that you encountered a problem with the interconnect cable during your repair. We've added reassembly notes to the guide to help with the realignment. If you assume the repair is not salvageable or you want to inquire regarding a replacement interconnect cable, please reach out to HMD support.
I reached HMD support, who told me to contact eustore@ifixit.com which I did, but they told me to post on the forum and noone replied. Is there any opportunity that the interconnect cable will be for sell? Just like other parts?
Hi Monika Marchlińska,
Sorry that you've been routed around on this issue. I've forwarded it internally to try and find a solution for the situation.
Manuel Haeussermann, I'm waiting :)
Manuel Haeussermann did you find any solution? If I could just buy the interconnect cable, that would be great
Hi Monika Marchlińska, Unfortunately, it does seem like the solution to this is still in the works, but I'll ask again. Please apologize the delayed response.
Hi toffvs,
Screen assembly parts are back in stock again, with Fix Kits following shortly! Additionally, we offer a notification option so you'll get an info email as soon when the item is restocked. Hope this helps!
More steps than I initially thought there would be when I bought the phone, but generally quite straight forward. I had to adjust the interconnect ribbon after installation (removing the battery, again). Maybe the step of replacing the battery could be done a little later, when the ribbon cables are set? I think it could be done nearly at the end of re-installation.
Hi Kyle Eyvindson, thanks for the feedback! We've added reassembly notes to the guide to make realigning the interconnect cable more straightforward.
What a complete waste of time. followed the steps new screen didn't work. followed the troubleshooting and replaced the broken screen and phone works. tried the new screen a second time and no joy. So put phone back together with the old broken screen. Love the idea that the Nokia can be fixed. Shame the quality control on the replacment screens is poor.
Hi pd1,
I'm sorry to hear that you encountered issues during your repair. Considering that your replacement part might be non-functioning, please get in contact with our customer support (eustore@ifixit.com for EU orders or support@ifixit.com for Non-EU orders), so we can help you get the issue sorted out! If you assume the repair is not salvageable, please contact HMD support to receive further support.
Took me about an hour, have added a few comments to the instructions. Phone seems to be working fine.
Hi robincm,
Happy to hear about the successful repair and thank you for your input!
Hi, after assembly I have my screen full of horizontal white stripes, any idea how to troubleshoot?
Hi Dino,
It's difficult to assess remotely, but it may be an issue with the cable or the connector. You might try reseating the display connector to see if anything changes as well as check the cable for damages. Please also check our general troubleshooting info. If you assume the repair is not salvageable, please contact HMD support to receive further support. If you assume that the display or the display cable is defective, contact iFixit customer support (eustore@ifixit.com for EU orders or support@ifixit.com for Non-EU orders), so we can help you get the issue sorted out!
I have the same issue, screen full of parallel white lines, I have opened the phone again checked if any damage to the screen cable which I could not appreciate, I reconnected it, reassembled everything but the issue is still there.
Isasi -
Hi Isasi,
I'm sorry you encountered this issue during your repair. Considering you've reconnected the cable and inspected it for damage, the cause might be a defective replacement part. Please contact iFixit customer support (eustore@ifixit.com for EU orders or support@ifixit.com for Non-EU orders), so we can help you sort it out!
telefoon in en uit elkaar gehaald, scherm vervangen met de instructies en wat geduld allemaal gelukt maar nu werkt mijn microfoon niet meer tijdens het bellen of opnemen van een video... kunnen jullie me helpen?
Hi eva,
I'm sorry to hear that you encountered issues during your repair. Based on your description, I assume every other function is working properly? If so, it might point to an issue with the earpiece speaker, it might face the wrong direction or the pins might not make contact with the motherboard. See Step 31 for information on the reassembly of the earpiece speaker. Please also see our general troubleshooting guidance.
Thanks to the guide and the iFixit replacement part, I managed to complete this in an hour or so. First time I'd bought a screen without a frame; don't make my mistake! Definitely get the frame version from here. I've got one screw left as well - hopefully nothing too important...
Was pleasantly suprised the screen and frame came with extra battery adhesive and a tube of thermal paste too, which was handy.
He seguido la guía en castellano y es muy útil. Yo soy un usuario que no suelo montar ni desmontar dispositivos electrónicos y he conseguido que funcionara perfectamente. Eso sí el proceso es algo complejo y requiere de mucha paciencia e insistencia. La traducción está muy bien hecha. ¡Muchas gracias he ahorrado tiempo y dinero en la reparación de mi pantalla y he aprendido algo sobre como funciona un smartphone!
I was expecting instruction on how to replace the screen but the instructions seem to stop before this critical step.. It would also be helpful to have a reassembly guide!
Hi Happy Bunny,
As noted in the introduction, this guide is written for the genuine Nokia G42 5G screen assembly. The screen assembly consists of the screen and midframe together as one part. A replacement of just the screen would require a different procedure and tools.
I've managed to mess up when reattaching the charging port ribbon cable to the charging port. It won't click into place, so I think I must've bent some of the pins. I can see you can buy the charging port assembly fairly easily, but am unsure if it's the cable that's damaged or the connector in the board.
Does anyone know where I can get a g42 charging port ribbon cable replacement from? Or if a replacement from another Nokia phone will work? I can see they are replacements for other models on eBay.
Thanks!
Hi Stefan, Nokia G42 5G Screen Fix Kits are now back in stock! Sorry for the wait time!
I bought this phone because it was repairable, with a good partnership between HMD and iFixit. At least, I thought so...
It is unacceptable that spare parts are out of stock and that no availability date is mentioned. I am registered on the list to be notified when it will be back in stock but there is no indication whether I will have to wait 1 day, 1 week, 1 month or 1 year before being able to repair my device.
I am somewhat disappointed by this nevertheless great initiative that is iFixit.
Hi JMA, Nokia G42 5G Screen Fix Kits are now back in stock! Sorry for the wait time!
The push buttons for on/off and volume are not adressed in this description. Please add
Hi there, any idea when this fix kit (Item # IF318-010-2) is back in stock. I signed up for the email notification, but just curious how long I might be waiting. Also does the screen in the kit come with the mid-frame as I don't want to make the same mistake as mentioned in the comment below?
Thanks to the guide and the iFixit replacement part, I managed to complete this in an hour or so. First time I'd bought a screen without a frame; don't make my mistake! Definitely get the frame version from here. I've got one screw left as well - hopefully nothing too important...
Was pleasantly surprised the screen and frame came with extra battery adhesive and a tube of thermal paste too, which was handy.