
Reemplazo de la batería

Introducción
Ir al paso 1Utiliza esta guía para sustituir una batería gastada o agotada en tu Apple Watch Series 4.
Esta guía muestra el procedimiento en la versión estándar, sólo GPS, del reloj, pero la versión celular/LTE es similar.
Para tu seguridad, descarga la batería por debajo del 25% antes de desarmar tu Apple Watch. Esto reduce el riesgo de un peligroso evento térmico si la batería se daña accidentalmente durante la reparación.
Nota: Si la batería está hinchada, toma las precauciones adecuadas.
Durante el procedimiento de apertura de la pantalla del Apple Watch, es probable que se dañe la junta de Force Touch. Si separas las capas de la junta o cortas el cable, también tendrás que reemplazar la junta de Force Touch en sí.
Necesitarás adhesivo de repuesto para volver a colocar los componentes cuando vuelva a montar el dispositivo.
Qué necesitas
Kits de reparación
Estos kits contienen todas las piezas y herramientas necesarias para completar esta guía.


Partes


Herramientas


Ver más…
-
-
Antes de comenzar las reparaciones, quita el reloj del cargador y apágalo.
-
Si la pantalla táctil está rota y no puedes apagar el reloj, utiliza este método alternativo para apagarlo.
-
-
-
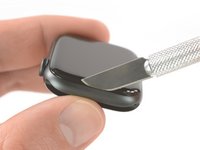
Debido a que el espacio entre la pantalla y el cuerpo del reloj es tan delgado, se necesita una cuchilla afilada para separar ambos. Lee las siguientes advertencias cuidadosamente antes de continuar.
-
-
-
Prepara un iOpener (o usa un secador de pelo o una pistola de calor) y calienta la esfera del reloj para aflojar el adhesivo de la pantalla.
-
Deja el iOpener en el reloj durante al menos dos minutos para calentar completamente la pantalla y suavizar el adhesivo que la sujeta a la caja.
-
-
-
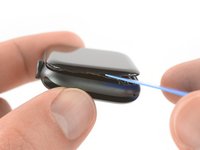
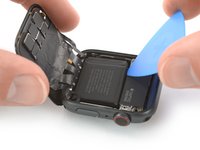
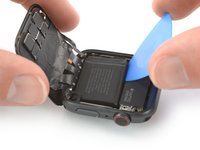
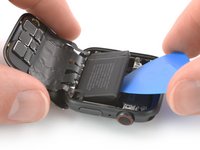
Coloca el borde de una hoja curva en el delgado espacio entre la pantalla y la caja exterior. Empieza por el lado corto de la pantalla, más cercano a la corona digital.
-
Presiona firmemente hacia abajo en el espacio.
-
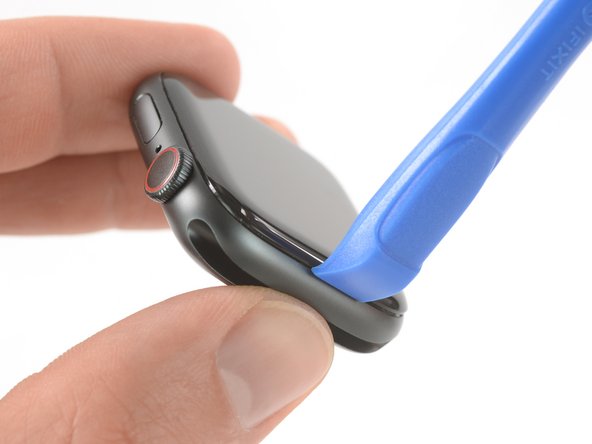
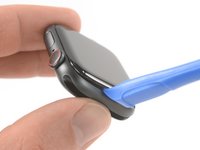
Una vez insertada, inclina la cuchilla para abrir ligeramente la pantalla.
This part is REALLY hard! Even after using the iOpener to warm the watch I had to use A LOT of force to get the blade in between the glass and the case. Be very careful when prying the display. I applied way too much force and my blade shot into the case under the display. I don’t think I damaged anything, but I did replace the force touch gasket to be sure.
I have a stainless steel case, not sure if that makes a difference, and was unable to do this without breaking the screen. Be very careful. Followed instructions but could not get the screen to release no matter how hot I got the watch.
I am moderately experienced at opening Apple devices having replaced batteries in several iPhones, iPods, and an iPad. I could not get the watch open with the x-acto knife blade as shown. I found other sites showed using a 0.1mm thick tool. I bought one and found it relatively easy to open the watch. It has the advantage of going in horizontal rather than vertical so it went between the glass and the force sense gasket. Force sense gasket wasn't disturbed at all. iFixit should add this type of tool to their offering.
-
-
-
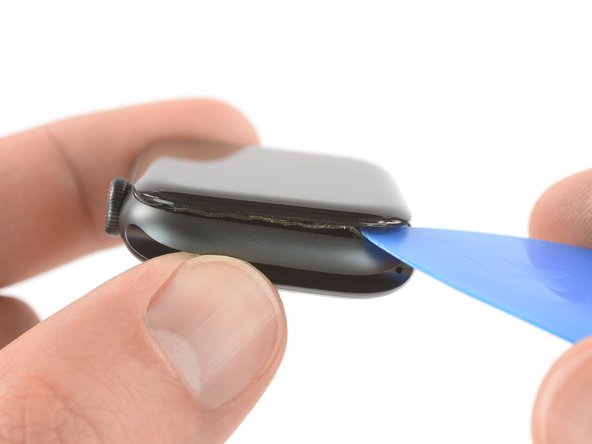
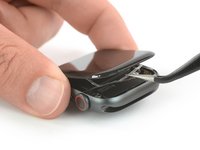
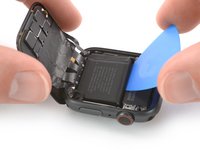
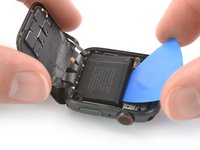
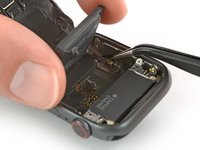
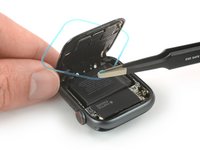
Es probable que el sensor Force Touch se pegue al marco de la pantalla en vez de al cuerpo del reloj. En este caso, inserta una púa de apertura debajo de la pantalla y separe cuidadosamente la junta de Force Touch de la pantalla.
-
Desliza la púa alrededor de la pantalla para separar el adhesivo entre la junta de Force Touch y la pantalla.
This impossible for me. I just left the force touch gasket attached to the display side. I was able to bend the display back with the gasket still in place.
See first the instructions for replacing the force touch gasket to familiarize yourself with parts that need separating. These instructions will seem unclear if you don't know what the force touch gasket looks like.
-
-
-
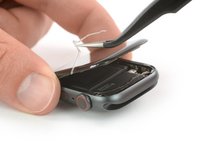
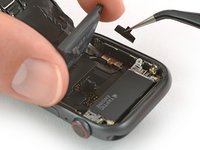
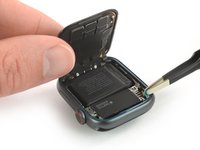
Abra la pantalla al máximo a un ángulo de 45°, y usa pinzas para despegar el adhesivo entre la pantalla y la junta Force Touch.
-
Enrosca el adhesivo alrededor y detrás de los cables de la pantalla para quitarlo completamente. Como el adhesivo debe ser reemplazado de todas formas, puedes cortarlo si eso te facilita su remoción.
-
-
-
-
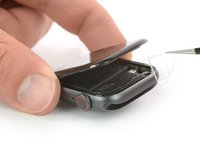
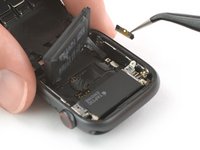
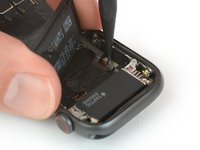
Dobla cuidadosamente la pantalla hacia atrás hasta que tengas suficiente espacio para sacar la batería.
-
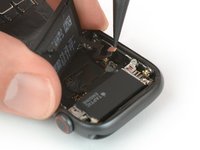
Inserta una púa de apertura entre la batería y el Motor Táctico.
If you are just replacing the screen then there is no need to remove battery.
When removing the screen I tore the two outer cables attached to the lcd screen. What are their purpose? I read somewhere they are just some sort of shield. Will my watch function normally without them?
thanks
-
-
Herramienta utilizada en este paso:Tweezers$4.99
-
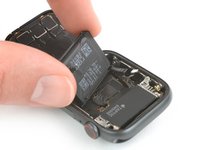
Levanta con cuidado la batería y llévala en un ángulo de 75°.
-
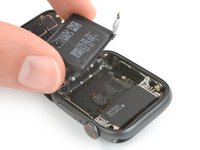
Usa un par de pinzas para despegar la pegatina negra de la placa de metal que cubre el conector de la batería.
-
-
-
Remueve la batería.
When installing the new battery be aware that the sidewall of the watch directly above the contacts and cover screw hole is magnetized. This was shock to me and a little frustrating. Every time I attempted to place the cover with a tweezers it was pulled toward the sidewall. I pushed the plate in place with a spudger, then attached the screw to the tip of the screwdriver. I was then able to insert the screw with minimal disturbance to cover plate.
-
-
-
Los siguientes pasos describen cómo aplicar el adhesivo de reemplazo en preparación para el procedimiento de resellado.
-
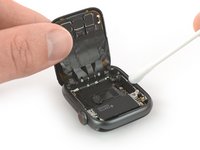
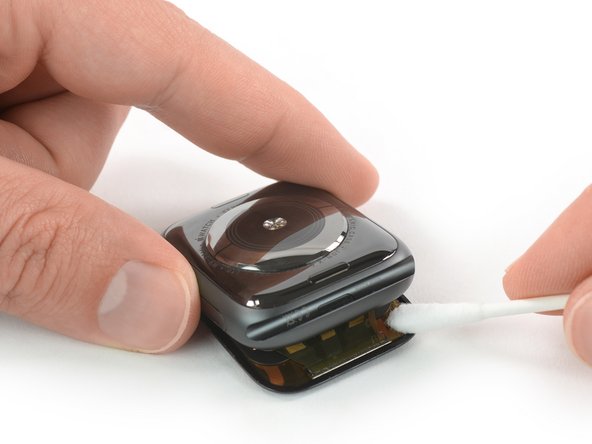
Aplica un poco de alcohol isopropílico alto (>99%) a un Q-tip o usa una almohadilla de limpieza para retirar suavemente el adhesivo sobrante en la parte superior de la junta Force Touch.
I also found a lot of gunt built up on the sidewall between where the glass and case connect. I used the tip of a spudger to scrape the dirt free, then followed with an 90% IPA (isopropyl alcohol) wetted cotton swab.
-
-
-
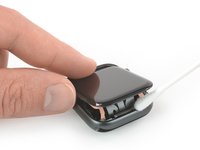
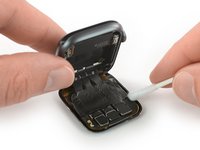
Pon el reloj de Apple al revés para que la pantalla quede plana mientras levantas la caja.
-
Retira el adhesivo sobrante de la parte posterior de la pantalla.
Und warum soll ich dann bei Amazon 70% Tigern kaufen?
Was genau meinst du?
-
-
Herramienta utilizada en este paso:Tweezers$4.99
-
Usa un par de pinzas para retirar cuidadosamente el adhesivo de reemplazo con la película protectora azul del papel de respaldo.
The step showing the new battery being installed is missing.
As stated 3 layers. Trick is to separate them correctly and at the right time. The greatest adhesion is to the blue top layer. If done as shown the most difficult task of separating the blue film will be done at the worst time, on the watch. It is better to do the hard part first, separate the blue from the adhesive. So leave the adhesive on the paper backing in the picture above. Then remove the inner part as 3 layers together leaving you with the paper backed adhesive.
This step should state that if you are replacing the force touch gasket, then you can skip steps 17, 18, and 19. The force touch gasket comes with adhesive already applied.
The gasket is black and won't look translucent blue as shown in the picture. The die cut is poor and I destroyed the first gasket I tried and bought a 2nd one. Carefully complete the die cut with an x-acto knife or equivalent before separating the gasket from the sheet. I don't think it is more difficult to remove the blue film than the paper film backing as suggested by another comment. You definitely need to leave one protective layer on until the gasket is positioned. The exposed adhesive grabs everything and it takes patients to get it positioned.
-
-
-
Sostén el adhesivo de reemplazo en diagonal para pasarlo sobre la pantalla.
-
Inclina ligeramente la pantalla hacia adelante para poder alinear el adhesivo con el marco.
-
Coloca el adhesivo de repuesto sobre la junta de Force Touch.
See my comments previous step. Instead of blue it should look like the brown paper side with the adhesive down. Now press into the cavity in the watch frame. The paper and cavity will make location easy. You shouldn't have to adjust much. Press the face down on top to squish the adhesive into place. It won't stick because the paper is still on. Open and check placement. Now remove the paper
See my comments previous step. Instead of blue it should look like the brown paper side with the adhesive down. Now press into the cavity in the watch frame. The paper and cavity will make location easy. You shouldn't have to adjust much. Press the face down on top to squish the adhesive into place. It won't stick because the paper is still on. Open and check placement. Now remove the paper
-
-
-
Usa el extremo puntiagudo de un spudger para hacer los ajustes de posición final y presiona el adhesivo en su lugar.
-
Sigue la guía de resellado para volver a sellar tu reloj después de volver a armarlo.
-


Para volver a ensamblar tu Apple Watch Series 4, sigue estas instrucciones en orden inverso para volver a conectar la batería.
Para un rendimiento óptimo, calibra tu batería recién instalada: cárgala al 100% y manténla cargada durante al menos 2 horas más. Luego usa tu dispositivo hasta que se apague debido a la baja batería. Finalmente, cárgala ininterrumpidamente al 100%.
Lleva tus desechos electrónicos a un centro de reciclaje certificado.
¿La reparación no salió como planificaste? Consulta nuestra comunidad de respuestas para ayuda en la resolución de problemas.
Cancelar: No complete esta guía.
42 personas más completaron esta guía.
Un agradecimiento especial a estos traductores:
100%


Estos traductores nos están ayudando a reparar el mundo! ¿Quieres contribuir?
Empezar a traducir ›


5 comentarios
Hi laws,
iFixit makes no claims to the continued splash-resistance of the Apple Watch after applying this adhesive strip. It's probably going to be just fine, but we can't confirm that the Apple Watch will maintain its IPX7 waterproof rating after being repaired.
Ich habe jetzt 2 Uhren durch - besten Dank für die Hilfestellung. Ich habe mir die “Dichtungs-Klebestreifen” besorgt, waren für mich aber nicht praktikabel. Bei beiden Uhren hat sich die Force-Touch-Dichtung teilweise gelöst und der Klebestreifen hat zwar auf der FT-Dichtung gehalten, aber das Display kam wieder hoch, da der die FT-Dichtung eben nicht mehr am Gehäuse geklebt hat.
Ich habe mir eine Tube Smartphone-Dichtmasse besorgt, damit konnte ich die FT-Dichtung wieder befestigen und habe damit auch das Glas wieder optimal einkleben können. Da sich sich die Masse (wie die Klebestreifen auch) bei Hitze wieder entfernen lässt: für mich die praktikablere Lösung. Auch nicht ganz so frickelig…
Wie heißt der Kleber? T-7000?
Why is the replacement battery slightly larger than the original? 10 hours of pressure applied after reattaching the display and heating it, but as soon as it's put on a charger, the replacement battery swells up a bit and pushes the display up
Hi. I changed the screen on an apple watch series 4, now the screen works, whcih is great, but when I charge it, the green snake comes on but never charges. It heats up the bottom, gets very warm. Could it be the battery itself? Maybe needs a new one? Is rthere anything else that woudl be causing the battery to not charge and or heat up on the bottom when chaging the screen?
Derrick Brewer - Contestar