Introducción
Sigue esta guía para reemplazar una batería desgastada y deteriorada en el Nintendo Switch Lite.
La Nintendo Switch Lite utiliza tornillos JIS, pero puedes usar un destornillador de cruz (Philips) si no tienes opción. Ten mucho cuidad de no barrer los tornillos. Los desarmadores de iFixit están diseñados para ser compatibles con ambos tornillos.
Para tu seguridad, descarga la batería por debajo del 25% antes de desarmar tu Switch. Esto reduce el riesgo de un evento térmico peligroso si la batería se daña accidentalmente durante la reparación. Si tu batería está hinchada, toma las precauciones adecuadas.
Nota: Este procedimiento requiere quitar la placa de protección, que está pegada al disipador de calor con pasta térmica. La pasta térmica tendrá que ser limpiada y aplicada de nuevo antes de reinstalar la placa de protección.
Qué necesitas
-
-
Usa un destornillador Y00 para quitar los cuatro tornillos de 6.3 mm de largo que aseguran el panel trasero.
-
-
-
Usa un destornillador JIS 000 o un Phillips 000 para remover los siguientes tornillos que sujetan el panel trasero.
-
Dos tornillos de 3.6 mm en la parte superior del dispositivo.
-
Dos tornillos de 3.6 mm en la parte inferior del dispositivo.
-
-
-
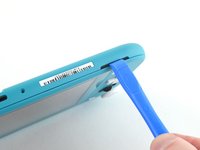
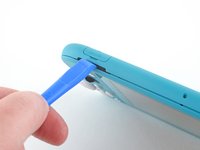
Inserta una herramienta de apertura en la rejilla del altavoz izquierdo en la parte inferior del dispositivo.
-
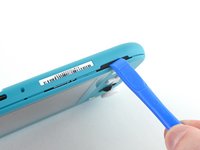
Gira la herramienta de apertura para liberar los clips que aseguran el panel trasero.
-
-
-
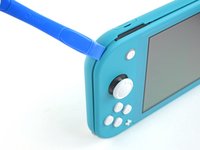
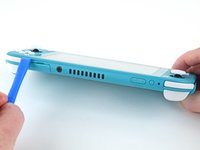
Desliza la herramienta de apertura por la esquina inferior izquierda para liberar los clips del lado izquierdo del dispositivo.
-
-
-
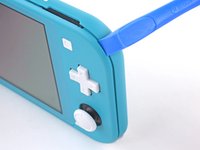
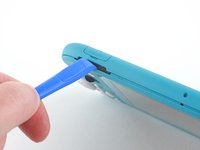
Inserta la herramienta de apertura en la rejilla del altavoz derecho en la parte inferior en el dispositivo.
-
Gira la herramienta de apertura para liberar los clips.
-
-
-
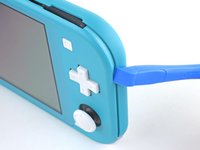
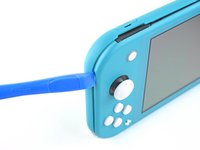
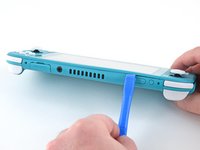
Desliza y empuja la herramienta de apertura por la esquina inferior derecha para liberar los clips del lado derecho del dispositivo.
-
-
-
-
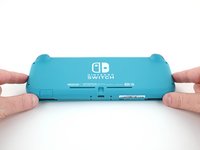
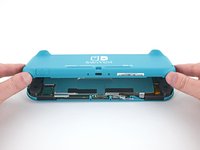
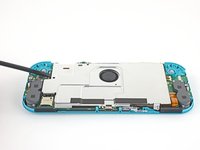
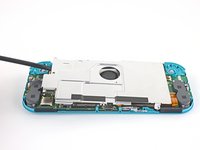
Levanta el borde inferior del panel trasero abriéndolo como un libro.
-
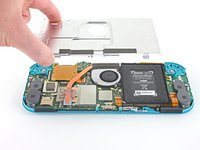
Remueve el panel trasero.
-
-
-
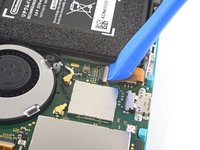
Usa un destornillador JIS 000 o un Phillips (de cruz) 000 para remover los cuatro tornillos siguientes:
-
Tres tornillos de 3.1 mm
-
Un tornillo de 4.5 mm
-
-
-
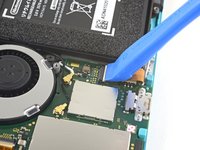
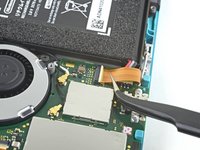
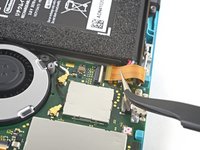
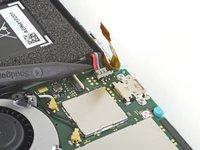
Utiliza una herramienta de apertura o tu uña para levantar la pequeña tapa de cierre con bisagra del conector ZIF del cable de interconexión de la placa madre.
-
-
-
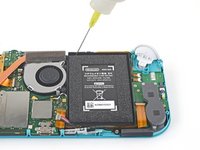
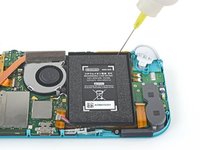
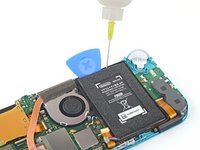
Aplica unas pocas gotas de removedor de adhesivo o alcohol isopropílico de alta concentración (90% o más) dentro del espacio de la batería a lo largo del borde superior para debilitar el adhesivo.
-
-
-
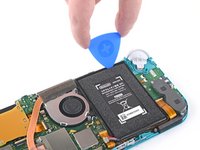
Deja la púa de apertura en su lugar y aplica unas gotas más de removedor de adhesivos o alcohol isopropílico dentro del espacio de la batería. Aplica solo unas gotas, o el liquido puede filtrarse a la pantalla.
-
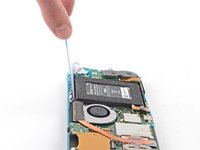
Inclina el borde superior del dispositivo hacia arriba y espera 1-2 minutos para que el alcohol isopropílico debilite el adhesivo.
-
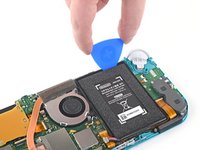
Continúa deslizando la púa a lo largo del borde superior de la batería, cortando más del adhesivo debajo.
-
-
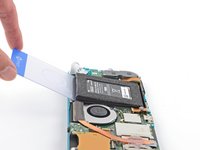
Herramienta utilizada en este paso:Plastic Cards$2.99
-
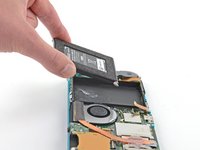
Una vez que haya suficiente espacio, inserta una tarjeta de plástico debajo de la batería y levanta lentamente la batería.
-
Remueve la batería.
-
-
Herramienta utilizada en este paso:Microfiber Cleaning Cloths$3.99
-
Usa un removedor de adhesivos o alcohol isopropílico y un paño de microfibra para limpiar bien cualquier resto de adhesivo que haya quedado en la batería antes de instalar la nueva batería.
-
Si tu nueva batería no viene con el adhesivo preinstalado, sigue esta guía para instalar el adhesivo precortado en la parte inferior de la batería.
-


Para volver a montar el dispositivo, sigue estas instrucciones en orden inverso.
Para un rendimiento óptimo, calibra tu batería recién instalada después de completar esta guía.
Lleva tus desechos electrónicos a un R2 o reciclador certificado por e-Stewards.
¿La reparación no salió según lo planeado? Prueba con soluciones de problemas básicos, o pide ayuda a nuestra Comunidad de respuestas de Nintendo Switch Lite.
Cancelar: No complete esta guía.
40 personas más completaron esta guía.
Un agradecimiento especial a estos traductores:
100%


Estos traductores nos están ayudando a reparar el mundo! ¿Quieres contribuir?
Empezar a traducir ›

27 comentarios
Hello!
I am preparing to repair my daughters nintendo switch light. It has stopped charging out of no where. I have all the tools, I just can't find the battery anywhere. Where would you recommend buying it from?
If you are still looking Ifixit sells one themselves Nintendo Switch Lite Battery
Thanks for the guide. Battery replacement kits are now available on Amazon: https://www.amazon.com/Nintendo-HDH-001-... (they weren’t in November! I was also looking for this during that time)
Unfortunately, the battery was much harder to remove than I expected. I did use a lot of isopropyl alcohol, but the adhesive they use really was giving me a lot of trouble. I should’ve wisened up and googled other adhesive removal methods or tried a new approach other than prying with the spudgers.
Well, now the LCD now has what looks like pressure damage in the bottom left where I’d imagine a lot of the prying pressure went. It is much more noticeable when the screen goes all-white, and not too bad with darker colors.
I don’t blame iFixit for my mistake of course, and it is really disappointing that Nintendo used the amount of adhesive that they did. But I hope this comment can serve as a warning to others attempting this repair to be more gentle even if it’s refusing to come off.
Yikes! Sorry to hear this. How did you pry with the spudger exactly? If you kept it around the top edge of the battery well then I would assume it wouldn’t damage the screen, but if you inserted the end of the spudger deeper in the battery well and used that point as the fulcrum, then I could see that putting a lot of pressure on the back of the LCD.
@craiglloyd I did an embarrassing amount of spudger prying pretty much everywhere along the top/bottom of the battery, I actually broke a few spudger tips in the process so that might reveal something about my approach…
But, I’m starting to think it may not be LCD damage after all, but rather some isopropyl alcohol caught behind the screen– During my prying, the Switch case was getting pretty heavily warped, so maybe some of the alcohol (that I definitely used in excess) slipped in and got sandwiched under the screen? I started to notice this since the blotches seem like they’ve moved over time. Here’s an image of the screen now https://imgur.com/DjYmFnJ (and the dark gray blotch along the leftside isn’t a shadow, white spots in bottom left I thought were pressure damage)
It’s still very usable / not noticeable on black colors and thanks again for the guide! I can give the screen more time to see if it improves at all, or maybe try going back in and trying to see it is trapped alcohol that can be released
vmgm -