
Sustitución de Almohadillas de los Sony WH-1000XM4

Introducción
Ir al paso 1Sigue esta guía para reemplazar las almohadillas de los auriculares inalámbricos Sony WH-1000XM4.
Nota: Las almohadillas izquierda y derecha son diferentes en este modelo.
Qué necesitas


-
-
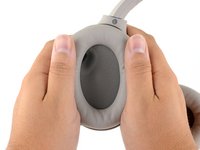
Coloca los auriculares sobre una superficie de trabajo, con las almohadillas para los oídos hacia arriba.
-
-
-
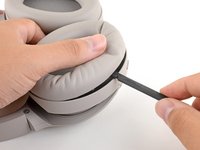
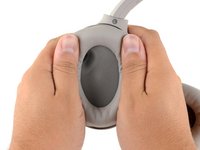
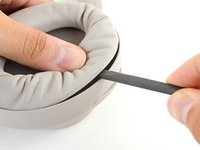
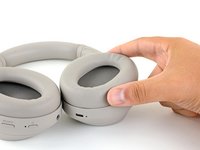
Usa tu pulgar para presionar la almohadilla IZQUIERDA cerca del borde exterior largo, creando un espacio entre la almohadilla y el marco.
-
-
-
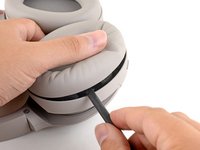
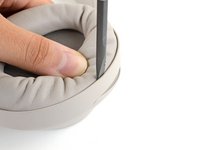
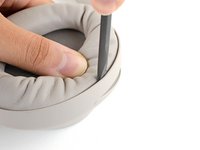
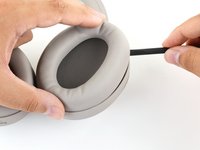
Inserta el extremo plano de un spudger en el espacio que creaste, entre el borde del cojín y el marco.
-
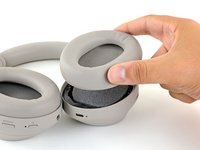
Gira el spudger hacia abajo para soltar el borde largo de la almohadilla.
-
-
-
-
Alinea el cojín sobre el altavoz y presiónelos firmemente para que encaje en su lugar.
-
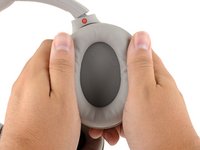
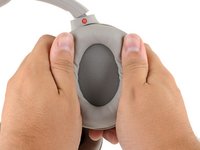
Presiona alrededor de todo el borde del cojín, asegurándote de que todos los clips se hayan acoplado.
-
-
-
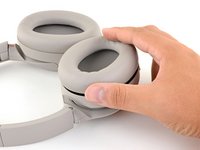
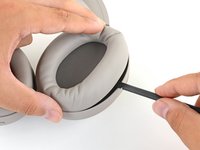
Presiona la almohadilla DERECHA con el pulgar, cerca del borde exterior, para crear un espacio entre la almohadilla y la carcasa.
-
-
-
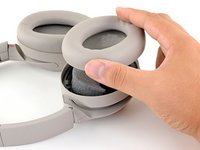
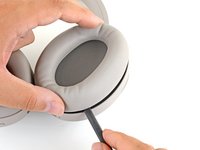
Introduce el extremo plano de una herramienta spudger, en el espacio que creaste, entre el borde de la almohadilla y la carcasa.
-
Gira el spudger hacia abajo para desencajar el borde de la almohadilla.
-
-
-
Alinea la almohadilla sobre el altavoz y presiónala firmemente para que encaje en su lugar.
-
Presiona alrededor de todo el borde de la almohadilla, para asegurarte de que todos los clips hayan encajado.
-


Compara tu nueva pieza de repuesto con la pieza original; es posible que debas transferir los componentes restantes o quitar los respaldos adhesivos de la nueva pieza antes de instalarla.
Para volver a armar tu dispositivo, sigue los pasos anteriores en orden inverso.
¿La reparación no salió según lo planeado? Prueba algunas solución de problemas o busca nuestra Comunidad de respuestas para obtener ayuda.
Cancelar: No complete esta guía.
31 personas más completaron esta guía.
Un agradecimiento especial a estos traductores:
100%

¡ Francisco Javier Saiz Esteban nos está ayudando a reparar el mundo! ¿Quieres contribuir?
Empezar a traducir ›


16 comentarios
This is a great guide!
it is also the solution to the ticking problem on the left ear cup!
there is a small cable linking the microphone to the headset that is beneath the earcup. it has a small holder that should prevent it from moving.
if it’s not attached properly, the noise canceling will start ticking every few seconds in a very annoying way.
removing the earcup and cleaning there is the best solution I found!
Thanks a lot for the amazing guide!!
I was having a similar issue where the right ear cup was making an annoying scratching sound. Turned out to be a hair that was stuck in and brushing against the speaker. Fixed by opening and removing with tweezers!
spencer -
Very comprehensible instructions, thank you! I have rather the problem that the original ear pads are not available anywhere and are not shipped to Germany by Sony. Does anyone have a tip on how to get the replacement pads or any idea which third-party pads can be recommendet?
Where can I buy official replacement earpads?
i also need to know that, i found some OEM on amazon, but i don't trust any of them
I don't know where to find the originals but you might want to look into Dekoni earpads, I just recieved mine for the Sony.
Haven't applied them yet but own plenty of other headphones with Dekoni eapads and I'm always satisfied with them.
Sony outsources the replacement parts to a company named Encompass. https://sony.encompass.com/model/SONWH10...
Consumable: Ear Pads When you need to replace them, please consult with Sony's consultation window, or with the store where you purchased them.
This is an automatic translation of the Japanese version of the reference guide.
If you are prying off the ear pads with something too thin you can actually accidentally slide it past the the ear pad and down far enough to catch the next "layer" which is what the ear pad attaches to, so be careful not to pry too hard in case that happens or you risk breaking the plastic. You might have to pull it back up a bit, it should give fairly easy when you have caught just the ear pad.
The aftermarket service provider for Sony products in Germany seems to be "Service Center Baumeister":
https://shop.scbaumeister.de/Ohrpolster-...
https://shop.scbaumeister.de/Ohrpolster-...
They come at a premium price, though.
70+56€ for replacement earpads?!?
FelixBan -
Thanks for the Tutorial I wish that sony would make the proper OEM pads available. In my opinion the original ones are the best. I have had my xm4 Headphones for years and would buy them again any day. I have had the annoying screeching problem. I think that i know what it is. I maybe moisture and humidity that gets in and affects the microphones. i wear mine constantly and have for many years. I have noticed a pattern and its moisture. I have spoken to sony and they were great. its not really a fault as far as i can tell. sony could not find OEM ear pads which is a shame all other pads are just not the same.
Here's two links for the earpads, https://sony.encompass.com/model/SONWH10...
https://sony.encompass.com/item/11687300...
You can get the battery from here as well!
Will - Contestar