
Reemplazo del cable de alimentación de De'Longhi EC155
Introducción
Ir al paso 1Tenga cuidado al desmontar los tubos y las conexiones. Es posible que estén bien sujetos a la máquina y que requieran un poco de esfuerzo para quitarlos.
Qué necesitas
Herramientas


Ver más…
-
-
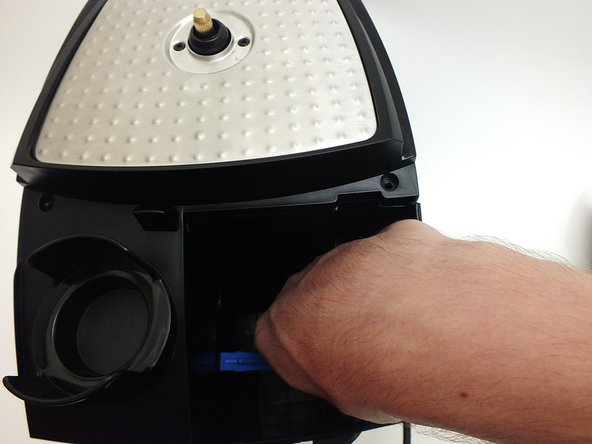
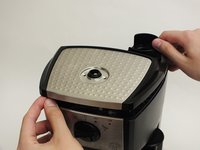
Voltea arriba el panel superior para revelar el depósito de agua.
-
Toma el depósito de agua por su mango y sácalo.
-
-
-
Voltea el dispositivo en su cabeza.
-
Usando el desarmador Phillips #2, desatornilla los cuatro tornillos de 12 mm en cada esquina del panel inferior.
-
Levanta el panel o voltea el dispositivo y deja que el panel caiga afuera.
At least on my unit, those screws weren't Phillips, but Torx Tamperproof T20! Shame on you, De'Longhi!
I also had the Tamperproof Torx on mine - I used a Dremel tool with a small round metal bit and just carefully plunged down on the little nub in the center that makes it tamperproof. Only need to grind it down a millimeter or so, as there isn't much torque on these screws and the torx bit needs just a little depth to grab on it good enough. If you have the tools handy it saves having to buy the tamperproof bits online.
-
-
-
Voltea el dispositivo en si cabeza, con la punta frontal mirandote.
-
Usando el Phillips #2 desatornilla los dos tornillos de 52 mm que se encuentran debajo de la porción superior del dispositivo.
-
-
-
-
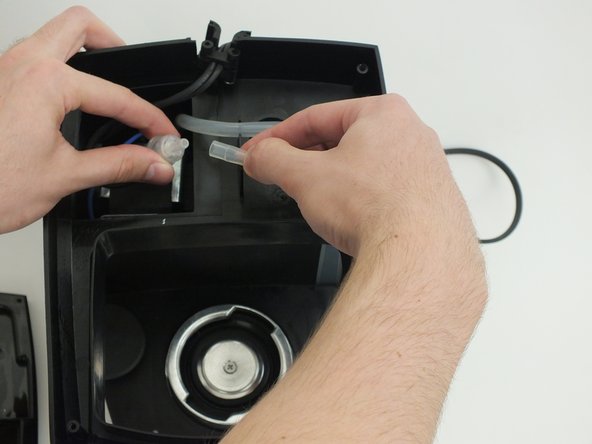
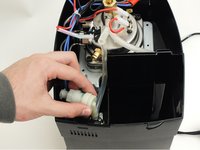
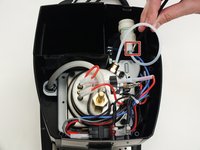
Voltea el dispositivo retira una punta del tubo del agujero de depósito de agua.
There are two tubes connected to the water reservoir hole. The one in the first pic is the one that goes to the water valve, which is the one that you pull through to the top. The one in the second pic is the short one from the bottom of the pump that can detached from the water hole and left in place, to be transferred later to the new pump. Detaching it from the from the filter as shown adds to the impression that this is the tube to the water valve to be pulled through to the top in the next step, which the user quickly finds is impossible, it’s too short.
-
-
Herramienta utilizada en este paso:Tweezers$3.99
-
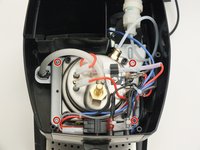
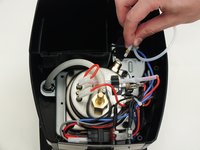
Retira cada clip de la válvula y núcleo usando las pinzas en ángulo de precisión.
My deLonghi failed by leaking from this connection (after years of operation). After a failed attempt with what I was told was an OEM o-ring, I successfully repaired it with a "Silicone O-Ring, 7mm OD, 3mm ID, 2mm Width, VMQ Seal Rings Gasket" from Amazon. (I used a dental pick to pull out the old ring.)
This is the standard o-ring, as used e.g. in Jura devices.
VauWeh -
-
-
-
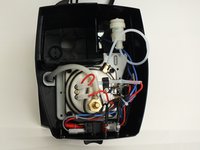
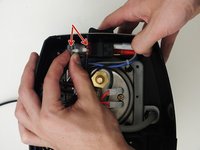
Jala hacia afuera cada LED con un pequeño tirón rápido.
-
Similar, remueve cada set de cables del sintonizador de configuración con un tirón rápido.
It’s better to keep the wires in place and remove the whole setter switch by prying off the knob, then removing the two screws exposed I was unable to remove the core your way because of the difficulty of getting past the setter switch, especially since at the same time you have to wrangle with getting the steamer wand out, even with the frother removed.
Also, your pic shows four wires to disconnect, there are actually five, and there’s no view of which of them go where—another reason for keeping them connected.
-
-
-
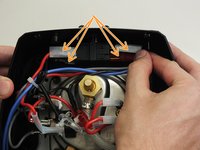
Inclina el núcleo mientras los levantas de atrás.
Pushing to the front is impossible at first if the settings switch is still in place (see earlier comment).
Also, it’s worth mentioning that the steaming wand *will* come out with the right twisting and turning of the core. I got stuck her trying to figure out how to detach it from its hose. But the attachment is permanent. This is what led me to buy more maneuvering room by removing the settings switch with wires still attached.
-
-
-
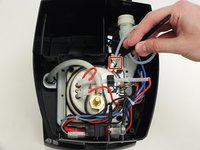
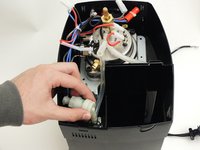
Retira ambos juegos de cables de la caja negra de la bomba de agua.
-
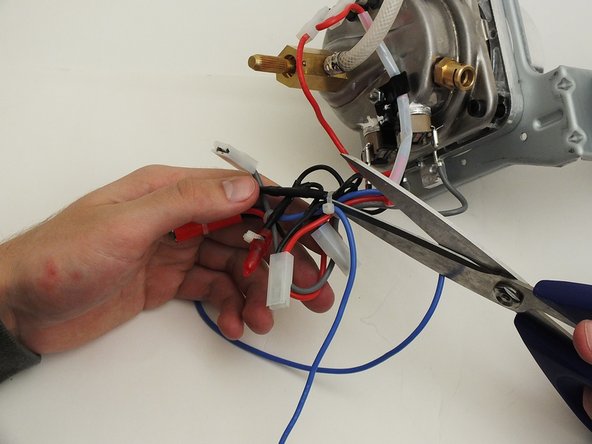
Corta la brida que sujeta todos los cables juntos.
-
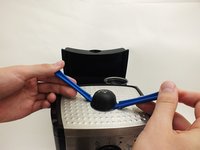
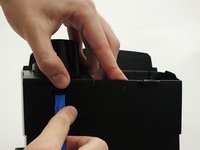
Aísla los cables azules del resto y retíralos del núcleo según sea necesario.
-


Para reensamblar tu dispositivo, sigue estas instrucciones en orden inverso.
Para reensamblar tu dispositivo, sigue estas instrucciones en orden inverso.
Cancelar: No complete esta guía.
4 personas más completaron esta guía.
Un agradecimiento especial a estos traductores:
100%

¡ Francisco Javier Saiz Esteban nos está ayudando a reparar el mundo! ¿Quieres contribuir?
Empezar a traducir ›
Equipo

Cal Poly, Team 4-2, Maness Fall 2015 Miembro de Cal Poly, Team 4-2, Maness Fall 2015
CPSU-MANESS-F15S4G2
Miembros de 4
36 Guías creadas
My model EC155, serial #43222 requires a Security Torx vs. a #2 Phillips to remove the 12mm screws at each corner of the bottom panel
Mike Hines - Contestar