Saltar al contenido principal
HP Chromebook 11A G6 EE Display Panel Hinges Replacement

HP Chromebook 11A G6 EE Display Panel Hinges Replacement

Jeff Johnson

Jeff Johnson y otro contribuidor

Última actualización: December 11, 2023

30 minuto - 1 hora
Moderado

Introducción

Ir al paso 1

The hinges of the HP Chromebook allow you to open and close your Chromebook. They are the backbone of the device that connects the keyboard to the monitor.

In some instances, the screws connecting the hinges to the device can become loose and can cause issues with the ability to open and close the laptop. This creates the potential to cause more severe damage to the device if this issue is not addressed.

Before assuming that your laptop needs to have it's hinges replaced, use this troubleshooting guide to see if you can fix your issue.

Before starting with the guide, do the following:

  1. Disconnect all external devices and connections to the device.
  2. Make sure the device is disconnected from power and Shut down the device from the Chromebook's OS.

Use the following replacement guide to access and repair or replace your display panel hinges.

Qué necesitas

Herramientas

Ver más…

  1. HP Chromebook 11A G6 EE Display Panel Hinges Replacement, Keyboard: paso 1, imagen 1 de 3 HP Chromebook 11A G6 EE Display Panel Hinges Replacement, Keyboard: paso 1, imagen 2 de 3 HP Chromebook 11A G6 EE Display Panel Hinges Replacement, Keyboard: paso 1, imagen 3 de 3
    • Remove six 6.6 mm screws from the back case using a Phillips #1 screwdriver.

    • Remove two 8.7 mm screws from the back case using a Phillips #1 screwdriver.

    • Turn the computer over and open it as if you are going to use it.

  2. HP Chromebook 11A G6 EE Display Panel Hinges Replacement: paso 2, imagen 1 de 3 HP Chromebook 11A G6 EE Display Panel Hinges Replacement: paso 2, imagen 2 de 3 HP Chromebook 11A G6 EE Display Panel Hinges Replacement: paso 2, imagen 3 de 3
    • Use the iFixit opening tool to get between the keyboard bezel and the outer edge of the laptop.

    • There are several clips on all sides that will need to be released. You'll hear and feel a pop as each clip is released.

    • Move the opening tool or spudger around the perimeter until you unclipped the keyboard on all sides.

    • This will require a little force. The only thing you don't want to do is push the spudger too deep under the keyboard. You could damage the internals if you do.

  3. HP Chromebook 11A G6 EE Display Panel Hinges Replacement: paso 3, imagen 1 de 2 HP Chromebook 11A G6 EE Display Panel Hinges Replacement: paso 3, imagen 2 de 2
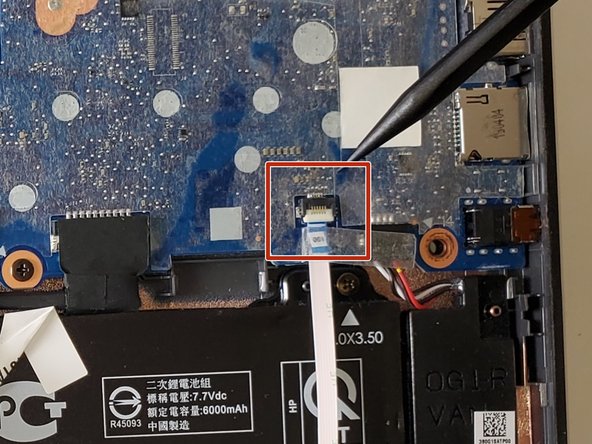
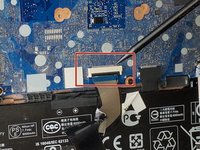
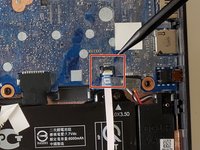
    • Carefully lift the top of the keyboard up to access the ribbon cables connecting it to the device.

    • Use the tip of a spudger or your fingernail to flip up the small locking flap on each connector. Then, pull the connector out.

    • Remove the keyboard and set aside.

  4. HP Chromebook 11A G6 EE Display Panel Hinges Replacement, Display Panel Hinges: paso 4, imagen 1 de 1
    • Use a Phillips #1 screwdriver to remove the 2.5 mm screw connected to the wireless module.

    • Gently peel back the tape and lift the wireless module out.

    • Take careful note of the routing of the wires from the display panel to the wireless module.

  5. HP Chromebook 11A G6 EE Display Panel Hinges Replacement: paso 5, imagen 1 de 2 HP Chromebook 11A G6 EE Display Panel Hinges Replacement: paso 5, imagen 2 de 2
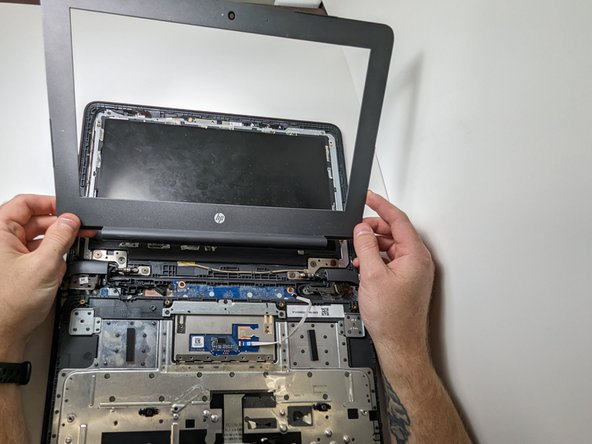
    • Using your iFixit opening tool, ease it in between the frame of the top case, and lift it up.

    • Slide your opening tool clockwise around the edge of the laptop, separating the front panel from the top case.

    • Lay the laptop flat if possible.

    • Carefully lift the frame and bring the top of the top cover towards you.

    • There will be adhesive connecting the frame to the LCD display.

    • Once the frame is about 90 degrees from the base, pull the bottom of the frame towards you, separating the frame from the top case.

  6. HP Chromebook 11A G6 EE Display Panel Hinges Replacement: paso 6, imagen 1 de 1
    • Use a Phillips #000 screwdriver to remove the five 2mm screws from the display panel bezel.

  7. HP Chromebook 11A G6 EE Display Panel Hinges Replacement: paso 7, imagen 1 de 1
    • Use a Phillips #1 screwdriver to remove the three 2.5 mm screws that secure each display panel hinge to the display enclosure.

    • Lift the tops of the left and right hinges towards you, separating them from the top case.

    • Use a Phillips #1 screwdriver to remove the two 2.5 mm screws that secure the hinge to the bottom case.

  8. HP Chromebook 11A G6 EE Display Panel Hinges Replacement: paso 8, imagen 1 de 1
    • Peel back the tape that secures the webcam to the left display panel hinge.

    • Gently slide out the webcam connector.

    • Separate the cable before removing the hinge to prevent pinching.

    • Take careful note of the routing of the cables.

  9. HP Chromebook 11A G6 EE Display Panel Hinges Replacement: paso 9, imagen 1 de 1
    • Rotate the hinge away from you while applying slight pressure toward the middle of the device to slide it out of the encasement.

    • Repeat this step for the right hinge.

Conclusión

To reassemble your device, follow these instructions in reverse order.

2 personas más completaron esta guía.

Jeff Johnson

Miembro Desde 09/06/23

303 Reputación

2 Guías creadas

0 comentarios

Agregar Comentario

Ver Estadísticas:

Ultimas 24 horas: 1

Ultimos 7 días: 2

Ultimos 30 días: 6

Todo El Tiempo: 179