
Dell XPS 13 9305 SSD Replacement

Introducción
Ir al paso 1This guide will demonstrate how to remove and replace the Solid State Drive (SSD) in your Dell XPS 13 9305. Use this guide if you're upgrading your SSD, replacing an existing SSD, or transferring an SSD from another computer.
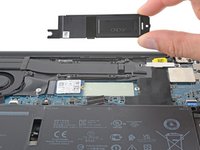
Note that the SSD shield is only required for 30 mm-long (M.2 2230) SSDs. If you install an 80 mm-long full size (M.2 2280) SSD, do not install the shield. This will be described again in the relevant step below.
Before you perform this repair, back up your existing SSD if possible. If you’re replacing the SSD where your operating system is installed, familiarize yourself with a disk cloning utility so you’ll be ready to migrate your data to the new SSD.
Qué necesitas
Kits de reparación
Estos kits contienen todas las piezas y herramientas necesarias para completar esta guía.


Partes


Herramientas


Ver más…
-
-
Use a Torx T5 screwdriver to remove the eight 3.2 mm-long screws.
-
-
-
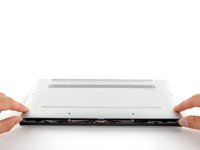
At each corner, insert an opening pick between the back cover and the device body.
-
Pry upward to release the retaining clips. Listen for a loud click when each clip releases.
-
-
-
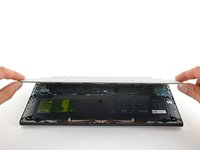
Lift the front edge of the cover away from you.
-
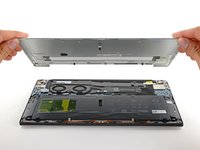
Remove the back cover from the laptop.
-
-
-
-
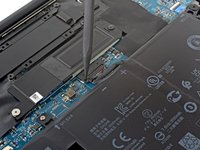
Push the battery connector out of its socket using the pointed end of a spudger.
-
-
-
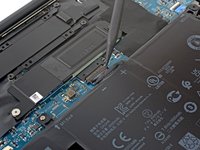
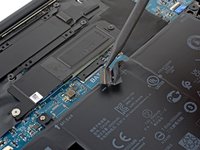
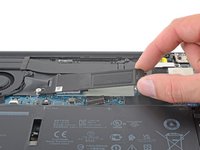
Use a Phillips #1 screwdriver to remove the 3.7 mm-long screw from the SSD cover.
-
-
-
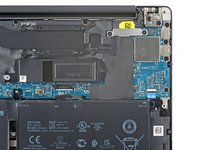
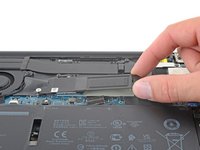
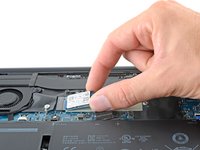
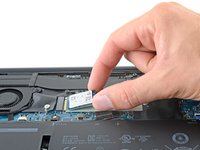
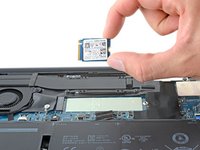
Grab the SSD by the corners. Be gentle to not pull up on the SSD.
-
Pull it straight out from the socket. If it feels stuck, wiggle it side to side.
-
-
-
For more information on how to install an M.2 SSD, check out this guide.
-


To reassemble your device, follow these instructions in reverse order.
Take your e-waste to an R2 or e-Stewards certified recycler.
Repair didn’t go as planned? Try some basic troubleshooting, or ask our Dell XPS answers community for help.
To reassemble your device, follow these instructions in reverse order.
Take your e-waste to an R2 or e-Stewards certified recycler.
Repair didn’t go as planned? Try some basic troubleshooting, or ask our Dell XPS answers community for help.
Cancelar: No complete esta guía.
2 personas más completaron esta guía.

Equipo

2 comentarios
I don't know whether anyone had the same experience, but the SSD keeps disconnecting sometimes. Does anyone have any idea whether it is possible to put something inside so that it keeps the SSD seated properly in the slot?
If it's a long SSD, did you remove the shield?