
Asus X200CA Display Replacement
Introducción
Ir al paso 1Use this guide to replace a broken or faulty display for your Asus X200CA laptop.
The LCD display of a computer is the screen that a laptop uses in order to display the video sent from the graphics card. A broken display can cause the screen to become solid black, or can cause a screen to have discolored LCDs. Discolored LCDs mean that images will show in the wrong color, or may not appear at all. If you are unsure of whether the screen is broken, refer to the blog post “How do I know if my screen is broken?” This blog post will give a run down of different types of breaks and what to look for to identify each.
Before using this guide, consider checking the battery and its condition. If the battery is failing, then the display will not show. To replace the battery, follow the Asus X200CA Battery Replacement guide.
The Asus X200CA display is made of glass. If your screen is shattered, follow the Taping Over The Display guide. This guide will ensure you do not hurt yourself on the glass or spill glass onto your work surface. The Taping Over The Display guide refers to an iPhone, but the concepts can be applied to the laptop screen.
Before beginning, make sure your laptop is completely off and that it is disconnected from external power sources.
Qué necesitas
Partes

Herramientas


Ver más…
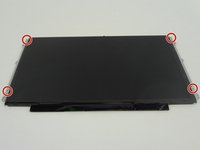
-
-
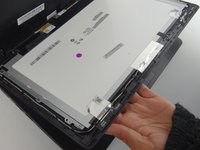
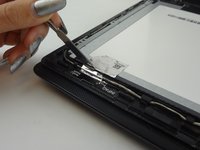
Wedge a metal spudger between the bezel and display cover.
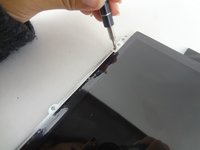
-
Slide the metal spudger back and forth along the top, left, and right sides to pry apart the screen from the outer shell.
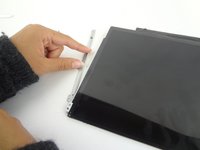
-
-


To reassemble your device, follow these instructions in reverse order.
To reassemble your device, follow these instructions in reverse order.
Cancelar: No complete esta guía.
3 personas más completaron esta guía.
Equipo

USF Tampa, Team S1-G2, Leahy Fall 2017 Miembro de USF Tampa, Team S1-G2, Leahy Fall 2017
USFT-LEAHY-F17S1G2
Miembros de 4
5 Guías creadas