
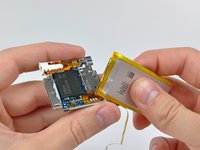
Remplazo de la batería de un iPod nano de 4º generación

Introducción
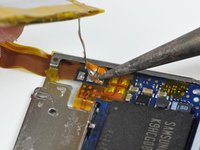
Ir al paso 1Remplazar la batería requiere una punta de soldador fina y es un trabajo difícil que solo soldadores experimentados deberían intentar.


-
-
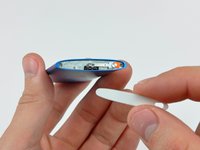
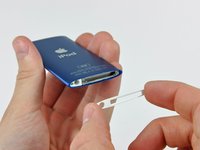
Inserta el borde de una herramienta de apertura de iPod entre la brecha de la carcasa exterior y el bisel superior.
-
Has palanca en el bisel superior separándolo del adhesivo asegurandolo al retenedor de la pantalla.
-
-
-
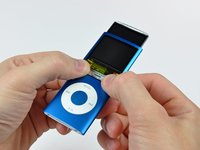
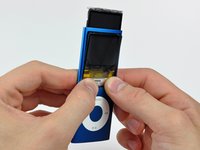
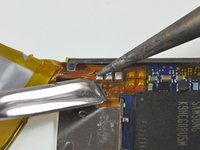
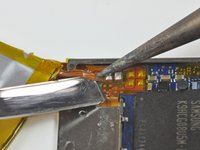
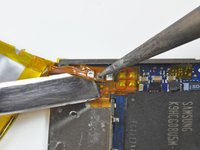
Usa el borde de una herramienta de apertura de iPod para separar el interruptor de retención del adhesivo que lo sujeta al borde superior de la pantalla.
-
-
-
-
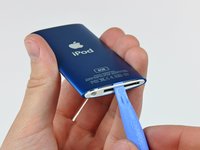
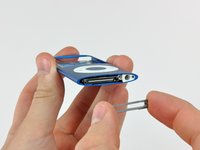
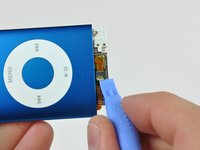
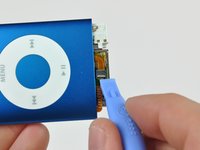
Inserta una herramienta de apertura de iPod entre el bisel inferior y el conector de base.
-
Separa el bisel inferior del adhesivo que lo sujeta al Nano y déjelo a un lado.
-
-
-
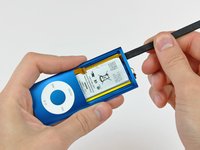
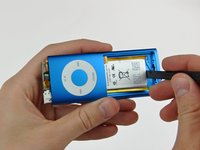
Usa el extremo plano de un spudger para separar la batería del adhesivo que la sujeta a la carcasa exterior.
-
Usa el extremo plano de un spudger para empujar el ensamblaje de la placa lógica y la batería ligeramente hacia afuera de la parte inferior del Nano. Detente una vez que salte un poco.
-
-
-
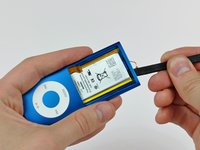
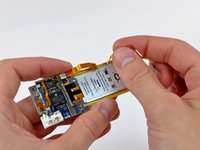
Pela el cable del interruptor de bloqueo a lo largo del borde de la batería y déjalo al lado. El cable del interruptor de bloqueo no esta unido a la batería.
-
Has palanca en la batería para separarla del adhesivo sosteniéndola a la bandeja de metal en la placa lógica.
-


Para re-ensamblar tu dispositivo, sigue estas instrucciones en orden inverso, mientras seas cuidadoso de no dañar el iPod.
Para re-ensamblar tu dispositivo, sigue estas instrucciones en orden inverso, mientras seas cuidadoso de no dañar el iPod.
Cancelar: No complete esta guía.
173 personas más completaron esta guía.
Un agradecimiento especial a estos traductores:
100%

¡ Amaury Leonel nos está ayudando a reparar el mundo! ¿Quieres contribuir?
Empezar a traducir ›

39 comentarios
There is one small point which is worth a mention here.After disconnnecting the screen by flicking up a little black bit on the ZIF Connector, I went on to open the next ZiF (The Click Switch)
Yes- bits of ZIF connector everywhere.I actually had to examine a new Click Switch circuit carefully to find that this one is different.
Yes - you flick the White bit. Do apple do this just to keep us on our toes?
I have taken the nano apart and started to use a solder iron to remove the old battery. I must have pulled on the battery before fully melting the solder and have pulled off two of the three tabs from the board.
Can this be fixed?
I think you might have to get a new board or figure out how to fix the pads with wire. I believe there are tutorials on that.
Ad123re -
I tried what Bradley suggested because it really seems easier than to solder the new battery to the iPod circuit board, which is really tiny. Still I couldn't do it. The battery pads are very fragile and I had an hard time folding the leads and the battery circuit board so that it looked the way it originally was. This was the part where I failed because afterwards I wasn't able to insert the battery plus the iPod circuit board inside its case again and ended it breaking it.
When I soldered my battery in I first touched the top and bottom of the pads on the new battery with flux and then added a little solder to the top and bottom of the pads. When I put the pads in place I only had to apply a quick touch and it soldered on perfectly.
Overall it was a real pain! :)