Esta traducción podría no reflejar los cambios más recientes añadidos a la guía de referencia. Ayúdanos a actualizar la traducción o revisa la guía original.
Introducción
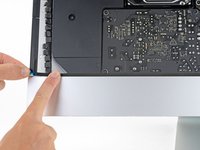
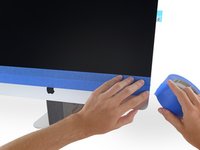
La extracción de la pantalla en un iMac de finales de 2012 requiere cortar el adhesivo alrededor del perímetro de la pantalla. Después de cortar el adhesivo, no se puede utilizar para volver a sellar la pantalla en su lugar, por lo que deberás aplicar un nuevo juego de tiras adhesivas.
Qué necesitas
Resumen del Video
-
-
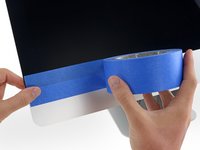
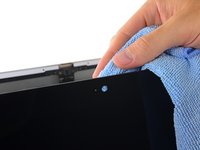
Si estás reutilizando tu pantalla existente, también tienes que remover el adhesivo viejo de la parte trasera de la pantalla.
-
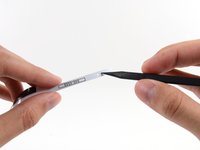
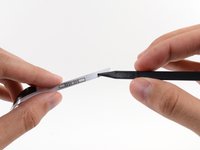
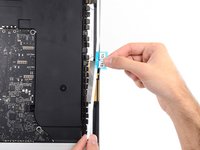
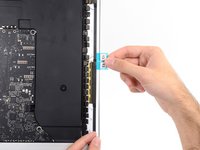
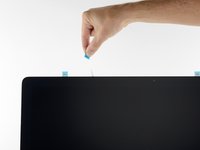
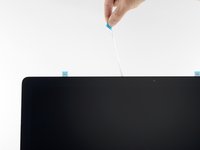
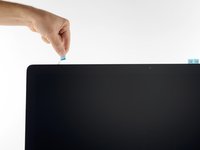
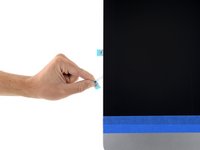
Despega las tiras viejas de adhesivo utilizando pinzas o tus dedos. Comienza en la parte inferior y despegar para arriba hacia la parte superior del dispositivo.
-
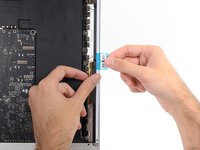
Luego de que se haya removido el adhesivo viejo, con cuidado limpia el área debajo del adhesivo con alcohol isopropílico de 90% (o más). Limpia en una dirección y no de atrás hacia adelante.
-
-
-
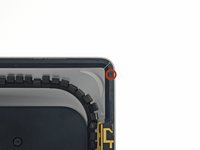
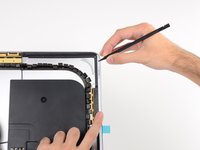
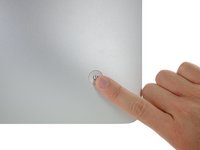
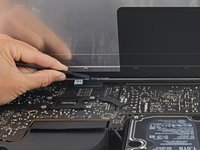
Con el spudger todavía asomando por el orificio de la tira adhesiva, empuja la punta del spudger en el orificio correspondiente en el marco de la iMac.
-
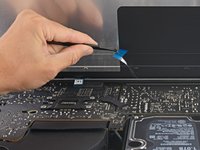
Usando el orificio y el spudger para anclar la posición de la tira adhesiva, alinea la tira contra el borde derecho, suavemente jala hacia abajo contra el spudger para asegurar que la tira esté tensa, y pégala sobre el marco.
-
-
-
-
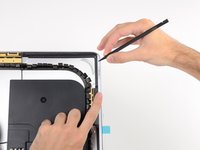
Ábrete paso por el perímetro del iMac, añadiendo tres tiras adhesivas más de la misma manera.
-
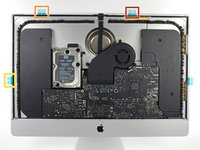
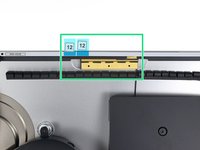
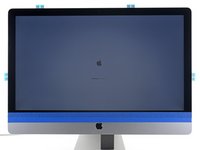
Trabajando en sentido antihorario desde la tira 13, coloque:
-
la tira 12 en la parte superior derecha
-
la tira 11 en la parte superior izquierda
-
la tira 16 en la vertical izquierda.
-
En la pantalla iMac Intel 27 "Retina 5K, las pestañas azules de la tira 12 no se alinearán con la antena superior de la misma forma que el modelo regular. Esto es perfectamente aceptable y no afectará el rendimiento de las tiras o la antena.
-
-
-
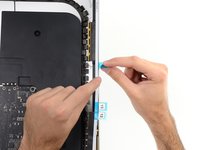
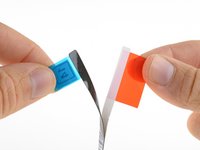
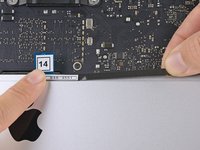
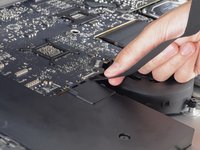
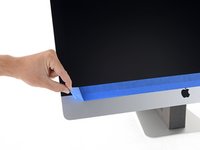
Toma la lengüeta roja de film en la tira adhesiva 14 y tira para remover el respaldo de la tira.
-
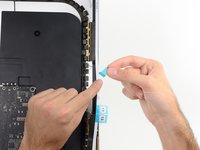
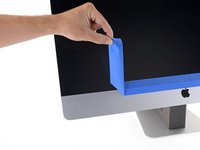
Alinea la tira en el borde inferior del gabinete trasero, directamente a la derecha del tornillo del medio en ese borde.
-
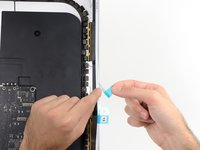
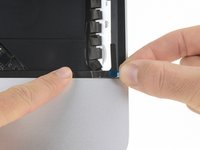
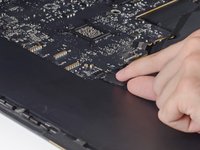
Desliza tu dedo a lo largo del borde de la tira adhesiva para asegurarte de que esté derecha y desarrugada, presionando hacia abajo al deslizar la tira para adherirla a la iMac.
-
-
-
En este punto, es una buena idea probar tu reparación para asegurarte de que tu iMac funcione correctamente antes de volver a sellarla. Sigue los siguientes tres pasos para volver a conectar temporalmente los cables de la pantalla y reiniciar tu iMac antes de retirar la película protectora de las tiras adhesivas.
-
Si ya has verificado que su iMac está funcionando correctamente y estás listo para sellarlo, ve al Paso 16.
-
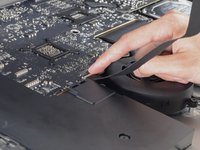
Inserta suavemente el conector de datos de la pantalla en su zócalo en la placa lógica. Asegúrate de presionarlo directamente en el zócalo e insertarlo completamente.
-
Coloca el bloqueo del conector de datos de la pantalla en el zócalo.
-
Insert el conector de alimentación de la pantalla en su zócalo en la placa lógica.
-


Para volver a ensamblar tu dispositivo, sigue estas instrucciones en orden inverso.
Para volver a ensamblar tu dispositivo, sigue estas instrucciones en orden inverso.
Cancelar: No complete esta guía.
188 personas más completaron esta guía.
Un agradecimiento especial a estos traductores:
88%


Estos traductores nos están ayudando a reparar el mundo! ¿Quieres contribuir?
Empezar a traducir ›

17 comentarios
Hello guys!
Could anyone tell what the width of these strips is? I need to buy some double sided strips to do a hard drive upgrade, but I can't order from iFixit :(
Thank you!
Some 3m Extreme Mounting tape works perfect for hdd upgrades on an imac.
torch130 -
Hey guys... there's one critical step that's missing here. Before doing Step 18, you have to make sure the iSight camera is in the right place. It's 'floating' inside the computer housing and has to be positioned just right for the glass to close/seal properly with the frame. I followed all of these steps but the glass would not seal around the camera, leaving a 1/8" gap there and distortion on the LCD when powered on. I had to re-order the strips and do the process over again. While doing a 'dry run', I realized the camera was the culprit and was able to hold it in position with a paper clip which allowed for the glass to adhere properly on the 2nd try.
I'm surprised to see, that you install the tape strips on the unit lying down.
It's a lot easier to attach them with the unit standing upright.
Also, attach ALL the strips to the rear housing, NOT to the LCD.
Attach the tape strips to the housing, mount the display, use som painters (/masking) tape, when you have aligned the display to the edges of the housing, attach the tape to the bottom of the glass and rear housing, making sure the display won't slip out of alignment.
Then, tilt the display towards you and support it with either a hand or your chest, while you remove the tapes protective layer and tilt the display back.
That way, it's still well aligned and it won't shift.
Same goes when removing the display in the first place.
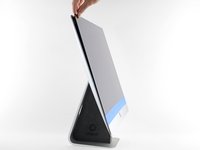
Don't lay it down on the table - use a wedge, to make sure that the housing doesn't tilt while removing the display, and let the wedge stay there unit finished. The display is a lot easier to handle when upright, and you won't put too much pressure on the edges of the glass.
By the way, a minor detail you guys left out;
The tape strips for the 2012 and 2013, are not the same as 2014 Retina model.
The WiFi antenna's are located differently on the right. It's slightly elevated on the Retina, compared to the 2012 and 2013 models.