
iBook G4 14" 933 MHz-1.33 GHz Rear Display Bezel Replacement

Introducción
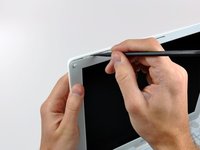
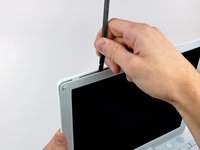
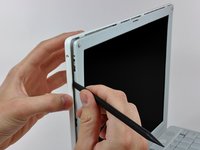
Ir al paso 1Removing the rear display bezel does not require removal of the display assembly.
Qué necesitas


-
-
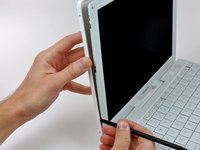
Use a 1.5 mm hex screwdriver to remove the two hex screws on either side of the display (four screws total).
-
If you don't have a 1.5 mm hex driver, you can probably get these screws out with a T6 Torx screwdriver. However, if you use a T6 Torx driver you'll be more likely to strip the screws.
-
-


To reassemble your device, follow these instructions in reverse order.
To reassemble your device, follow these instructions in reverse order.
Cancelar: No complete esta guía.
Una persona más ha completado esta guía.
