Saltar al contenido principal

Canon PowerShot SD750 LCD Screen Replacement

Aviso: Estás editando una guía de requisitos previos. Cualquier cambio que realices afectará a todas las 3 guías que incluyen este paso.

Inglés
Español

Traduciendo paso 4

Paso 4
Canon PowerShot SD750 LCD Screen Replacement: paso 0, imagen 1 de 2 Canon PowerShot SD750 LCD Screen Replacement: paso 0, imagen 2 de 2
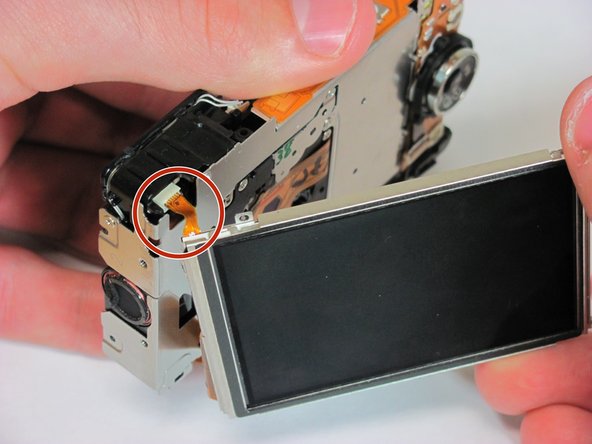
  • Locate the two ribbons connected to the camera and the LCD screen. (One is red and small and the other is wide and orange)

  • Remove the top left red ribbon by gripping the connector on the camera and sliding it straight out.

  • Remove the side orange ribbon by gripping the connector on the camera and sliding it straight out.

  • Note: It may be helpful to use tweezers when removing the connectors. (Pay close attention to how the ribbons are disconnected as this will help in replacing the screen later)

  • Note: When reassembling, use tweezers to reconnect the small red connector on the top left of the screen.

Insertar traducción aquí

Insertar traducción aquí

Insertar traducción aquí

Insertar traducción aquí

Insertar traducción aquí

Tus contribuciones son autorizadas bajo la licencia de código abierto de Creative Commons.