
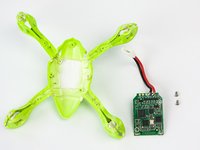
Hubsan X4 107L Flight Controller Replacement

Introducción
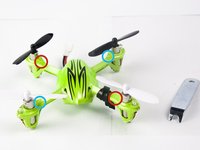
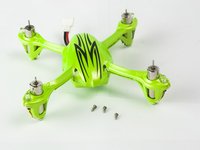
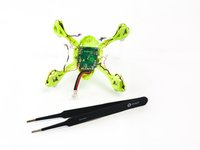
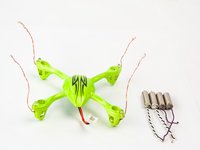
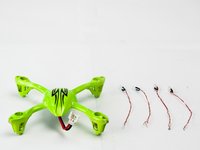
Ir al paso 1The Hubsan X4 107L is a rugged, entry level quadcopter ideal for RC amateurs learning to fly. This is a complete teardown guide for the X4.


-
-
Firmly grasp both sides of the battery connector and pull them apart.
-
Grip the battery and slide it out of the quadcopter body.
-
-
-
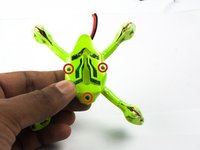
Orient the quadcopter so the propellers are on the bottom.
-
Remove the rubber shock absorbers from the motor mounts by hand.
-
-
-
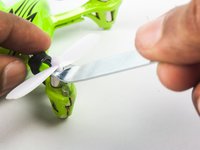
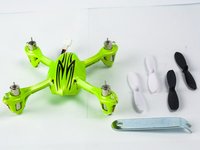
Use the prop removal tool to pry the propellers off the motors.
-
"A" propellers are on the front left and back right motors.
-
"B" propellers are on the front right and back left motors.
-
-
-
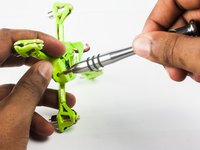
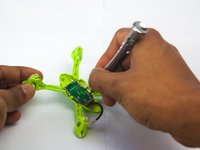
Use the wire cutter to remove any customized or aftermarket modifications holding the body together.
-
-
-
Use a Phillips #000 screwdriver to remove the three screws securing the lower body to the frame.
-
-
-
-
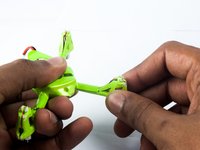
Carefully apply upward pressure on one of the motor arms while bending the body downwards to snap the lower body armpice out of place.
-
Repeat this step for all four arms. The lower body will separate from the main frame after snapping the fourth arm out of place.
-
-
-
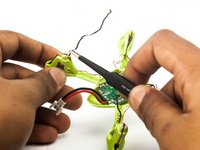
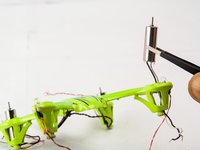
Use a soldering iron and solder wick to desolder the four motors from the control board.
-
If the connection holds even after removing the solder from the joint, gently pull up on the wire while applying heat to the joint until the wire separates from the PCB.
-
-
-
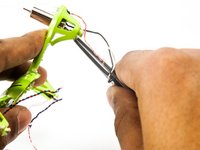
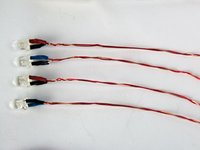
Using a technique similar to desoldering the motor wires, disconnect the LEDs from the control board.
You don't need to desolder the LED if you're moving the flight controller board to a different body.
You may not have to, but I highly recommend it! The LEDs come out of the top of the top of the motor arms, while the flight controller drops out of the bottom of the quad. Unless you can push the LEDs down and out of their brackets you'll still need to desolder and deroute them to avoid putting strain on the leads or the flight controller when removing those components.
-
-
Herramienta utilizada en este paso:Tweezers$4.99
-
Use the tweezers to unthread the motor and LED wires from the quadcopter arms.
-
-
-
Use the tweezers to push the motors out of their housings.
-
Once the motor is mostly out of the motor mount, grip it from the top and pull it straight out.
-
-
-
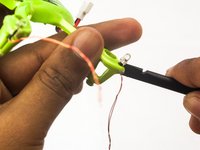
Remove the LEDs using the spudger to widen their housing and nudge them up.
-
To free an LED from its housing, insert the spudger into the top section of the gap in the plastic revealing the side of the LED.
-
Simultaneously twist the spudger to widen the housing while pushing the LED up and out of the frame.
-
-
-
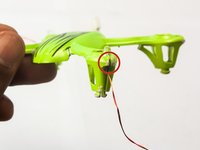
Use the PH000 driver to remove the two screws securing the flight controller to the frame.
-
-
-
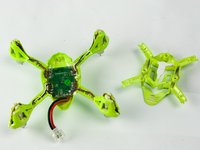
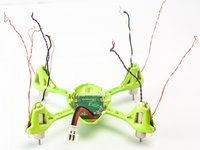
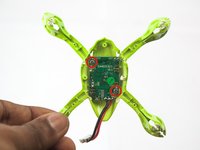
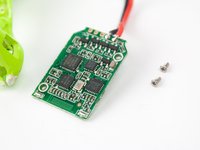
The Hubsan X4's Flight Controller (aka Control Board) has a handful of neat components that keep the quadcopter in the air:
-
Hubsan HBS002 Processor
-
Invensense ITG-3050 Integrated Triple-Axis Gyroscope
-
16.000 MHz Quartz Crystal Oscillator
-
3210AP 3-Axis Accelerometer
-
A7105 2.4GHz Wireless Module
-
-
-
All done! To reassemble your X4, follow these steps in the reverse order.
-


To reassemble your device, follow these instructions in reverse order.
To reassemble your device, follow these instructions in reverse order.
Cancelar: No complete esta guía.
16 personas más completaron esta guía.

7 comentarios
Will I be able to conect the controller to the receiver with the new motherboard?
It's been my experience the transmitter will bind with what ever quad is ready to bind. I routinely steal my buddy's quad when he plugs it in before he turns his transmitter on.
Just a qiuck note. I burned 2 motherboards with those blue replacement batteries...
hi, while connecting x4 h107c + with 2 wires from battery to the 3 pin on pcb..the motor only spins..no led lights..what can be wrong ?
I have the same issue. The ground being in the center I do not know if the positive is on left or right. Maybe using a small wire to jumb the two to each other?
Ti Brock -