
HP Envy X2-15-C001Dx Battery Replacement
Introducción
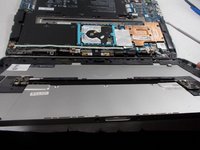
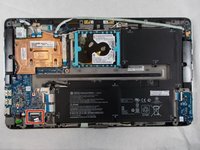
Ir al paso 1This guide provides step-by-step instructions for removing and replacing the battery in the HP Envy X2-15-C001Dx laptop.
A healthy battery is crucial for your laptop's portability, and a faulty one can cause power issues and potential safety risks. Replacing the battery will enhance the overall health of the device.
If you're dealing with rapid battery drain or other power-related problems, this guide will help you troubleshoot and fix the issue. Before starting, make sure the device is powered off and unplugged to ensure safety throughout the process.
Qué necesitas


-
-
-
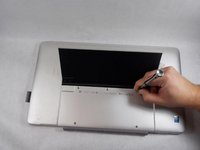
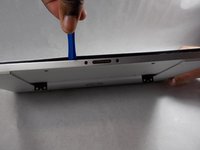
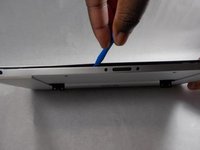
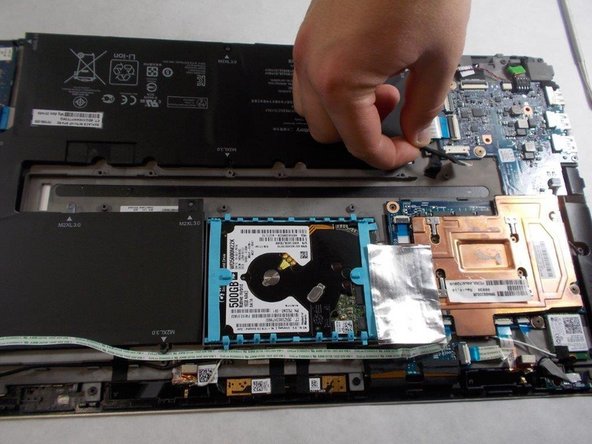
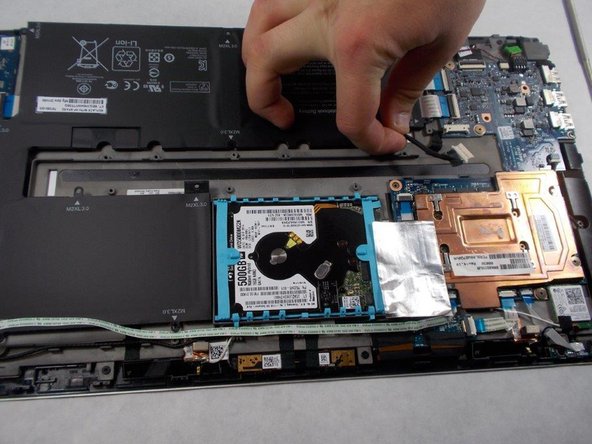
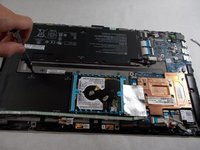
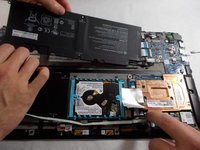
Gently unplug the battery connector from the motherboard by carefully gripping the connector and pulling it straight out. Avoid tugging on the wires to prevent damage. Ensure the connector is fully detached before proceeding with any further steps.
-
-
-
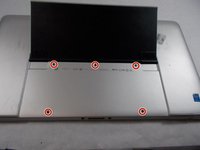
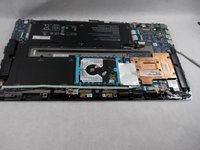
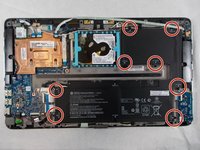
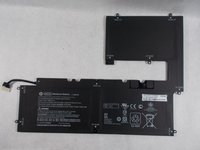
Using a functioning screwdriver i.e Phillips #1 screwdriver, carefully remove the eight screws securing the battery to the device. Unscrew each one slowly and set them aside in a safe spot, like a small container, to prevent loss. Ensure all screws are completely removed and that the battery is fully detached before proceeding to lift it out.
-


To reassemble your device, follow these instructions in reverse order.
For optimal performance, after completing this guide, calibrate your newly installed battery.
Take your e-waste to an R2 or e-Stewards certified recycler.
To reassemble your device, follow these instructions in reverse order.
For optimal performance, after completing this guide, calibrate your newly installed battery.
Take your e-waste to an R2 or e-Stewards certified recycler.
Cancelar: No complete esta guía.
5 personas más completaron esta guía.
Equipo

UMass Dartmouth, Team 2-6, Sinclaire Fall 2021 Miembro de UMass Dartmouth, Team 2-6, Sinclaire Fall 2021
UMASSD-SINCLAIRE-F21S2G6
Miembros de 3
6 Guías creadas
Un comentario
There is not need to remove the back hinge. Step 4 can be omitted.
In Step 8 I found two additonal screws to the left and right, close to the corner. These are not shown here in the pictures.
When opening the case as in step 9, then the top corners are the hardest to open. The bottom is easiest.
Genrally I recommend using an antistatic mat and a wristband, when opening electronics.