
HP Envy 4-1030us Wireless Card Replacement
Introducción
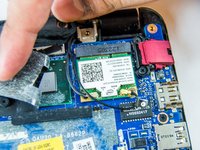
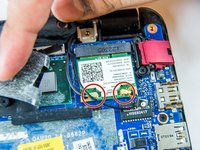
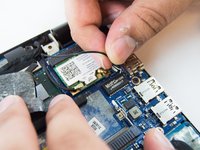
Ir al paso 1Replacing the wireless (WLAN) card may be necessary for resolving wireless network issues. The card is small with delicate wires clipped to it. Be gentle when wiggling the wires and card free from the system since the contacts are delicate and can affect wireless performance.
When working with electronic components, we recommend wearing an electrostatic wristband, it is possible for the static electricity present on you to discharge onto one of the components, wearing one of these wristbands and clipping it to a piece of metal will prevent this from happening.
Qué necesitas


-
-
Using the Philips #0 screwdriver, remove the 12 7.5mm screws from the bottom cover.
-
-
-
-
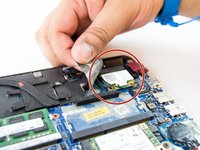
After removing the bottom cover, the wireless card is accessible toward the rear of the system.
-


To reassemble your device, follow these instructions in reverse order.
To reassemble your device, follow these instructions in reverse order.
Cancelar: No complete esta guía.
Una persona más ha completado esta guía.
Equipo

USF Tampa, Team S1-G1, Thompson Fall 2017 Miembro de USF Tampa, Team S1-G1, Thompson Fall 2017
USFT-THOMPSON-F17S1G1
4 Miembros
6 Guías creadas