
Dell XPS 13 Battery Replacement
Introducción
Ir al paso 1Click here for the updated version of this guide. The guide you are currently viewing is archived here for historical purposes only.
Qué necesitas
Kits de reparación
Este kit contiene todas las piezas y herramientas necesarias para completar esta guía.

Partes

Herramientas


Ver más…
-
-
-
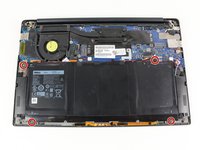
Remove the four 3 mm Phillips #0 screws located on each corner of the battery.
-


To reassemble your device, follow these instructions in reverse order.
To reassemble your device, follow these instructions in reverse order.
Cancelar: No complete esta guía.
23 personas más completaron esta guía.
Equipo

Cal Poly, Team S21-G6, Livingston Spring 2017 Miembro de Cal Poly, Team S21-G6, Livingston Spring 2017
CPSU-LIVINGSTON-S17S21G6
5 Miembros
30 Guías creadas
6 comentarios
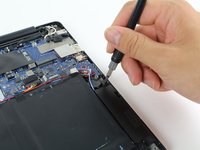
There is a #00 Phillips under the XPS cover on the bottom. Also one of the #0 screws holding the battery down is #00. It is not necessary to remove the speakers but the wires are taped to the battery so pick and remove the tape.
Took me about 45 minutes.
Couple of complexities:
1. The speaker removal, it’s easier just to unscrew and pull out that way. Moreover, it’s easier the same way to replace, the problem is if you push in the speakers can remain wobbly unless you properly attach to the flexible plastic things.
2. When replacing the screws on the battery, do the little screw first. It shows it on the images, but doesn’t mention it, it’s a different sized screw (step 3).
3. Removing the screws on the back of the laptop is tough unless you have a good screw driver. In the end, I bought one from China from Aliexpress that was bang on what I needed.
Does anyone have a source for a replacement battery? I checked Amazon but reviews were sketchy at best.
I was concerned about the Amazon reviews as well. I ordered my battery directly from Dell for $85.
Great guide! Came in real handy when I needed to replace a swollen battery.
Although the speaker removal part can be skipped completely.
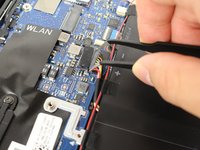
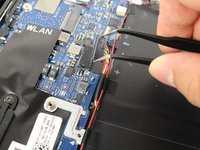
Just remove the 4 Philip battery screws and peel off the black tapes securing the red/white speaker wires would be sufficient to allow the battery to slide right off.