Saltar al contenido principal
Canon Powershot S110 Option Dial Replacement

Canon Powershot S110 Option Dial Replacement

akac92

akac92 y 6 otros contribuidores

Última actualización: May 17, 2019

10 minuto
Fácil

Introducción

Ir al paso 1

In this guide, the process of partially breaking down the Canon Powershot S110 and replacing the option dial will be explained in detail.

Qué necesitas

Herramientas

  1. Canon Powershot S110 Option Dial Replacement, Option Dial: paso 1, imagen 1 de 2 Canon Powershot S110 Option Dial Replacement, Option Dial: paso 1, imagen 2 de 2
    • Remove the battery by sliding open the battery cover on the bottom of the camera.

    • The battery must be removed to avoid shorting out any part of the camera.

  2. Canon Powershot S110 Option Dial Replacement: paso 2, imagen 1 de 3 Canon Powershot S110 Option Dial Replacement: paso 2, imagen 2 de 3 Canon Powershot S110 Option Dial Replacement: paso 2, imagen 3 de 3
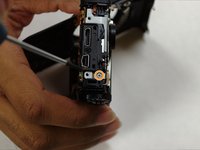
    • Remove the six screws by using a small Phillips head screwdriver.

    • Remove the two screws on the side of the camera on either side of the HDMI input panel.

    • Remove the two screws on the opposite side of the camera.

    • Remove the two screws on the bottom of the camera located on either side of the tripod mounting hole.

  3. Canon Powershot S110 Option Dial Replacement: paso 3, imagen 1 de 1
    • Using an opening tool, carefully remove the outermost cover of the camera from its holders around the edges.

    • Once all of the clips around the plastic cover are released, the cover will lift off.

  4. Canon Powershot S110 Option Dial Replacement: paso 4, imagen 1 de 2 Canon Powershot S110 Option Dial Replacement: paso 4, imagen 2 de 2
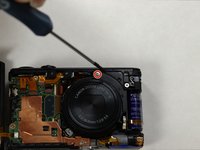
    • Remove the two screws holding the top plastic bracket in place by using a Phillips head screwdriver.

    • Remove the screw holding down the lens cover.

    • Remove the screw located near the option dial next to the USB connections.

  5. Canon Powershot S110 Option Dial Replacement: paso 5, imagen 1 de 1
    • Carefully lift the top panel of the camera by using a prying tool.

  6. Canon Powershot S110 Option Dial Replacement: paso 6, imagen 1 de 1
    • Remove the screw at the center of the option dial by using a Phillips head screwdriver.

  7. Canon Powershot S110 Option Dial Replacement: paso 7, imagen 1 de 2 Canon Powershot S110 Option Dial Replacement: paso 7, imagen 2 de 2
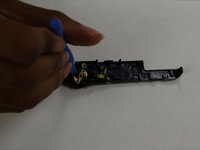
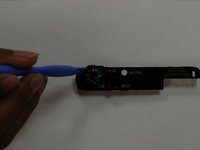
    • Remove the underlying component that was attached to the now-removed screw by using a prying tool.

    • Remove the dial on the opposite side of the part using a prying tool.

Conclusión

To reassemble your device, follow these instructions in reverse order.

2 personas más completaron esta guía.

akac92

Miembro Desde 07/14/15

298 Reputación

2 Guías creadas

Equipo

UW Tacoma, Team 1-2, Liner SU 2015 Miembro de UW Tacoma, Team 1-2, Liner SU 2015

UWT-LINER-SU15S1G2

Miembros de 4

5 Guías creadas

0 comentarios

Agregar Comentario

Ver Estadísticas:

Ultimas 24 horas: 1

Ultimos 7 días: 5

Ultimos 30 días: 10

Todo El Tiempo: 1,181