
*Read guide note* How to rebuild a laptop CMOS battery

Introducción
Ir al paso 1If your laptop's CMOS battery is dead and the OEM no longer sells new ones (and aftermarket ones are hard to find), you can take the dead battery apart and replace the bare cell so your laptop can hold the CMOS contents again.
IMPORTANT: DUE TO THE ASSOCIATED DANGER IF THINGS GO WRONG, THIS IS ONLY RECOMMENDED FOR OLDER NOTEBOOKS WHERE THERE ARE FEW OR NO THIRD PARTY COMMERCIALLY AVAILABLE REPLACEMENTS. If a pre-built replacement can be purchased, this is (generally) better as the cost is similar to this procedure. This procedure is also error-prone and can create the same issue as a dead battery if the tape fails.
Guide notes:
- The cell does not need to be covered 100%. However, due to the risk of an explosion, you MUST cover every visible area at least to the point it is "protected." Liquid electrical tape is used to do this for this guide. It can also be removed cleanly if something goes wrong and provides a better seal without the risks introduced by using heat shrink and a butane flame.
- Laptop disassembly is not covered.
- Every laptop is different, so yours probably differs from the one this was pulled from. For instructions, check iFixit or the manufacturer's website.
- NOTE: SOME TOSHIBA LAPTOPS SOLDER THIS TO THE MOTHERBOARD.
- This guide ONLY applies to coin cell rebuilds. Do not use this guide for other batteries.
- When adding tape to the cell, be very careful not to create a direct short. To avoid this, place the tabs slightly higher than the factory and cut the tape sort but will also hold reliably.
Qué necesitas
Partes


Herramientas


Ver más…
-
-
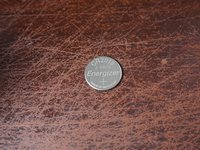
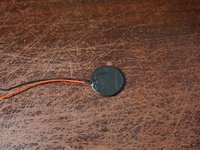
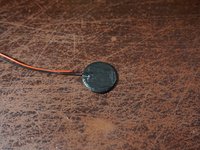
Take the battery apart and check out what cell you need. This may be difficult depending on the wrap used.
-
-
-
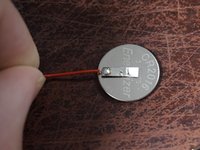
After purchasing a battery, disassemble the CMOS battery. Use caution not to heavily bend the tabs. Too much damage may make them unusable.
-
Break the tabs off of the old battery. Dispose of based on your local laws.
-
-
-
-
After the polarity has been matched, tape the positive lead to the new cell. To remove the risk of a failed rebuild, start on the + side and cut the tape to fit comfortably.
-
-
-
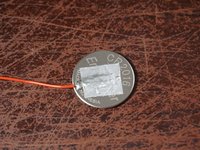
After confirming the tape is not causing a short, add tape to the negative tab and tape down the negative terminal onto the new battery.
-
-
-
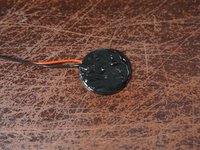
After verifying both leads are securely held onto the new cell, apply liquid electrical tape to the battery. 2-3 medium thickness coats are recommended.
-


After building the replacement cell, install it in the notebook. Verify the battery works by setting the BIOS, powering it off and then removing the battery/AC adapter. If the CMOS memory is retained, your battery works.
After building the replacement cell, install it in the notebook. Verify the battery works by setting the BIOS, powering it off and then removing the battery/AC adapter. If the CMOS memory is retained, your battery works.
Cancelar: No complete esta guía.
10 personas más completaron esta guía.

Equipo
