Saltar al contenido principal

iPad Mini CDMA LCD Replacement

Aviso: Estás editando una guía de requisitos previos. Cualquier cambio que realices afectará a todas las 38 guías que incluyen este paso.

Inglés
Holandés
Paso 2
iPad Mini CDMA LCD Replacement: paso 0, imagen 1 de 3 iPad Mini CDMA LCD Replacement: paso 0, imagen 2 de 3 iPad Mini CDMA LCD Replacement: paso 0, imagen 3 de 3
  • The LCD is still connected to the rest of the iPad by two wide strips of adhesive tape that run up from the inside of the rear case to the front bottom LCD frame.

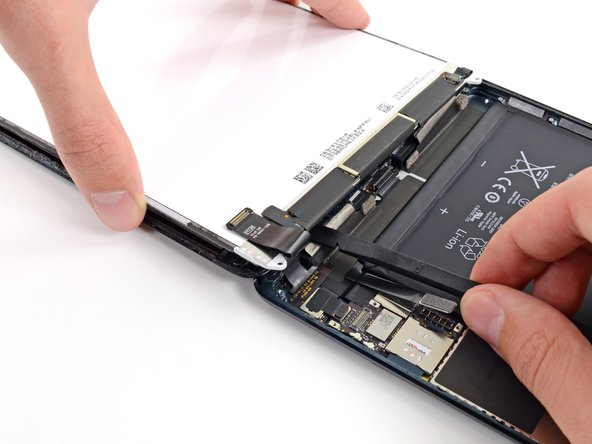
  • While holding the LCD with one hand, insert the flat end of a spudger between the LCD and tape on the iPad's right side.

  • Slide the spudger outward, separating the tape, while gently lifting up on the LCD to pull it away from the tape.

  • It may help to twist the spudger, to spread the gap the rest of the way and separate the LCD from the tape.

Insertar traducción aquí

Insertar traducción aquí

Insertar traducción aquí

Insertar traducción aquí

Tus contribuciones son autorizadas bajo la licencia de código abierto de Creative Commons.