Introducción
Sigue esta guía para sustituir la pantalla de un iPad mini 5 Wi-Fi. Es posible que tengas que hacerlo si la pantalla está agrietada o ha dejado de funcionar.
Esta guía también muestra cómo transferir el botón de inicio original y el sensor magnético a la pieza de repuesto.
Ten en cuenta que sólo el conjunto del botón home original del iPad será capaz de funcionar con Touch ID. Si quieres mantener la funcionalidad Touch ID, tendrás que transferir el conjunto del botón de inicio original a la nueva pantalla.
Algunas pantallas de reemplazo no vienen con un sensor magnético instalado. Sin un sensor magnético, el iPad no será capaz de dormir y despertar cuando se utiliza una Smart Cover. También puede causar que el botón de encendido no sea capaz de dormir y despertar el iPad. AssistiveTouch también puede perder su funcionalidad de reposo y activación. Sin un sensor magnético, si mantienes pulsado el botón de encendido para activar el control deslizante de apagado, la pantalla seguirá encendida. El botón de inicio también despertará la pantalla.
La transferencia del sensor magnético requiere conocimientos avanzados de soldadura. El cable del sensor magnético está soldado a la pantalla. Asegúrate de seguir [ Topic:Soldering#Section_Safety_Procedures|procedimiento de seguridad de soldadura|new_window=true]] como usar protección ocular, trabajar en un área bien ventilada y lavarte las manos con agua y jabón después de soldar.
Por tu seguridad, descarga la batería por debajo del 25% antes de desmontar el dispositivo. Esto reduce el riesgo de un evento térmico peligroso si la batería se daña accidentalmente durante la reparación. Si su batería está hinchada, toma las precauciones adecuadas.
Algunas fotos de esta guía son de un modelo diferente y pueden contener ligeras discrepancias visuales, pero no afectarán al procedimiento de la guía.
Qué necesitas
-
-
Si el cristal de tu pantalla está agrietado, evita que se siga rompiendo y evita daños corporales durante la reparación pegando cinta adhesiva sobre el cristal.
-
Coloca tiras superpuestas de cinta adhesiva transparente sobre la pantalla del iPad hasta cubrir toda la superficie.
-
Haz todo lo posible por seguir el resto de la guía tal como se describe. Sin embargo, una vez roto el cristal, es probable que siga agrietándose mientras trabajas, y puede que tengas que usar una herramienta metálica para hacer palanca y levantar el cristal.
-
-
-
Calienta un iOpener y aplícalo en el borde izquierdo durante dos minutos.
-
-
-
Coloca una ventosa hasta la mitad del lado calentado.
-
Asegúrese de que la taza esté completamente plana en la pantalla para obtener un sello hermético.
-
Mientras sostiene el iPad hacia abajo con una mano, tire de la ventosa para separar ligeramente el conjunto del panel frontal de la carcasa trasera.
-
-
-
Mientras sostiene el vaso con la ventosa, inserta la punta de una púa de apertura en el espacio entre el vidrio y el cuerpo del iPad.
“Don't insert the opening pick any deeper than the black bezel on the side of the display. Inserting the pick too far may damage the LCD.”
Unfortunately, you only know you have inserted it too far when you have, and you start seeing little bubble veins form between the glass screen and the LCD.
The adhesive can be very stiff/hard, and if pushing through it can result in the pick plunging into the LCD when the adhesive finally gives way.
Take your time, use alot of heat, and if you need to try and push the pick in, try and do so in a slicing motion along the edge, use the wide edge, or hold the pick so that your finger will hit the edge of the screen before the pick tip will pass the bezel.
Adhesive strips are only 1mm wide on sides. Up to 5mm wide top and bottom. I used the Isclack. Screen seemed ok bending without breaking. Worth looking for a photo of the replacement adhesive strips so you know what you have to separate. Be extra careful at the lower right corner where the cables are.
This is a failure of a guide as it doesn’t tell you to insert at a downward angle so you don’t potrude into the LCD… Now I have to spend more money to replace the screen as I pushed adhesive between the LCD and the screen even though I went no farther than a millimeter short of the screen...
can you open the right side if the left is too cracked to use a suction cup on?
This guide needs amending urgently.
You MUST NOT put the pick or whatever you are using more than 2mm under the sides of the screen, or you will cut through the adhesive tape securing the backlight assembly to the LCD glass.
This will push adhesive into the viewable area of the LCD and cause the backlight assembly to no longer be secured against the LCD fully.
I now need a new screen.
This line below from the guide is absolutely INCORRECT and will ruin your expensive display:
”Don't insert the opening pick any deeper than the black bezel on the side of the display.”
The black bezel is 5mm to 6mm wide; you MUST NOT insert anything to that depth or you will destroy your display. 2mm maximum!
thanks. will take this into account for my repair
Adab Abu -
I too damaged my display because of this absolute nonsense (The German version, which I used, still had this INCORRECT portion in it). I can't believe how long it took iFixit to update this, even though people have been reporting this for years on end. Sadly iFixit still haven't updated a variety of other things that are still at the very least high risk instructions. I just messaged them the other day, but they don't seem to care about or understand the remaining issues that this guide has. At least they updated one of the most severe things, but they just plainly told me 'I'm wrong' about the rest. I liked iFixit it so far, and I've worked on a variety of (difficult) repairs - but this experience was a very huge let down.
A few thoughts after opening a number of Mini 4’s.
1) if the display is warm enough you can squeeze the digitizer and LCD back together after a minor incursion with the opening pick and it will reseal.
2) I’ve started going in at the top just to the right of the camera (I use an iFlex to get in then switch to a pick). Then I run down either side with my fingers choked up on the pick so there only a mm or 2 sticking out. Usually after running down one side, I can get the display open enough to get the pick in behind the LCD when I do the other side
-
-
-
Vuelve a calentar y vuelve a aplicar el iOpener en el borde izquierdo durante unos minutos.
If your iPad is cold, consider leaving the iOpener on for longer than 5 minutes. The aluminum housing is a very large thermally dissipating mass and will quickly cool off the glass and make you have to start over and wait the 10 minutes to reheat. There’s a very slim window in which you’re able to insert the pick into the glass adhesive before it solidifies once again. I’ve been fighting with it for like 20 minutes following these instructions and it’s not working. You really need to leave it for longer than just 5 minutes to get the back housing hot too.
Heat is essential. I used a 3d printer’s heated set at 65 degrees. Chris Storer’s stip above saved me as you really need to let it sit for quite a while to soften the adhesive. Since I was doing a battery change, I heated both sides as the aluminum back is a huge heatsink that really sucks up the heat. Don’t try forcing it; if the suction cup isn’t pulling a gap in the screen, leave it on the heater for additional time.
Love the 3d printer idea, I hadn’t thought of that! I have used a heat gun as well but you have to be very careful to not use too much heat. Also watch for inserting the pick too far, it is really easy to delaminate glass from the display!
russ -
-
-
-
Inserta una segunda púa de apertura junto con la primera y desliza la selección hacia abajo a lo largo del borde del iPad, liberando el adhesivo sobre la marcha.
-
-
-
Deja la púa de plástico en el iPad, después de haber pasado la cámara frontal.
-
Coge una segunda púa e insértala a la izquierda de la cámara frontal, justo donde estaba antes la primera púa. Deslízala hacia la esquina para despegar el resto del adhesivo.
-
Deja la segunda púa ahí, para evitar que el adhesivo de la esquina vuelva a pegarse.
-
-
-
-
Gira las dos púas de las esquinas superiores del iPad para despegar los últimos restos del adhesivo que mantienen la pantalla en su lugar.
-
Levanta la pantalla por el borde superior para abrir el dispositivo.
"Twist the two picks at the top edge of the iPadTwist the two picks at the top edge of the iPad "
When I did this twisting motion, and I thought I was being gentle, one of the picks cracked nearly in half. That adhesive is very strong! I probably did not cut into it far enough before applying the twisting to open the screen.
-
-
-
Para no tensar ningún cable, sujeta la pantalla perpendicularmente al marco.
-
-
-
Utiliza un destornillador Phillips para quitar los dos tornillos de 1,3 mm que sujetan el soporte del cable de la pantalla.
-
-
-
Introduce el extremo plano de un spudger bajo el soporte del cable de pantalla y levántalo para desconectar el conector a presión de la batería de la placa lógica.
The guide says "Don't try to remove the display cable bracket as it's attached to the battery by the battery cable.Don't try to remove the display cable bracket as it's attached to the battery by the battery cable.".
Well then, please explain how to attach a new battery since my battery does not come with an attached display cable bracket. This point caused me a lot of confusion and finally I removed the bracket and installed it on the new battery. But the question remains about exactly what is the required steps.
The bracket has conductive material fixed to the underside but the part that goes on the battery connector has a separate piece of adhesive which may or may not serve as to insulate. Without any available guidance, I installed the battery cable and the top of it rests on the conductive material, apparently providing a ground bond between the other 3 connectors and the bracket.
More information should be provided here.
-
-
-
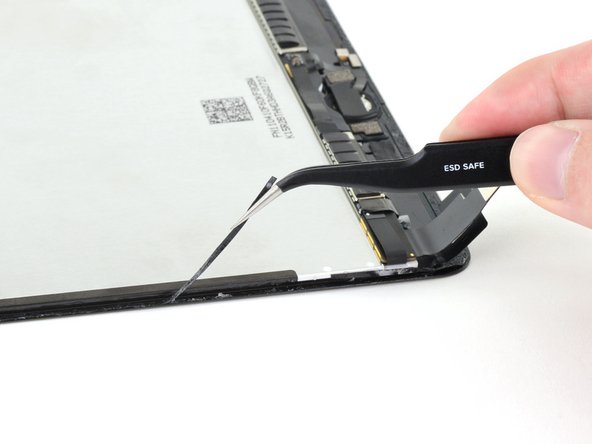
Utiliza unas pinzas para sacar el clip del soporte del cable de la pantalla por debajo del borde del marco.
-
Gira el soporte del cable de la pantalla hacia la batería.
-
-
-
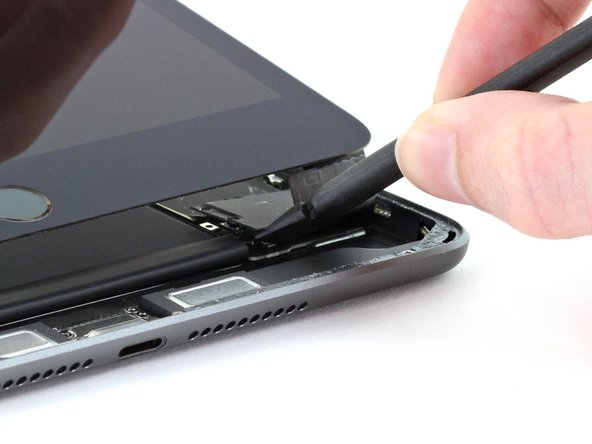
Utiliza el extremo puntiagudo de un spudger para desconectar el conector a presión del digitalizador de la placa lógica.
-
-
-
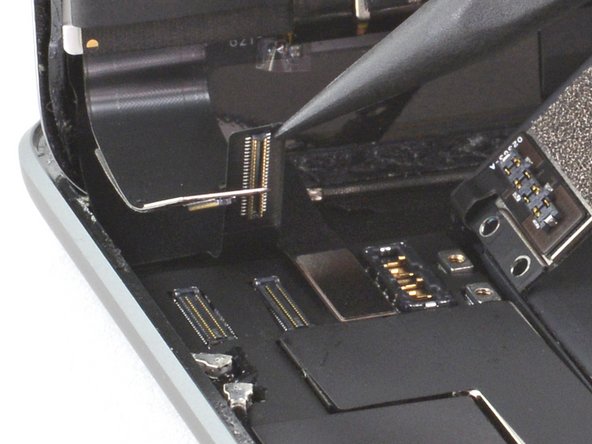
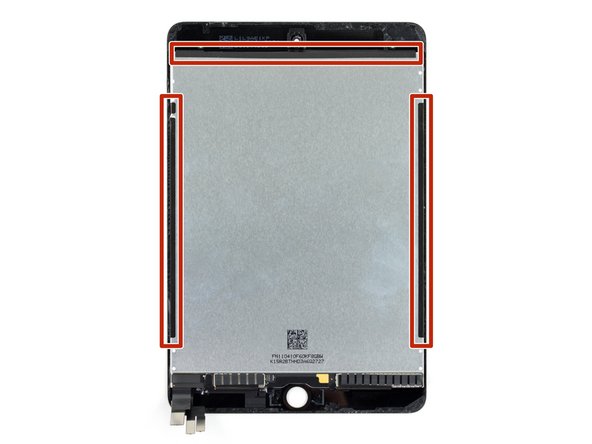
No retires la cinta adhesiva negra de los bordes izquierdo, derecho y superior de la pantalla. Estas sujetan la pantalla al cristal frontal.
-
-
-
Utiliza unas pinzas para retirar la pegatina que cubre el conector ZIF del ensamblaje del botón de inicio.
-
-
-
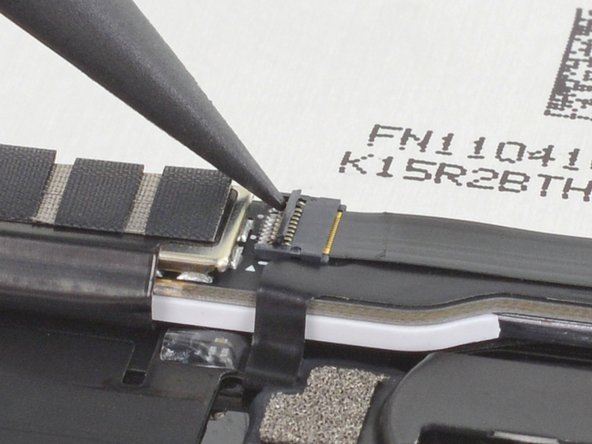
Utiliza el extremo puntiagudo de un spudger, una herramienta de apertura o tu uña para levantar la pequeña pestaña de bloqueo con bisagra del conector ZIF del ensamblaje del botón de inicio.
-
-
-
Utiliza unas pinzas para sacar el cable del ensamblaje del botón de inicio del conector ZIF.
-
-
-
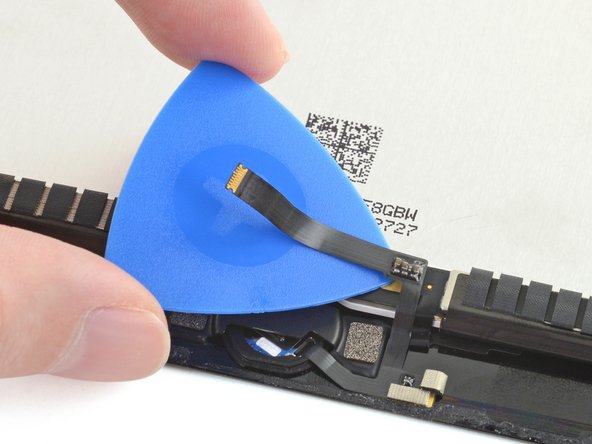
Utiliza una púa de apertura para separar el cable de ensamblaje del botón de inicio de la pantalla.
-
-
-
Utiliza una herramienta de apertura de plástico para hacer palanca y retirar el soporte del botón de inicio de la pantalla.
-
Utiliza unas pinzas para levantar y retirar el soporte del botón de inicio.
-
Utiliza una abrazadera pequeña para sujetar el soporte a la pantalla durante el tiempo de endurecimiento.
-
-
-
Calienta un iOpener y aplícalo a la parte inferior de la pantalla durante dos minutos para debilitar el adhesivo que sujeta el botón de inicio.
-
-
-
Empuja lentamente el botón de inicio hacia arriba y hacia fuera por la parte posterior de la pantalla.
-
-
-
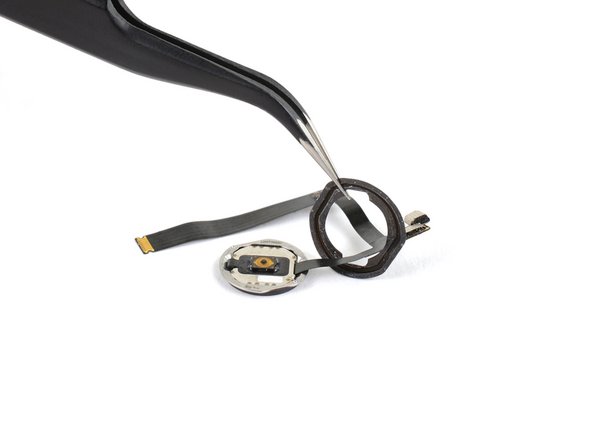
Levanta y retira el ensamblaje del botón de inicio.
-
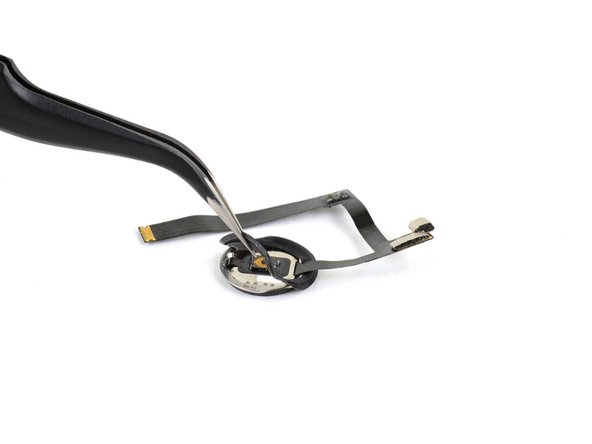
Despega la junta del botón de inicio. Luego, pásala por el cable para retirarla.
-
Coloca una junta de reemplazo en el botón de inicio.
-
Gira el botón de inicio para que el cable del botón de inicio quede donde estaba antes del desmontaje. Asegúrate de que el cable del botón de inicio puede insertarse en su conector ZIF.
-
Centra el botón de inicio para que encaje en su ranura en la pantalla. A continuación, presiona firmemente la junta para adherirla a la pantalla.
-
-
-
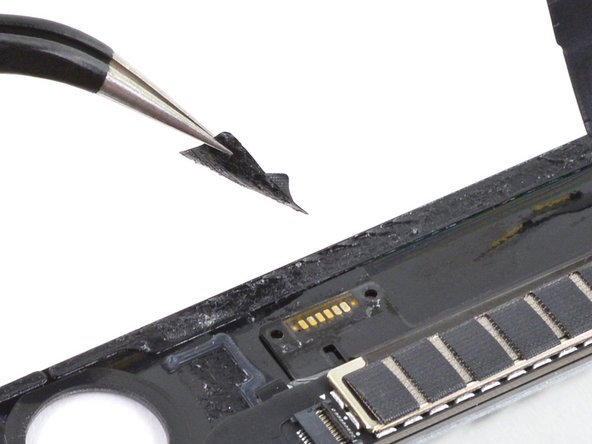
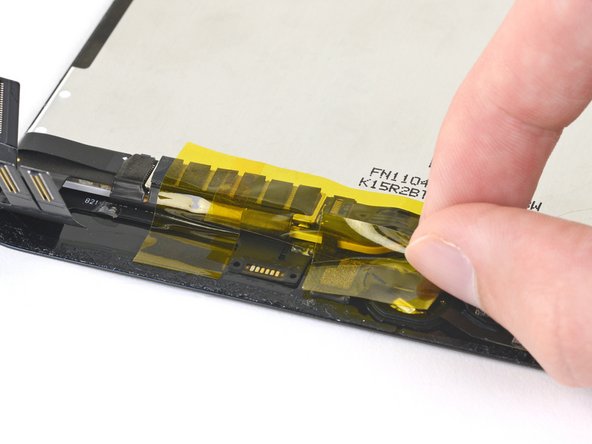
Utiliza unas pinzas para retirar el adhesivo que cubre las almohadillas de soldadura del sensor magnético.
-
-
-
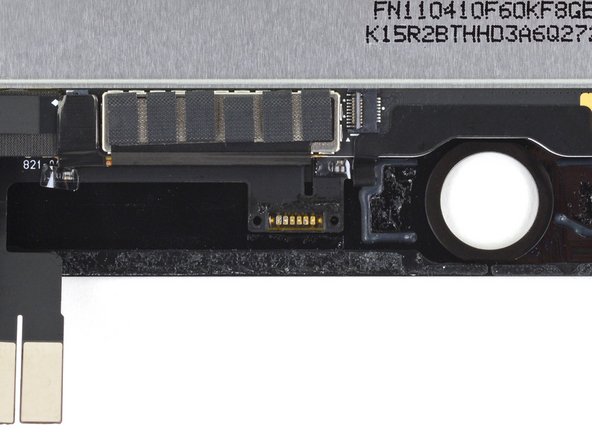
En los siguientes pasos, desoldarás las seis almohadillas de soldadura que fijan el sensor magnético a la pantalla.
-
-
-
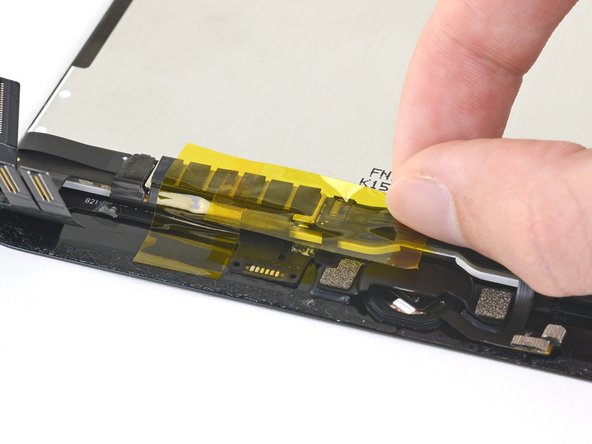
Aplica cinta de poliamida alrededor de las almohadillas de soldadura del sensor magnético para proteger los componentes del calor.
-
-
-
Utiliza un soldador o una pistola de aire caliente para aplicar calor uniformemente a las seis almohadillas de soldadura del sensor magnético.
-
-
-
Cuando la soldadura de las almohadillas esté fundida, utiliza unas pinzas para separar el sensor magnético de la pantalla.
-
Cuando la zona esté lo suficientemente fría como para tocarla, retira la cinta de poliamida.
-
Utiliza unas pinzas para retirar el cable del sensor magnético.
-
-
-
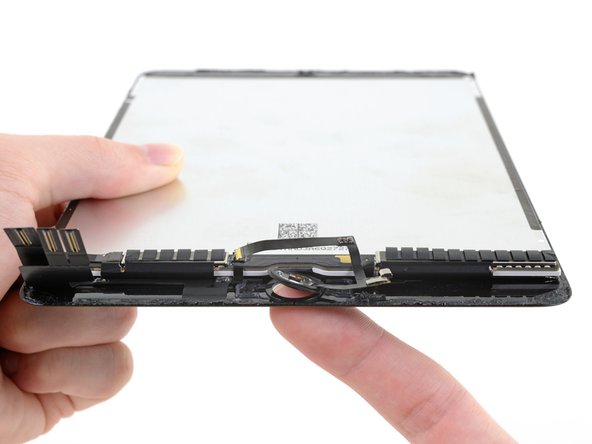
Tras retirar el botón de inicio y el sensor magnético, sólo queda la pantalla.
-


Compara tu nueva pieza de repuesto con la pieza original: es posible que tengas que transferir los componentes restantes o retirar los adhesivos de la nueva pieza antes de instalarla.
Para volver a montar el dispositivo, siga estas instrucciones en orden inverso..
Lleva tus residuos electrónicos a un centro de reciclaje certificado.
¿La reparación no ha ido según lo previsto? Prueba con una solución de problemas básicos, o pide ayuda a nuestra comunidad de respuestas de iPad mini 5.
Cancelar: No complete esta guía.
9 personas más completaron esta guía.
Un agradecimiento especial a estos traductores:
100%

¡ Mariana Roca nos está ayudando a reparar el mundo! ¿Quieres contribuir?
Empezar a traducir ›

3 comentarios
is it possible to buy the screen with the magnetic sensor already on it?
Yes, if it is in stock.
hello sir
I want to replace my ipad with another apple products
its possible or no ?