
iMac Intel 20" EMC 2266 Heat Sink Replacement

Introducción
Ir al paso 1Replacing the heat sink in your iMac will keep your processor cool and happy.


-
-
Lay your iMac front side down on a table with the lower edge facing yourself.
-
Loosen the single Phillips screw in the center of the access door.
-
Remove the access door from your iMac.
-
-
Herramienta utilizada en este paso:Heavy-Duty Suction Cups (Pair)$14.95
-
Stick two suction cups to opposing corners of the glass panel.
-
-
-
Remove the following 12 screws securing the front bezel to the rear case:
-
Eight 13 mm T8 Torx.
-
Four 25 mm T8 Torx.
-
-
-
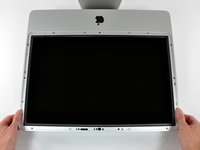
Gently lift the front bezel from its top edge off the rear case.
-
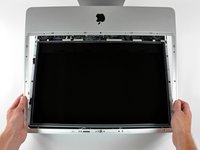
Once the top edge of the front bezel has cleared the rear case, rotate the front bezel toward the stand and lift it off the rear case.
-
Rotate the front bezel away from the rest of the device and lay it above the top edge of the iMac.
-
-
-
Pull the LCD temperature sensor connector straight up off its socket on the logic board.
-
(located at the top of the logic board on the 24")
-
-
-
Remove the single T10 Torx screw securing the right speaker to the rear case.
-
-
-
-
Disconnect the optical drive fan connector from the audio board by pulling it straight away from its socket.
-
-
-
Set the logic board on a cloth or a soft surface.
-
Use the sharp end of a spudger to remove the clear tape covering the heat sink bracket.
-


To reassemble your device, follow these instructions in reverse order.
To reassemble your device, follow these instructions in reverse order.
Cancelar: No complete esta guía.
8 personas más completaron esta guía.
