
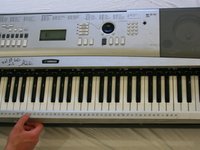
Yamaha YPG-225 Keys Replacement
Introducción
Ir al paso 1Learn to remove and replace a broken key for your keyboard with this guide. The process is fairly simple and mostly requires the removal of screws.
Qué necesitas
Herramientas


-
-
Locate the six batteries and remove them from the battery cavity.
-
-


To reassemble your device, follow these instructions in reverse order.
To reassemble your device, follow these instructions in reverse order.
Cancelar: No complete esta guía.
7 personas más completaron esta guía.
Equipo

Cal Poly, Team 2-62, Propen Fall 2012 Miembro de Cal Poly, Team 2-62, Propen Fall 2012
CPSU-PROPEN-F12S2G62
Miembros de 2
6 Guías creadas
3 comentarios
Excellent, Although I've got a different type of yamaha keyboard, still good inside info.
Great article. Thank you so much.
The instructions were very good and easy to understand. Question on the same subject. How about keys that have popped up on the key bed.