Saltar al contenido principal
VTech Kidizoom Smartwatch DX2 Battery Replacement

VTech Kidizoom Smartwatch DX2 Battery Replacement

Jessica Richard

Jessica Richard y 4 otros contribuidores

Última actualización: December 19, 2018

15 - 30 minutos
Difícil

Introducción

Ir al paso 1

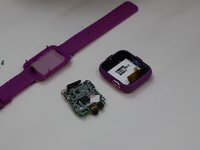
If your Smartwatch is not charging, and you tested the cables, then the battery may need to be replaced. This guide will show you how to do this.

Qué necesitas

Partes

Herramientas

Ver más…

  1. VTech Kidizoom Smartwatch DX2 Battery Replacement, Master Switch: paso 1, imagen 1 de 2 VTech Kidizoom Smartwatch DX2 Battery Replacement, Master Switch: paso 1, imagen 2 de 2
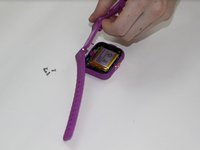
    • Begin by flipping the watch over with its back facing upwards.

  2. VTech Kidizoom Smartwatch DX2 Battery Replacement: paso 2, imagen 1 de 2 VTech Kidizoom Smartwatch DX2 Battery Replacement: paso 2, imagen 2 de 2
    • Next, use the Phillips #00 screwdriver to unscrew the four 6.0 mm screws located in each corner of the watch to remove the backplate.

  3. VTech Kidizoom Smartwatch DX2 Battery Replacement: paso 3, imagen 1 de 2 VTech Kidizoom Smartwatch DX2 Battery Replacement: paso 3, imagen 2 de 2
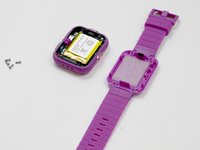
    • Gently lift the backplate up to remove it.

  4. VTech Kidizoom Smartwatch DX2 Battery Replacement: paso 4, imagen 1 de 3 VTech Kidizoom Smartwatch DX2 Battery Replacement: paso 4, imagen 2 de 3 VTech Kidizoom Smartwatch DX2 Battery Replacement: paso 4, imagen 3 de 3
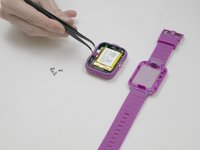
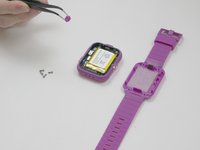
    • After removing the backplate, lift the master switch up from the circuit board.

  5. VTech Kidizoom Smartwatch DX2 Battery Replacement, Motherboard: paso 5, imagen 1 de 1
    • Using a Phillips #00 screwdriver, remove the 0.6 mm screw.

  6. VTech Kidizoom Smartwatch DX2 Battery Replacement: paso 6, imagen 1 de 2 VTech Kidizoom Smartwatch DX2 Battery Replacement: paso 6, imagen 2 de 2
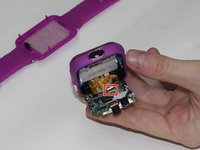
    • Carefully remove the speaker from the case without disconnecting it from the motherboard.

  7. VTech Kidizoom Smartwatch DX2 Battery Replacement: paso 7, imagen 1 de 2 VTech Kidizoom Smartwatch DX2 Battery Replacement: paso 7, imagen 2 de 2
    Herramienta utilizada en este paso:
    Tweezers
    $4.99
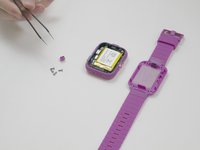
    • Using the tweezers, carefully lift the bar holding the connection to the screen.

    • Remove the motherboard from the device.

    and how to put it back

    noah - Contestar

    I'm trying to replace the microphone. Will replacing the motherboard get me a new microphone? I don't see it listed as a replacement part.

    Bill Pasnau - Contestar

  8. VTech Kidizoom Smartwatch DX2 Battery Replacement, Battery: paso 8, imagen 1 de 1
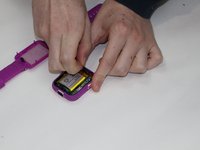
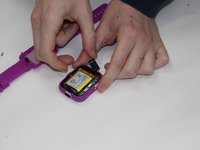
    • Carefully pry the battery off of the circuit board using the plastic opening tool.

    how do you swich the battery

    Nathan Snyder - Contestar

  9. VTech Kidizoom Smartwatch DX2 Battery Replacement: paso 9, imagen 1 de 1
    • De-solder the wires connecting the battery to the circuit board.

    • Remove the battery.

Conclusión

To reassemble your device, follow these instructions in reverse order.

Una persona más ha completado esta guía.

Jessica Richard

Miembro Desde 10/25/18

512 Reputación

4 Guías creadas

Equipo

UMass Dartmouth, Team S3-G5, Peak Fall 2018 Miembro de UMass Dartmouth, Team S3-G5, Peak Fall 2018

UMASSD-PEAK-F18S3G5

Miembros de 4

7 Guías creadas

4 comentarios

Hey guys, My VTech watch is plugged in but once I turn it on it does but then shows a dead battery. I actually didn’t play with it for a while and I left it dead battery.

Gabriel Baker - Contestar

So I might try this trick and see if it works.

Gabriel Baker - Contestar

Sometime i’ll try it

Gabriel Baker - Contestar

when I have the right tools

Gabriel Baker - Contestar

Agregar Comentario

Ver Estadísticas:

Ultimas 24 horas: 1

Ultimos 7 días: 18

Ultimos 30 días: 71

Todo El Tiempo: 10,306