
Samsung DV300F Front and Rear Casing Replacement
Introducción
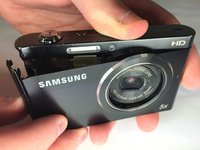
Ir al paso 1This guide will show you how to remove the casing around the device so that it and the parts underneath it can be replaced.
Qué necesitas
Herramientas

-
-
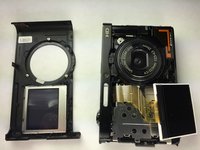
Remove the two black 4.2 mm screws on the right side of the camera using a Phillips #0 screwdriver.
-
Remove the two black 4.2 mm screws on the left side of the camera using a Phillips #0 screwdriver.
-
Remove the two black 4.2 mm screws on the bottom of the camera using a Phillips #0 screwdriver.
-
-


To reassemble your device, follow these instructions in reverse order.
To reassemble your device, follow these instructions in reverse order.
Cancelar: No complete esta guía.
2 personas más completaron esta guía.
Equipo

Baylor, Team 5-10, Williams Spring 2015 Miembro de Baylor, Team 5-10, Williams Spring 2015
BU-WILLIAMS-S15S5G10
3 Miembros
10 Guías creadas