Introducción
Utiliza esta guía para sustituir la pila de su TicWatch Pro 3 GPS.
Por tu seguridad, descargue la batería por debajo del 25% antes de desmontar el reloj. Esto reduce el riesgo de incendio si la batería se daña accidentalmente durante la reparación. Si su batería está hinchada, tome las precauciones adecuadas.
Necesitarás adhesivo de repuesto cuando vuelvas a montar el dispositivo. Tu dispositivo funcionará con normalidad, pero perderá su clasificación IP (Ingress Protection).
Qué necesitas
-
-
Antes de comenzar las reparaciones, desconecta el reloj del cargador y apágalo.
-
Retira la correa del reloj.
-
-
-
Utiliza un destornillador Torx T3 para quitar los cuatro tornillos de 4,1 mm de largo que sujetan la tapa trasera.
-
-
-
Aplica un iOpener calentado en la parte trasera del reloj durante 5 minutos para aflojar el adhesivo que se encuentra debajo.
-
-
-
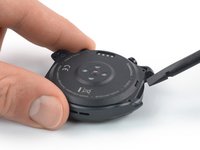
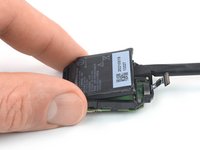
Inserta el extremo plano de un spudger en la abertura del micrófono en el borde superior de la tapa trasera.
-
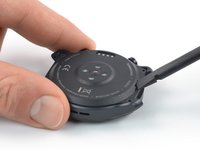
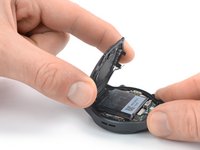
Haz palanca hacia arriba para aflojar el conjunto de la cubierta trasera. Esto puede requerir algo de fuerza.
-
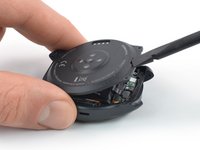
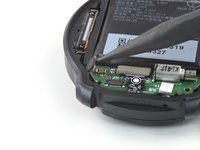
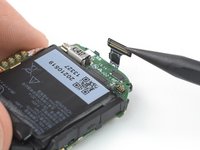
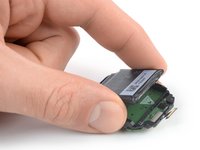
Abre el conjunto de la cubierta trasera 45 grados para acceder al cable del conjunto del sensor.
-
-
-
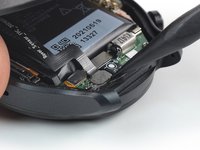
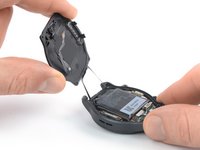
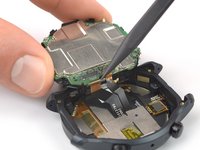
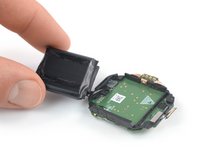
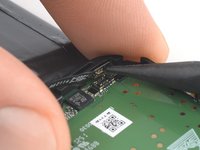
Usa un spudger para desconectar el cable del conjunto del sensor levantando el conector de su zócalo.
-
-
-
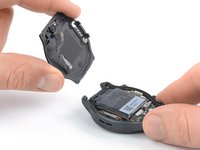
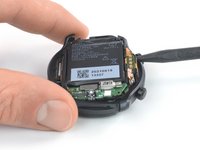
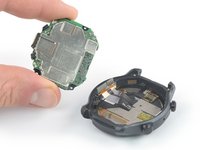
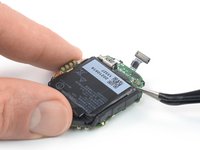
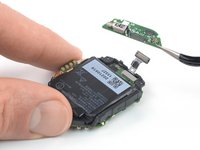
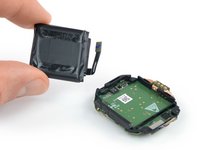
Retira el conjunto de la cubierta trasera.
-
-
-
-
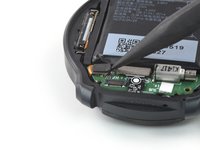
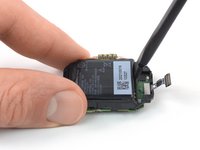
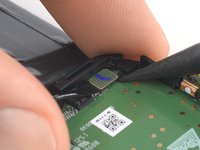
Usa un spudger para desconectar el cable del micrófono levantando el conector de su zócalo.
-
-
-
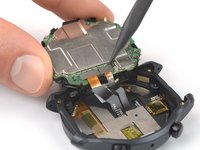
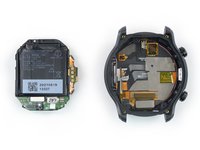
Utiliza un destornillador Phillips para quitar los tres tornillos de 4,1 mm de largo que sujetan el ensamblaje del núcleo.
-
-
-
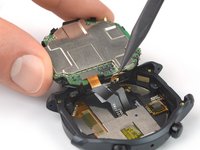
Inserta la punta de un spudger entre el borde derecho del conjunto central y el marco del reloj.
-
Haz palanca hacia arriba para aflojar el ensamblaje del núcleo.
-
-
-
Con cuidado, abre el ensamblaje del núcleo como si fuera la portada de un libro.
At this point, the little transparent plastic square over each button got away on my tear-down.
Those have a black dot in the middle, i though they might only be for waterproofing, but with or without them in place, i cannot push any of the button anymore. I think i just killed my watch.
If i'm not a fluke, i think this need a bit more warning. -
-
-
Usa un spudger para desconectar la pantalla y los cables del digitalizador levantando los conectores de sus enchufes.
-
-
-
Utiliza un spudger para desconectar el cable de interconexión haciendo palanca con el conector recto hacia arriba desde su zócalo.
-
-
Herramienta utilizada en este paso:Tweezers$4.99
-
Utiliza unas pinzas para retirar la placa secundaria.
-
-
-
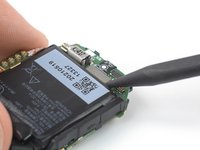
Inserta el extremo plano de un spudger entre el borde inferior de la batería y el marco central.
-
Haz palanca hacia arriba para aflojar la batería.
-
-
-
Dobla con cuidado la batería para acceder al conector del cable de la batería.
-
-
-
Desconecta el cable de la batería haciendo palanca con un spudger para sacar el conector de su alojamiento.
-
-
-
Retira la batería
I passaggi dal n° 5 al n° 14 non sono necessari !!! Più connettori si scollegano e più si ha la probabilità di rovinarli quando si andranno a riattaccare !!! Basta fare un po' di attenzione e si riesce a sollevare la batteria senza staccare tutti i connettori indicati in questi passaggi non necessari.
Quando la batteria si gonfia i pulsanti non funzionano più specie dopo una carica completa
Quando l orologio fa una carica completa la batteria si gonfia e spinge sul connettore pulsanti che smettono di funzionare come risolvere .
Forse sostituire batteria?
-


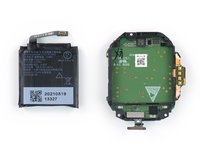
Compara tu nueva pieza de repuesto con la pieza original: es posible que tengas que transferir los componentes restantes o retirar los adhesivos de la nueva pieza antes de instalarla.
***Para volver a montar el dispositivo, sigue estas instrucciones en orden inverso.
Durante el montaje, aplica adhesivo nuevo donde sea necesario después de limpiar las zonas pertinentes con alcohol isopropílico (>90%).
Para un rendimiento óptimo, [Battery Calibration|calibra la batería recién instalada|new_window=true]] después de completar esta guía.
Lleva tus residuos electrónicos a un R2 o e-Stewards.
¿La reparación no ha ido según lo previsto? Prueba con soluciones de problemas básicos, o pide ayuda a nuestra Comunidad de respuestas del TicWatch Pro 3.
Cancelar: No complete esta guía.
33 personas más completaron esta guía.
Un agradecimiento especial a estos traductores:
100%


Estos traductores nos están ayudando a reparar el mundo! ¿Quieres contribuir?
Empezar a traducir ›


16 comentarios
Where did you buy a replacement battery (if you did)? I have scoured thru aliexpress, ebay, and tried to find shattered-screen watches I could transplant from, with no luck so far. I guess I'll keep looking. My watch barely lasted a year before the battery life halved. The voltage sag is so bad the watch bootloops whenever it vibrates below 30% voltage.
I've found a listing in aliexpress for an aftermarket battery but need to de-solder the original BMS and transfer to this new battery. Here's the link to aliexpress.
I don't think it's tin welding, but most likely TIG welding.
Difficult to open it, but the less experienced could solder the battery contacts on the top without opening the old solder.
A small problem (solved) that I encountered with the battery purchased as compatible from ali-express is the greater ( >5mm)
distance (compared to the battery) of the original two poles of the battery.
You have to bend them carefully inwards to be able to weld them afterwards.
Hello all,
I bought this battery as marco deirossi but I don't know how to weld them properly. What's the welding method? It doesn't seem like typical welding for me. Also, I have taken off the sticker of the new batter and the new orange foil out of it. Did I do something wrong? Shall I buy new batter?
Best Regards
Paul
Hello... Does anyone know where you can get this battery? since on Aliexpress it appears as out of stock in all the sellers that publish it.
Was able to install a new battery thanks to all the comments here but had to improvise a bit.
I had some trouble connecting the battery adapter to the battery and ended up shortening one of the flat connectors on the battery. Used some copper wire to bridge the gap and make it a bit easier.
After soldering the wires to the original adapter I made a small hole in the flat connectors of the battery, threaded the wire through there and soldered that. Ended up removing the wire insulation to be able to bend it in space. Recommend taping off anything you don't want the wires to touch beforehand if you do try to prevent short circuiting.
Also be mindful of the buttons during repair. Somewhere in the process I somehow lost the tiny clicker on one and misaligned the other. Was able to glue the latter back in the proper spot. Luckily only the one is necessary to do most stuff.
Hope this helps someone
Hi Ribson
the best thing to do is bend the two poles of the battery 90° inwards and give them a spot of soldering directly on the plus and minus contacts of the BCM circuit. It is NOT necessary to extract the mainboard as per the guide because you risk damaging the button contacts. Remove the cover, unhook the sensor flat cable, slightly heat the battery, pry it and unhook it from the flat cable. Open the battery film in the BCM circuit part and cut the two poles of the battery so that only the charging circuit remains in your hand
bend the two poles 90° inwards and solder on the BCM circuit
https://imgur.com/OiLXSrL
Hi Ferdi,
I don't understand why you did all that work,
pull the old BCM circuit out of the old battery.
Bend the two poles of the new battery 90° inwards.
spot solder directly on top without drilling anything or adding bits of wire.
What's the best temperature for iron to solder the terminals? I have a new battery, I have the old dissected and the terminal pad removed. The new battery already came with the poles be t inwards 90 degrees. Do I need to do more to the BCM circuit? I just cut the old poles off the battery.
is that LOSONCOER battery capable to fit to 3 pro ultra ?
or i need to look into another battery?
i've assembled and disassembled this a few times now and get power and screen, but the buttons never work anymore?? And this last time that little tiny brass contact that seems to touch the inside of the watch case metal plate (near the bottom button; you see it touching his index finger in Step 11) snapped off !! is that important (will the buttons work without it even)? or am i really screwed?