Saltar al contenido principal
Panasonic Lumix DMC-FX01 Rear Casing Replacement

Panasonic Lumix DMC-FX01 Rear Casing Replacement

Andrew

Andrew y 5 otros contribuidores

Última actualización: January 3, 2023

15 - 30 minutos
Moderado
Mejor introducción

Introducción

Ir al paso 1

Directions are given as if you were holding the camera to take a picture.

Qué necesitas

Herramientas

  1. Panasonic Lumix DMC-FX01 Rear Casing Replacement, Battery: paso 1, imagen 1 de 1
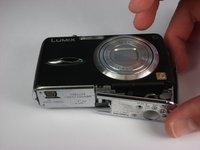
    • Locate the memory card and battery card latch on the bottom of the camera.

    • Slide the latch to the open position.

  2. Panasonic Lumix DMC-FX01 Rear Casing Replacement: paso 2, imagen 1 de 1
    • Open the battery latch, and slide the battery release lever to the right.

  3. Panasonic Lumix DMC-FX01 Rear Casing Replacement: paso 3, imagen 1 de 1
    • Remove the battery from the camera.

  4. Panasonic Lumix DMC-FX01 Rear Casing Replacement, Rear Casing: paso 4, imagen 1 de 1
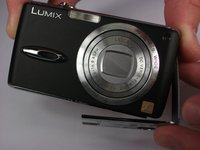
    • Remove the three 4.6 mm screws on the bottom of the camera using a Phillips #00 screwdriver.

  5. Panasonic Lumix DMC-FX01 Rear Casing Replacement: paso 5, imagen 1 de 1
    • Remove the single 3.2 mm screw on the left side of the camera using a Phillips #00 screwdriver.

  6. Panasonic Lumix DMC-FX01 Rear Casing Replacement: paso 6, imagen 1 de 2 Panasonic Lumix DMC-FX01 Rear Casing Replacement: paso 6, imagen 2 de 2
    • Remove the left side casing.

  7. Panasonic Lumix DMC-FX01 Rear Casing Replacement: paso 7, imagen 1 de 1
    • Remove the two 3.2 mm screws on the right side of the camera using a Phillips #00 screwdriver.

  8. Panasonic Lumix DMC-FX01 Rear Casing Replacement: paso 8, imagen 1 de 1
    • Remove the bottom right panel.

  9. Panasonic Lumix DMC-FX01 Rear Casing Replacement: paso 9, imagen 1 de 2 Panasonic Lumix DMC-FX01 Rear Casing Replacement: paso 9, imagen 2 de 2
    • Gently remove the back casing.

    • Start at the bottom and carefully pry towards the top to get this piece free.

Conclusión

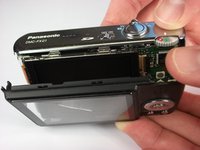
To reassemble your device, follow these instructions in reverse order.

Una persona más ha completado esta guía.

Andrew

Miembro Desde 10/11/10

396 Reputación

4 Guías creadas

Equipo

Cal Poly, Team 9-22, Regan Fall 2010 Miembro de Cal Poly, Team 9-22, Regan Fall 2010

CPSU-REGAN-F10S9G22

4 Miembros

8 Guías creadas

0 comentarios

Agregar Comentario

Ver Estadísticas:

Ultimas 24 horas: 0

Ultimos 7 días: 1

Ultimos 30 días: 4

Todo El Tiempo: 3,390