
Oontz Angle 3 ULTRA Back Panel Replacement
Introducción
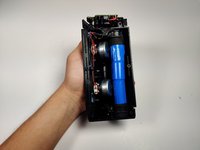
Ir al paso 1This guide will help you open up your Oontz Angle 3 Ultra, which will allow you to work on its sensitive internals. To open up the speaker, you must remove the back panel to access the inner components of the device.
Qué necesitas
Herramientas


-
Herramienta utilizada en este paso:Tweezers$4.99
-
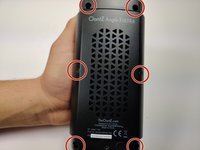
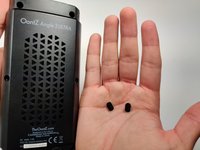
Remove the two black rubber sheaths around the edges of the speaker.
-
Under the symbol-marked sheath there is a white rubber covering for the buttons. Peel this away to reveal the panel underneath.
-
On two corners of its triangular face there is a small divot, which allows you to use your fingernails or a pair of tweezers to grip and peel away the covering.
-
-


To reassemble your device, follow these instructions in reverse order.
To reassemble your device, follow these instructions in reverse order.
Cancelar: No complete esta guía.
Una persona más ha completado esta guía.
Equipo

Embry-Riddle Aeronautical University, Team S6-G9, Rauch Spring 2020 Miembro de Embry-Riddle Aeronautical University, Team S6-G9, Rauch Spring 2020
ERAU-RAUCH-S20S6G9
3 Miembros
6 Guías creadas