Saltar al contenido principal

Nokia 2128i Speaker Replacement

Qué necesitas

  1. Nokia 2128i Speaker Replacement, Battery: paso 1, imagen 1 de 3 Nokia 2128i Speaker Replacement, Battery: paso 1, imagen 2 de 3 Nokia 2128i Speaker Replacement, Battery: paso 1, imagen 3 de 3
    • Be sure cell phone is off before you begin to disassemble the phone.

    • Press the button on the bottom of the back of the cell phone.

    • Slide rear panel down and remove it.

  2. Nokia 2128i Speaker Replacement: paso 2, imagen 1 de 3 Nokia 2128i Speaker Replacement: paso 2, imagen 2 de 3 Nokia 2128i Speaker Replacement: paso 2, imagen 3 de 3
    • Using your fingernail, pry the back of the battery upwards and pull out.

  3. Nokia 2128i Speaker Replacement, Faceplate: paso 3, imagen 1 de 3 Nokia 2128i Speaker Replacement, Faceplate: paso 3, imagen 2 de 3 Nokia 2128i Speaker Replacement, Faceplate: paso 3, imagen 3 de 3
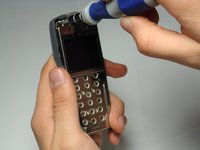
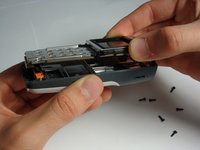
    • Insert the plastic opening tool under the faceplate.

    • Separate the faceplate from main body by twisting the prying tool with some force.

    • The faceplate is held by three plastic fasteners, so pry evenly on both sides of phone.

  4. Nokia 2128i Speaker Replacement, Motherboard Assembly: paso 4, imagen 1 de 3 Nokia 2128i Speaker Replacement, Motherboard Assembly: paso 4, imagen 2 de 3 Nokia 2128i Speaker Replacement, Motherboard Assembly: paso 4, imagen 3 de 3
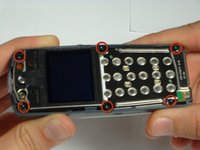
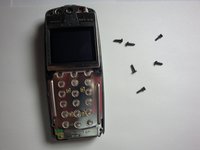
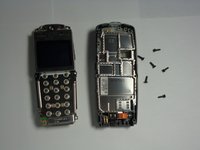
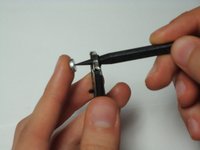
    • Locate and remove the six screws on the front of the phone using a T6 Torx.

    • All 6 screws are 6.9mm long.

  5. Nokia 2128i Speaker Replacement: paso 5, imagen 1 de 3 Nokia 2128i Speaker Replacement: paso 5, imagen 2 de 3 Nokia 2128i Speaker Replacement: paso 5, imagen 3 de 3
    • After removing screws, lift the motherboard assembly straight off the cell phone body.

  6. Nokia 2128i Speaker Replacement, Speaker: paso 6, imagen 1 de 3 Nokia 2128i Speaker Replacement, Speaker: paso 6, imagen 2 de 3 Nokia 2128i Speaker Replacement, Speaker: paso 6, imagen 3 de 3
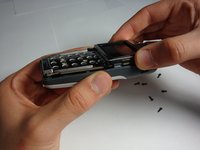
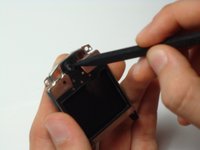
    • With the LCD unit removed, gently press out the speaker with a non-metallic pointed object.

Conclusión

To reassemble your device, follow these instructions in reverse order.

Curtis Lutje

Miembro Desde 10/07/10

28 Reputación

6 Guías creadas

Equipo

Cal Poly, Team 20-8, Maness Fall 2010 Miembro de Cal Poly, Team 20-8, Maness Fall 2010

CPSU-MANESS-F10S20G8

4 Miembros

24 Guías creadas

0 comentarios

Agregar Comentario

Ver Estadísticas:

Ultimas 24 horas: 0

Ultimos 7 días: 1

Ultimos 30 días: 2

Todo El Tiempo: 839