
Lenovo Yoga 720-15IKB Display Replacement
Introducción
Ir al paso 1If the screen in the Lenovo Yoga 720-15IKB is not properly displaying images or is cracked, it may be time to replace it. Follow these instructions to replace the display in your laptop.


-
-
Power off the device before starting.
-
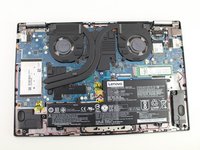
Flip the device over with the hinges facing away from you.
-
Remove seven 5.0 mm Torx T5 screws.
-
Remove three 9.5 mm Torx T5 screws.
-
-
-
-
Remove the 6, 2.5x5 screws, located on the hinges of the underside of the device.
-
Separate the display from the back panel. The display should be away from the actual computer itself.
-


To reassemble your device, follow these instructions in reverse order.
To reassemble your device, follow these instructions in reverse order.
Cancelar: No complete esta guía.
Una persona más ha completado esta guía.
Equipo

The Citadel Military College of South Carolina, Team S1-G9, Eggleston Spring 2021 Miembro de The Citadel Military College of South Carolina, Team S1-G9, Eggleston Spring 2021
CMCSC-EGGLESTON-S21S1G9
Miembros de 3
6 Guías creadas
Un comentario
This method didn't work for me. The screen is stuck to the lid with tape that has to be pulled from the bottom in order to release the screen without breaking it. I had to buy a new screen with tape.