
Lenovo Yoga 720 Bottom Cover Replacement

Introducción
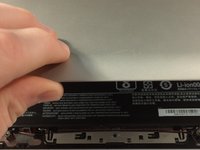
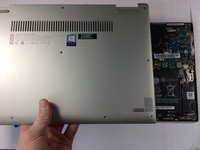
Ir al paso 1This guide shows how to properly remove the bottom case.
Qué necesitas
Partes
Herramientas


Ver más…


To reassemble your device, follow these instructions in reverse order.
To reassemble your device, follow these instructions in reverse order.
Cancelar: No complete esta guía.
5 personas más completaron esta guía.

2 comentarios
Can’t seem to find information about this but why should I discharge the laptop to 25% before I do this?
I bought a new wifi card that I will put in.
You should discharge the laptop to minimize the danger of fire and exploding battery if accidentally damages or short circuit occur during handling the accumulator. Fully charged accumulators will react more violently when short-circuited or damaged.