Saltar al contenido principal

HP dv5-1125nr WLAN Card Replacement

Qué necesitas

  1. HP dv5-1125nr WLAN Card Replacement, Battery: paso 1, imagen 1 de 1
    • Ensure your computer is shut down. Removing the battery while the laptop is still on may corrupt your files. Remove any power adapters and cords connected to the laptop body.

    • Slide the switch to the left until the release clicks.

  2. HP dv5-1125nr WLAN Card Replacement: paso 2, imagen 1 de 1
    • Remove the battery.

    • The release switch may need to be held down while removing the battery.

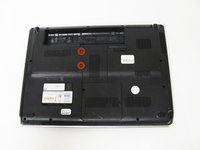
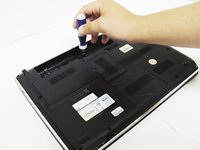
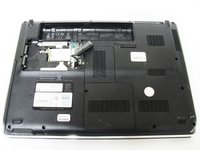
  3. HP dv5-1125nr WLAN Card Replacement, Hard Drive: paso 3, imagen 1 de 2 HP dv5-1125nr WLAN Card Replacement, Hard Drive: paso 3, imagen 2 de 2
    • Remove the two 5mm Phillips screws on the hard drive cover using a Phillips #00 screwdriver.

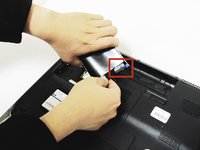
  4. HP dv5-1125nr WLAN Card Replacement: paso 4, imagen 1 de 1
    • Remove the plastic hard drive cover.

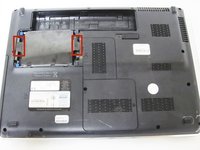
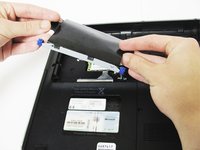
  5. HP dv5-1125nr WLAN Card Replacement: paso 5, imagen 1 de 2 HP dv5-1125nr WLAN Card Replacement: paso 5, imagen 2 de 2
    • Pull up on the two plastic flaps on the hard drive enclosure to remove it.

  6. HP dv5-1125nr WLAN Card Replacement: paso 6, imagen 1 de 2 HP dv5-1125nr WLAN Card Replacement: paso 6, imagen 2 de 2
    • Gently lift the ribbon cable away from the hard drive enclosure to free the drive.

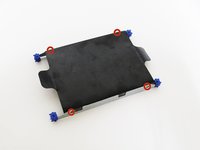
  7. HP dv5-1125nr WLAN Card Replacement: paso 7, imagen 1 de 2 HP dv5-1125nr WLAN Card Replacement: paso 7, imagen 2 de 2
    • Locate four 2mm Phillips screws on the side of the enclosure and remove them using a Phillips #00 screwdriver.

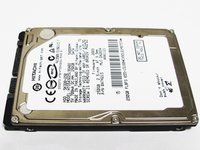
    • Slide the hard drive out of the enclosure to complete the removal process.

  8. HP dv5-1125nr WLAN Card Replacement, WLAN Card: paso 8, imagen 1 de 1
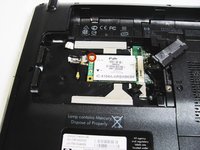
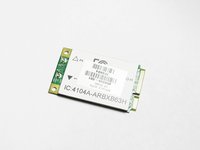
    • Locate the wireless card and the two wires attached to it.

    • Caution: Prying on the WLAN card wires in the wrong direction could damage your wireless card. Make sure to lift straight up when removing the wires.

    • Using a plastic spudger tool, carefully lift up on each wire connecting the card to unsnap the connectors.

  9. HP dv5-1125nr WLAN Card Replacement: paso 9, imagen 1 de 2 HP dv5-1125nr WLAN Card Replacement: paso 9, imagen 2 de 2
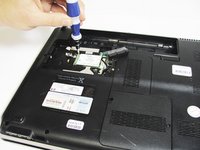
    • Locate the 2.5mm Phillips screw on the corner of the WLAN card and remove it using a Phillips #000 screwdriver.

  10. HP dv5-1125nr WLAN Card Replacement: paso 10, imagen 1 de 2 HP dv5-1125nr WLAN Card Replacement: paso 10, imagen 2 de 2
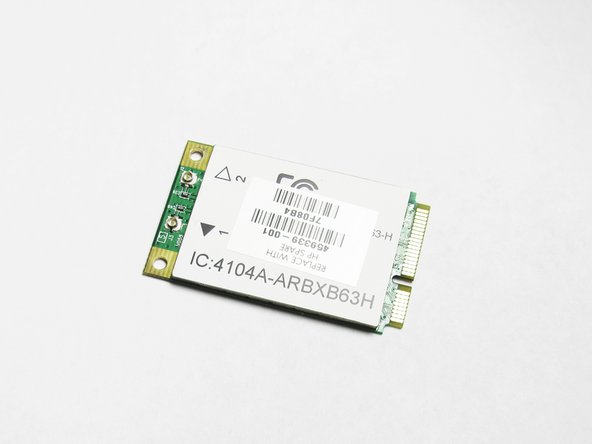
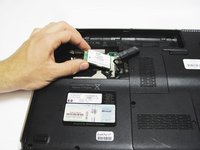
    • Upon removing the screw, the WLAN card will pop up. Keeping a natural angle, slide the card out of the slot.

    • The card is now free from your computer.

Conclusión

To reassemble your device, follow these instructions in reverse order.

Una persona más ha completado esta guía.

Cory Mayer

Miembro Desde 04/01/14

879 Reputación

2 Guías creadas

Equipo

Cal Poly, Team 9-15, Regan Spring 2014 Miembro de Cal Poly, Team 9-15, Regan Spring 2014

CPSU-REGAN-S14S9G15

4 Miembros

10 Guías creadas

0 comentarios

Agregar Comentario

Ver Estadísticas:

Ultimas 24 horas: 2

Ultimos 7 días: 11

Ultimos 30 días: 16

Todo El Tiempo: 1,124