
HP Envy x2 13-j002dx Battery Replacement
Introducción
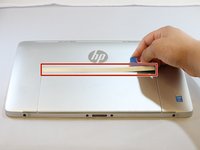
Ir al paso 1In this guide we will be opening up the HP Envy x2 13-j002dx and replacing the battery. This is an easier repair that can be done by just about anyone. The only screw driver required is a Philips #0 and a Philips #00 screw drivers. You will also need a pair of tweezers and a set of opening picks.


-
-
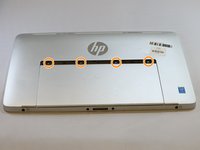
Remove five 4mm Phillips #0 screws securing the lower case to the HP Envy x2 13-j002dx.
-
-


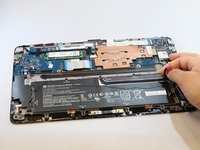

To reassemble your device, follow these instructions in reverse order.
To reassemble your device, follow these instructions in reverse order.
Cancelar: No complete esta guía.
5 personas más completaron esta guía.
Equipo

Eastern Washington University, Team S2-G4, Munoz Winter 2019 Miembro de Eastern Washington University, Team S2-G4, Munoz Winter 2019
EWU-MUNOZ-W19S2G4
2 Miembros
1 Guía escrita
Un comentario
For step 2, when I was taking the screws out, they were held in by the magnets that were on either side of them making it difficult to remove. I ended up having to use another magnet to get them out.