
HP EliteBook 1040 G4 Battery Replacement

Introducción
Ir al paso 1Use this guide to replace the battery on the HP Elitebook 1040 G4. The battery is essential for providing power to the laptop. A faulty battery can cause many adverse effects on your laptop experience: from overheating to computer crashes, or even just simple difficulties with charging or holding a charge. Although the battery in this computer is rechargeable, the battery itself may need to be replaced after long and repeated use.
To complete this guide, you will need a T5 Torx head screwdriver and a Phillips #00 screwdriver.
Before beginning, be sure to unplug and completely power off your computer.
Qué necesitas
Kits de reparación
Este kit contiene todas las piezas y herramientas necesarias para completar esta guía.

Partes

Herramientas


Ver más…
-
-
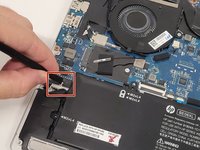
Use a T5 Torx screwdriver to remove the eight 5 mm screws securing the back cover to the chassis.
-
-
-
-
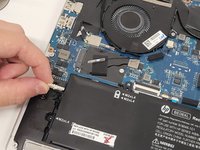
Use a Phillips #00 screwdriver to remove the eight 4 mm screws securing the battery to the motherboard.
-


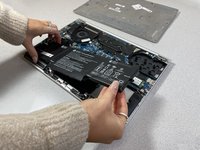

To reassemble your device, follow these instructions in reverse order.
For optimal performance, after completing this guide, calibrate your newly installed battery.
Take your e-waste to an R2 or e-Stewards certified recycler.
To reassemble your device, follow these instructions in reverse order.
For optimal performance, after completing this guide, calibrate your newly installed battery.
Take your e-waste to an R2 or e-Stewards certified recycler.
Cancelar: No complete esta guía.
Una persona más ha completado esta guía.

Equipo

Clemson, Team 4-1, Hunter Fall 2021 Miembro de Clemson, Team 4-1, Hunter Fall 2021
CLEM-HUNTER-F21S4G1
5 Miembros
10 Guías creadas