Saltar al contenido principal

HP Compaq nc8430 Fan Replacement

Qué necesitas

  1. HP Compaq nc8430 Fan Replacement, Battery: paso 1, imagen 1 de 1
    • Completely shut down the device and unplug any adapters and cords connected to the device.

    • Carefully flip the device over so that the bottom is facing up.

    • Slide both of the latches to the left.

  2. HP Compaq nc8430 Fan Replacement: paso 2, imagen 1 de 1
    • Slide up against the three lines the battery has.

  3. HP Compaq nc8430 Fan Replacement: paso 3, imagen 1 de 1
    • Slide the battery up and away from the laptop.

    • Slowly remove the battery to prevent any connectors from getting damaged.

  4. HP Compaq nc8430 Fan Replacement, Fan: paso 4, imagen 1 de 1
    • Use a J1 screwdriver to remove each screw on the bottom of the computer. This will allow for the opening of the laptop to gain access to the fan.

  5. HP Compaq nc8430 Fan Replacement: paso 5, imagen 1 de 1
    • Now that you have unscrewed most of the bottom of the laptop, carefully flip it back over.

    • Press down firmly on the four latches shown in the photo to detach the key board. This will unlock the latches holding the keyboard down, doing this will grant you access to the inside of the computer.

  6. HP Compaq nc8430 Fan Replacement: paso 6, imagen 1 de 2 HP Compaq nc8430 Fan Replacement: paso 6, imagen 2 de 2
    • Remove the keyboard carefully now that it is detached, and use the pry tool to assist you in the removal of the keyboard.

  7. HP Compaq nc8430 Fan Replacement: paso 7, imagen 1 de 1
    • Now your laptop should have no screws and no keyboard.

    • You should now be able to open up the base of the laptop. With a bit of force, detach the sides latches of the base by pulling them open carefully.

    • Your computer should now look like the provided photo, where you can see where the fan is located.

  8. HP Compaq nc8430 Fan Replacement: paso 8, imagen 1 de 2 HP Compaq nc8430 Fan Replacement: paso 8, imagen 2 de 2
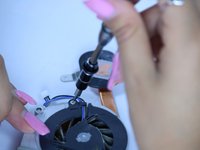
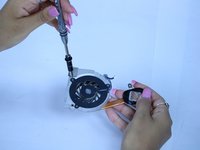
    • Carefully remove fan by detaching the blue and white plug from the main socket.

    • Continue to unscrew all screws to completely disassemble to gain complete access to the computer's fan.

  9. HP Compaq nc8430 Fan Replacement: paso 9, imagen 1 de 1
    • As an extra precaution, please check for any dirt or debris that are preventing the fans complete functionality.

    • Use a cotton swab and alcohol to clean the fan before re attaching it to ensure smooth functioning of the fan.

Conclusión

To reassemble your device, follow these instructions in reverse order.

Una persona más ha completado esta guía.

Andrea Funes

Miembro Desde 03/22/17

125 Reputación

1 Guía escrita

Equipo

0 comentarios

Agregar Comentario

Ver Estadísticas:

Ultimas 24 horas: 0

Ultimos 7 días: 0

Ultimos 30 días: 5

Todo El Tiempo: 1,219