Saltar al contenido principal
Gateway MA6 Laptop Wireless Card Replacement

Gateway MA6 Laptop Wireless Card Replacement

Chris Naughton

Chris Naughton y 4 otros contribuidores

Última actualización: June 23, 2019

5 minuto
Fácil

Introducción

Ir al paso 1

The wireless card regulates laptop connectivity to wireless networks for internet access. If your laptop has trouble connecting to a working wireless network, the wireless card may be damaged and may have to be replaced.

Qué necesitas

Herramientas

  1. Gateway MA6 Laptop Wireless Card Replacement, Battery: paso 1, imagen 1 de 1
    • To prevent injury, make sure the laptop is unplugged before removing the battery.

    • Make sure the switch in the upper right corner of the laptop is switched to the "unlock" position (toward the unlocked padlock icon).

  2. Gateway MA6 Laptop Wireless Card Replacement: paso 2, imagen 1 de 3 Gateway MA6 Laptop Wireless Card Replacement: paso 2, imagen 2 de 3 Gateway MA6 Laptop Wireless Card Replacement: paso 2, imagen 3 de 3
    • Pull the switch on the upper lefthand corner of the laptop towards the unlocked padlock icon.

    • Firmly pull the battery outwards and away from the laptop.

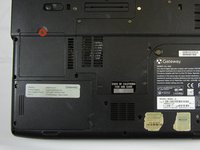
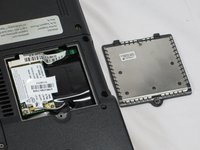
  3. Gateway MA6 Laptop Wireless Card Replacement, Wireless Card: paso 3, imagen 1 de 2 Gateway MA6 Laptop Wireless Card Replacement, Wireless Card: paso 3, imagen 2 de 2
    • Loosen the 3mm Phillips #0 screw from the back of the WiFi card backplate.

    • The screw will remain in the backplate.

    • Lift upwards on the back plate to remove it.

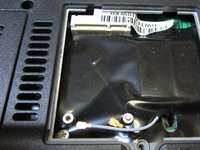
  4. Gateway MA6 Laptop Wireless Card Replacement: paso 4, imagen 1 de 1
    • Use the plastic opening tool to gently pry upwards on the two connecting cables to remove them.

  5. Gateway MA6 Laptop Wireless Card Replacement: paso 5, imagen 1 de 1
    • Remove the 2 mm Phillips #0 screw.

    • The card will lift itself up 30° after the screw has been removed.

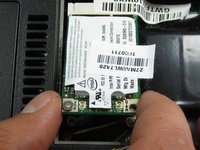
  6. Gateway MA6 Laptop Wireless Card Replacement: paso 6, imagen 1 de 2 Gateway MA6 Laptop Wireless Card Replacement: paso 6, imagen 2 de 2
    • Hold the WiFi card on both sides and pull outwards to remove it.

Conclusión

To reassemble your device, follow these instructions in reverse order.

Chris Naughton

Miembro Desde 04/07/14

705 Reputación

5 Guías creadas

Equipo

Cal Poly, Team 6-2, Forte Spring 2014 Miembro de Cal Poly, Team 6-2, Forte Spring 2014

CPSU-FORTE-S14S6G2

Miembros de 5

20 Guías creadas

0Guía Comentarios

Agregar Comentario

Ver Estadísticas:

Ultimas 24 horas: 0

Ultimos 7 días: 0

Ultimos 30 días: 5

Todo El Tiempo: 774