
Electric Outlet Cover Replacement
Introducción
Ir al paso 1In this guide I will be walking you through how to replace an electrical outlet cover. Keep in mind some outlets have different looks but here we will be replacing a standard outlet with two ports. Stay cautious when replacing an outlet cover because electric currents are still running through them and can potentially cause harm if not handled properly.
Before you begin this repair, we recommend you to turn off the electricity in your household to avoid electrocution.
Qué necesitas

-
-
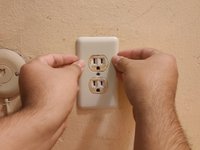
Setup a workspace around the damaged/old electrical outlet cover you are replacing.
-
-


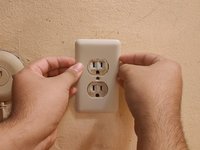

To make sure the outlet cover is properly installed, try to move the faceplate around and plug in your devices to ensure the outlet still works
To make sure the outlet cover is properly installed, try to move the faceplate around and plug in your devices to ensure the outlet still works
Cancelar: No complete esta guía.
3 personas más completaron esta guía.
Equipo

CSU Los Angeles, Team S12-G22, Harris Fall 2020 Miembro de CSU Los Angeles, Team S12-G22, Harris Fall 2020
CSULA-HARRIS-F20S12G22
1 Miembro
1 Guía escrita