
Dell Vostro 5510 Back Cover Replacement

Introducción
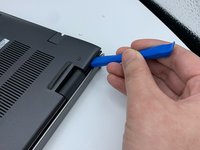
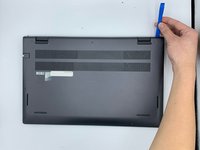
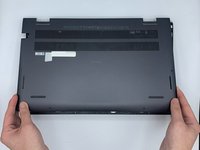
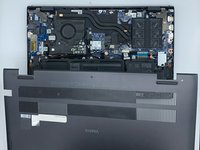
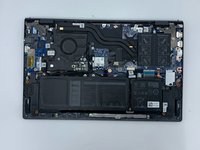
Ir al paso 1The first step in any replacement of the internal components of the Dell Vostro 15 5510 is to remove its back cover. To complete this guide, you will need a Phillips #0 screwdriver head and a plastic opening tool. This guide also is necessary for accessing most of the internal components of the laptop.
Qué necesitas
Herramientas


To reassemble your device, follow these instructions in reverse order.
To reassemble your device, follow these instructions in reverse order.
Cancelar: No complete esta guía.
Una persona más ha completado esta guía.

Equipo

University of North Texas, Team 3-5, Saru Jimmy Spring 2023 Miembro de University of North Texas, Team 3-5, Saru Jimmy Spring 2023
UNT-SARU JIMMY-S23S3G5
4 Miembros
6 Guías creadas