
Dell Studio 1737 Keyboard Replacement
Introducción
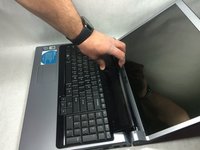
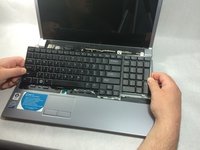
Ir al paso 1This guide will demonstrate how to remove or replace the keyboard of a Dell Studio 1737 laptop.
Qué necesitas


-
-
Slide the battery release slider all the way to the right and push the battery straight out of the back of the computer
-
-
-
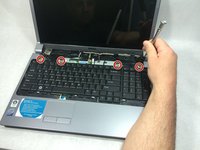
Use a plastic opening tool to detach the internal clips (marked with red boxes in photo) and release the small plastic panel above the keyboard
-
-


To reassemble your device, follow these instructions in reverse order.
To reassemble your device, follow these instructions in reverse order.
Cancelar: No complete esta guía.
2 personas más completaron esta guía.
Equipo

UMass Dartmouth, Team S8-G4, Catania Spring 2017 Miembro de UMass Dartmouth, Team S8-G4, Catania Spring 2017
UMASSD-CATANIA-S17S8G4
3 Miembros
8 Guías creadas