Saltar al contenido principal
Dell Optiplex 745 Small Form Factor Motherboard Replacement

Dell Optiplex 745 Small Form Factor Motherboard Replacement

Alexander Rosner

Alexander Rosner y otro contribuidor

Última actualización: August 17, 2019

10 - 20 minutos
Moderado

Introducción

Ir al paso 1

In this guide, we will be removing parts of the computer from the motherboard to be able to take the board itself out.

Qué necesitas

iFixit gana una comisión si finalizas una compra usando estos enlaces.
  1. Dell Optiplex 745 Small Form Factor Motherboard Replacement, Opening the case: paso 1, imagen 1 de 2 Dell Optiplex 745 Small Form Factor Motherboard Replacement, Opening the case: paso 1, imagen 2 de 2
    • Pull the tab and the lid will pop up.

  2. Dell Optiplex 745 Small Form Factor Motherboard Replacement: paso 2, imagen 1 de 2 Dell Optiplex 745 Small Form Factor Motherboard Replacement: paso 2, imagen 2 de 2
    • Grab the lid and pull it up and off.

  3. Dell Optiplex 745 Small Form Factor Motherboard Replacement, Motherboard: paso 3, imagen 1 de 3 Dell Optiplex 745 Small Form Factor Motherboard Replacement, Motherboard: paso 3, imagen 2 de 3 Dell Optiplex 745 Small Form Factor Motherboard Replacement, Motherboard: paso 3, imagen 3 de 3
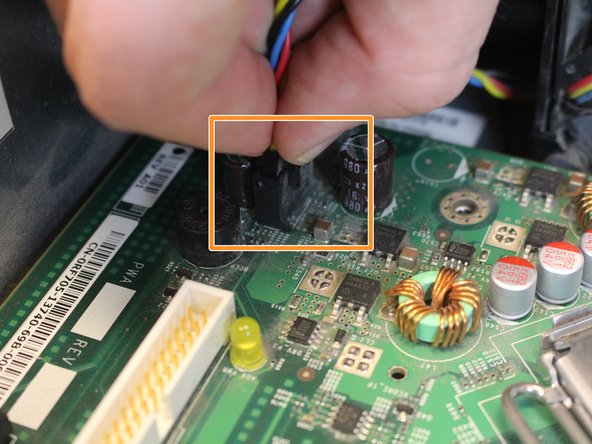
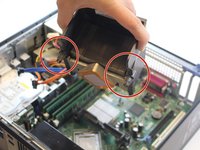
    • Disconnect all of the cords that are connected to the motherboard.

    • Press in the lever on the side of the male end, and then pull out.

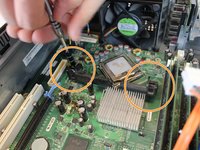
    • Pull cord straight out.

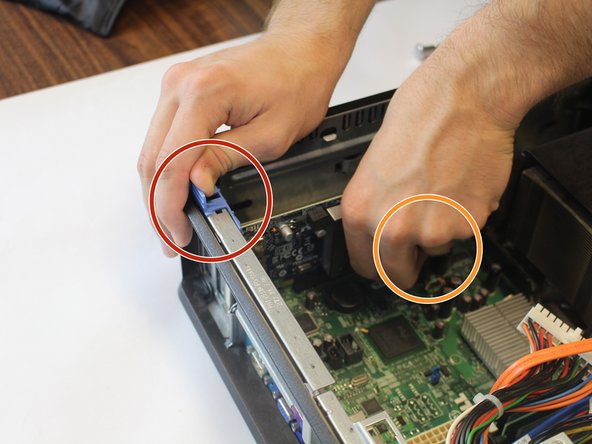
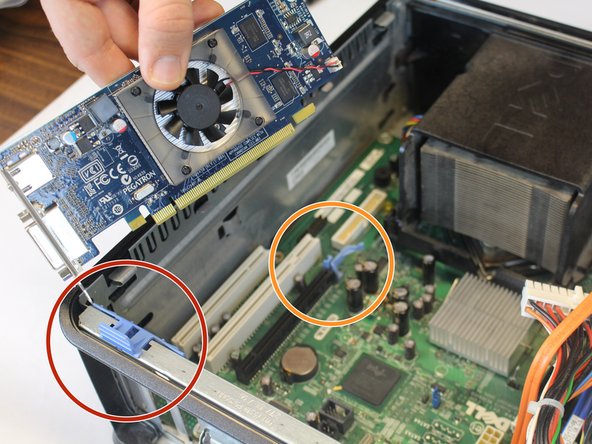
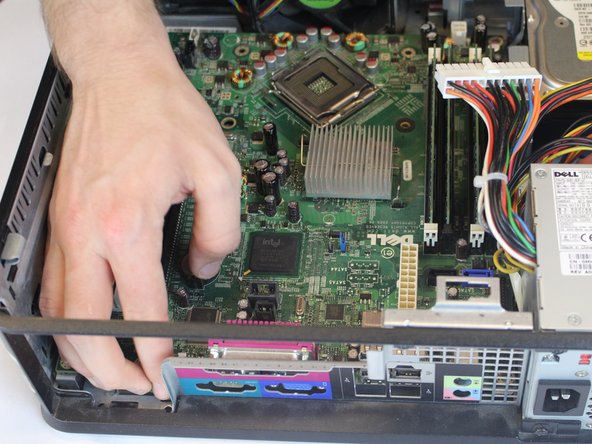
    • Disconnect the front plate (USB and audio output) from the motherboard.

    • Some of the cords in the pictures are missing due to the condition of our device when creating this guide.

  4. Dell Optiplex 745 Small Form Factor Motherboard Replacement: paso 4, imagen 1 de 3 Dell Optiplex 745 Small Form Factor Motherboard Replacement: paso 4, imagen 2 de 3 Dell Optiplex 745 Small Form Factor Motherboard Replacement: paso 4, imagen 3 de 3
    • Remove the graphics card.

    • Lift the blue latch on the fat end of the graphics card.

    • Pull the blue lever on the skinny end of the graphics card toward the power supply.

    • Pull out one end of the card at a time.

  5. Dell Optiplex 745 Small Form Factor Motherboard Replacement: paso 5, imagen 1 de 3 Dell Optiplex 745 Small Form Factor Motherboard Replacement: paso 5, imagen 2 de 3 Dell Optiplex 745 Small Form Factor Motherboard Replacement: paso 5, imagen 3 de 3
    • Remove the heat sink.

    • Unscrew the (2) two screws using a Phillips #2 screwdriver and lift out the heat sink.

  6. Dell Optiplex 745 Small Form Factor Motherboard Replacement: paso 6, imagen 1 de 3 Dell Optiplex 745 Small Form Factor Motherboard Replacement: paso 6, imagen 2 de 3 Dell Optiplex 745 Small Form Factor Motherboard Replacement: paso 6, imagen 3 de 3
    • Remove the (5) five 6mm Phillips #2 screws from the motherboard.

    • Remove the (2) two 17mm Phillips #2 screws from the mount for the heat sink.

  7. Dell Optiplex 745 Small Form Factor Motherboard Replacement: paso 7, imagen 1 de 3 Dell Optiplex 745 Small Form Factor Motherboard Replacement: paso 7, imagen 2 de 3 Dell Optiplex 745 Small Form Factor Motherboard Replacement: paso 7, imagen 3 de 3
    • Remove the back plate by lifting straight out by the blue latch that secures the graphics card.

    • Pull the end of the motherboard closest to the back of the computer away from the static back plate.

    • Lift this end away and out of the case.

Conclusión

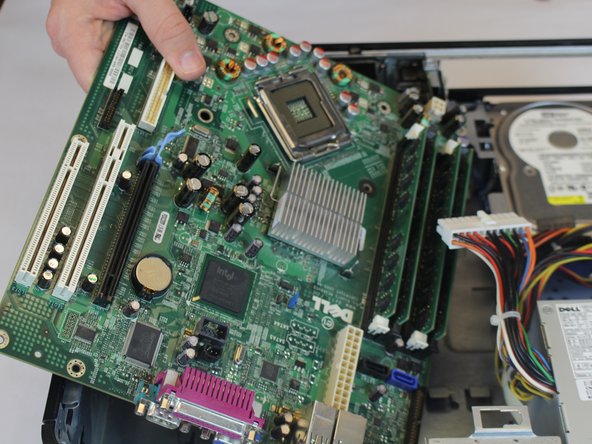
To reassemble your device, follow these instructions in reverse order.

7 personas más completaron esta guía.

Alexander Rosner

Miembro Desde 10/03/17

291 Reputación

1 Guía escrita

Equipo

USF Tampa, Team S5-G5, Walkup Fall 2017 Miembro de USF Tampa, Team S5-G5, Walkup Fall 2017

USFT-WALKUP-F17S5G5

4 Miembros

9 Guías creadas

0 comentarios

Agregar Comentario

Ver Estadísticas:

Ultimas 24 horas: 0

Ultimos 7 días: 4

Ultimos 30 días: 16

Todo El Tiempo: 1,953