Saltar al contenido principal
Dell Latitude 3380 Fan Replacement

Dell Latitude 3380 Fan Replacement

Dami Olowoye

Dami Olowoye y 3 otros contribuidores

Última actualización: May 7, 2024

5 minuto
Fácil

Introducción

Ir al paso 1

In this guide, we will be showing you how to replace the fan setup within the Dell Latitude 3380.

The fan is an important part of the laptop as it helps keep all the parts cool which prevents overheating. When a part is overheated, it will not perform as well as it should.

Qué necesitas

Herramientas

Ver más…

  1. Dell Latitude 3380 Fan Replacement, Back Cover: paso 1, imagen 1 de 2 Dell Latitude 3380 Fan Replacement, Back Cover: paso 1, imagen 2 de 2
    • Turn the laptop over so that the back is facing up.

    • Remove the nine 3 mm screws with a Phillips #0 screwdriver.

  2. Dell Latitude 3380 Fan Replacement: paso 2, imagen 1 de 2 Dell Latitude 3380 Fan Replacement: paso 2, imagen 2 de 2
    • Use an opening tool to pry the back cover away from the laptop.

  3. Dell Latitude 3380 Fan Replacement, Fan: paso 3, imagen 1 de 1
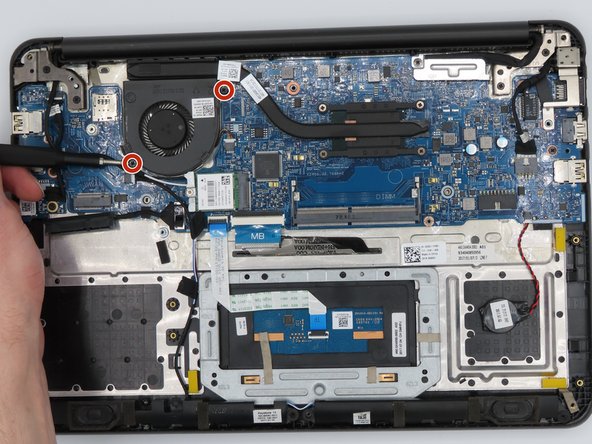
    • Remove the two 5 mm screws from the fan using a Phillips #0 screwdriver.

  4. Dell Latitude 3380 Fan Replacement: paso 4, imagen 1 de 1
    • Loosen the four captive screws on the heatsink using a Phillips #0 screwdriver.

  5. Dell Latitude 3380 Fan Replacement: paso 5, imagen 1 de 1
    • Remove the heatsink from the motherboard.

  6. Dell Latitude 3380 Fan Replacement: paso 6, imagen 1 de 2 Dell Latitude 3380 Fan Replacement: paso 6, imagen 2 de 2
    Herramienta utilizada en este paso:
    Tweezers
    $4.99
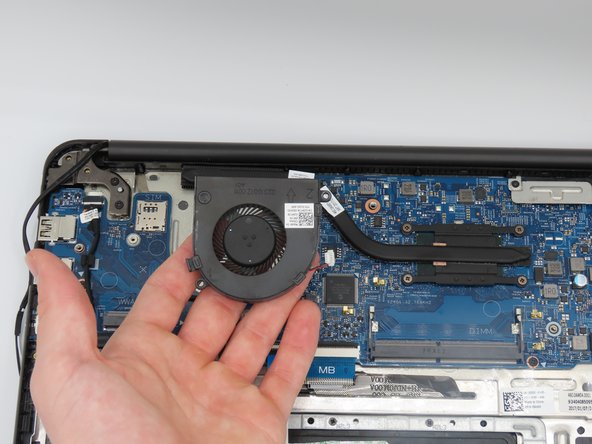
    • Using tweezers, loosen the power connector from the fan to the motherboard, fully disconnecting the fan.

Conclusión

To reassemble your device, follow these instructions in reverse order.

0 comentarios

Agregar Comentario

Ver Estadísticas:

Ultimas 24 horas: 0

Ultimos 7 días: 1

Ultimos 30 días: 8

Todo El Tiempo: 119