
Dell Inspiron 3520 Keyboard Replacement
Introducción
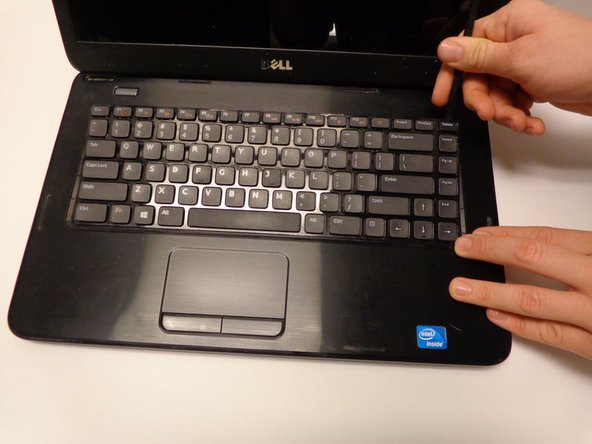
Ir al paso 1The Dell Inspiron 3520 has a basic keyboard that is easily accessible from the open surface of the notebook. The 3520 model does not have a keyboard backlight. This makes the keyboard much simpler to remove. Keep in mind that this will require some force on the repairers part.
Qué necesitas
Herramientas

-
-
Turn off notebook
-
Set the notebook upside down with the battery facing away from you.
-
Locate the unlock and release sliding tabs on the bottom right and left hand corners of the battery respectively.
-
-
-
-
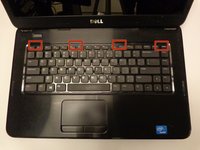
Locate the four tabs along the top edge of the keyboard.
-
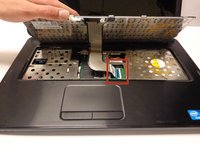
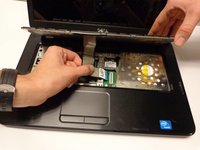
Using the spudger, push the tabs away from the keyboard and pull the keyboard up away from the laptop.
-


To reassemble your device, follow these instructions in reverse order.
To reassemble your device, follow these instructions in reverse order.
Cancelar: No complete esta guía.
7 personas más completaron esta guía.
Equipo

USF Tampa, Team 16-2, Watkins Winter 2015 Miembro de USF Tampa, Team 16-2, Watkins Winter 2015
USFT-WATKINS-W15S16G2
3 Miembros
5 Guías creadas
Un comentario
Hi, any ideas why a NEW keyboard still wouldn't work after installing it? The ribbon was connected properly, it’s the right keyboard, and I made sure the driver was updated. Any help would be greatly appreciated. Started a new job and my keyboard went to $@$* in the first week. Can’t really afford to buy a new laptop this weekend. It works with an external USB keyboard so it’s probably not a software issue… I think?
Alittle advice would be greatly appreciated. Thanks!