Saltar al contenido principal

Dell Chromebook 11-3120 Track Pad Replacement

Qué necesitas

  1. Dell Chromebook 11-3120 Track Pad Replacement, Back Panel: paso 1, imagen 1 de 2 Dell Chromebook 11-3120 Track Pad Replacement, Back Panel: paso 1, imagen 2 de 2
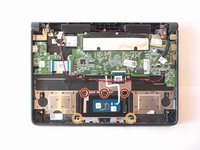
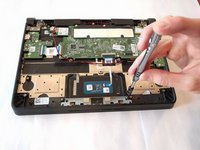
    • Use the #J0 screwdriver to unscrew the seven 4mm screws located around the back panel.

  2. Dell Chromebook 11-3120 Track Pad Replacement: paso 2, imagen 1 de 2 Dell Chromebook 11-3120 Track Pad Replacement: paso 2, imagen 2 de 2
    • Use the plastic opening tool to gently pry around the four sides of the back panel until the panel is fully released.

    • Taking the back cover off of the computer may require more force than expected. When using the opening tool, be careful not to use too much force on it, and make sure all the screws are removed.

  3. Dell Chromebook 11-3120 Track Pad Replacement, Track Pad: paso 3, imagen 1 de 3 Dell Chromebook 11-3120 Track Pad Replacement, Track Pad: paso 3, imagen 2 de 3 Dell Chromebook 11-3120 Track Pad Replacement, Track Pad: paso 3, imagen 3 de 3
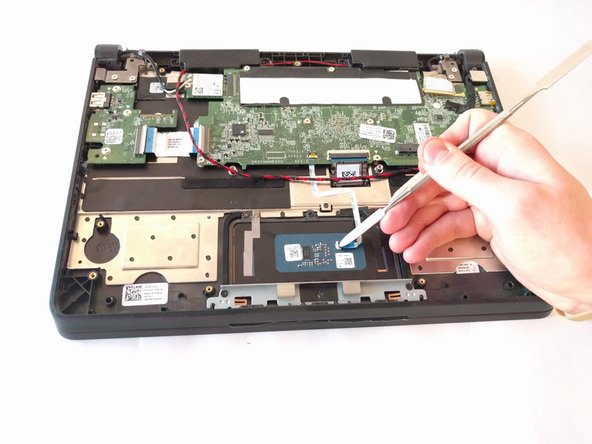
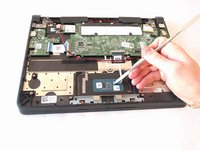
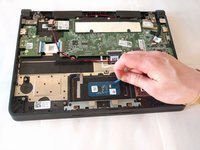
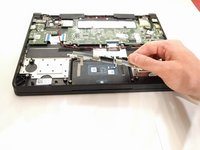
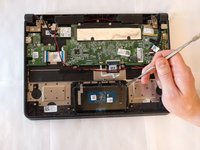
    • Using a pointed metal spudger, pull the tiny switch on top of the ribbon cable port away from the wire insertion to unlock it. Then gently remove the ribbon cable that connects the trackpad to the motherboard.

    • Use caution when removing ribbon cables as they may tear if too much force is applied.

    • Make sure the switch is lifted before pulling out the ribbon cable. Failure to do so can damage the locking mechanism.

  4. Dell Chromebook 11-3120 Track Pad Replacement: paso 4, imagen 1 de 2 Dell Chromebook 11-3120 Track Pad Replacement: paso 4, imagen 2 de 2
    • Using a JIS #0 screwdriver, unscrew the three 4 mm screws securing the trackpad in place.

    • Using the JIS #0 screwdriver, unscrew the two 4mm screws that hold the metal clicking mechanism in place.

  5. Dell Chromebook 11-3120 Track Pad Replacement: paso 5, imagen 1 de 2 Dell Chromebook 11-3120 Track Pad Replacement: paso 5, imagen 2 de 2
    • Gently lift the metal click bar off of the trackpad.

    • Lift the trackpad with the pointed metal spudger from any side to free the trackpad from its position.

Conclusión

To reassemble your device, follow these instructions in reverse order.

2 personas más completaron esta guía.

Equipo

0 comentarios

Agregar Comentario

Ver Estadísticas:

Ultimas 24 horas: 0

Ultimos 7 días: 1

Ultimos 30 días: 8

Todo El Tiempo: 1,156