Saltar al contenido principal
Únete a la Comunidad de Reparación - Crear Cuenta

Canon PowerShot SD1100 IS Top Button Assembly Replacement

Qué necesitas

    1. Canon PowerShot SD1100 IS Top Button Assembly Replacement, Front and Rear Cover: paso 1, imagen 1 de 2 Canon PowerShot SD1100 IS Top Button Assembly Replacement, Front and Rear Cover: paso 1, imagen 2 de 2
      • Remove wrist strap and battery.

      Pregunta a FixBot

      Agregar Comentario

    2. Canon PowerShot SD1100 IS Top Button Assembly Replacement: paso 2, imagen 1 de 3 Canon PowerShot SD1100 IS Top Button Assembly Replacement: paso 2, imagen 2 de 3 Canon PowerShot SD1100 IS Top Button Assembly Replacement: paso 2, imagen 3 de 3
      • Remove 2 screws from each side of the camera (4 total, 0.102 in).

      • Remove 2 screws from the bottom on the camera (0.138 in).

      • Do not mix the 4 side screws with the 2 bottoms ones; they are different sizes.

      Pregunta a FixBot

      Agregar Comentario

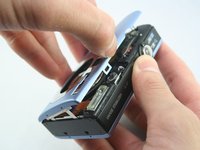
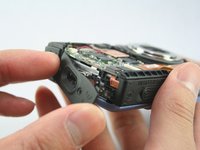
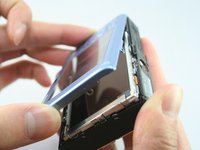
    3. Canon PowerShot SD1100 IS Top Button Assembly Replacement: paso 3, imagen 1 de 3 Canon PowerShot SD1100 IS Top Button Assembly Replacement: paso 3, imagen 2 de 3 Canon PowerShot SD1100 IS Top Button Assembly Replacement: paso 3, imagen 3 de 3
      • Gently pull off the front cover.

      • The plate on the side should come off.

      • Gently pull off the back cover.

      Pregunta a FixBot

      Agregar Comentario

    4. Canon PowerShot SD1100 IS Top Button Assembly Replacement: paso 4, imagen 1 de 1
      • The cases should now be removed.

      Pregunta a FixBot

      Agregar Comentario

    1. Canon PowerShot SD1100 IS Top Button Assembly Replacement, Top Button Assembly: paso 5, imagen 1 de 1
      • Use the spudger to disconnect the black tab.

      Pregunta a FixBot

      Agregar Comentario

    2. Canon PowerShot SD1100 IS Top Button Assembly Replacement: paso 6, imagen 1 de 1
      • Gently pull off the shutter button assembly.

      Pregunta a FixBot

      Agregar Comentario

    3. Canon PowerShot SD1100 IS Top Button Assembly Replacement: paso 7, imagen 1 de 1
      Herramienta utilizada en este paso:
      Tweezers
      $4.99
      • Use the tweezers to disconnect the microphone cable.

      Pregunta a FixBot

      Agregar Comentario

    4. Canon PowerShot SD1100 IS Top Button Assembly Replacement: paso 8, imagen 1 de 1
      • The shutter button assembly should now be removed.

      Pregunta a FixBot

      Agregar Comentario

Conclusión

To reassemble your device, follow these instructions in reverse order.

Cancelar: No complete esta guía.

Una persona más ha completado esta guía.

Wyatt Chan

Miembro Desde 01/05/11

235 Reputación

2 Guías creadas

Equipo

Cal Poly, Team 3-32, Regan Winter 2011 Miembro de Cal Poly, Team 3-32, Regan Winter 2011

CPSU-REGAN-W11S3G32

Miembros de 3

96 Guías creadas

0Guía Comentarios

Agregar Comentario

Ver Estadísticas:

Ultimas 24 horas: 7

Ultimos 7 días: 34

Ultimos 30 días: 60

Todo El Tiempo: 2,634