
Canon PowerShot ELPH 300HS Camera Case Replacement
Introducción
Ir al paso 1Before you begin, make sure that you are in a relatively dust free environment with adequate space for the project. This guide involves lot of small screws, so it will also be helpful to have some way to keep track of them as well.
Qué necesitas
Partes
Herramientas


Ver más…
-
-
Turn off your camera by pressing the power button, located on the top-center of the device.
-
Locate the battery door on the bottom right area of the camera case.
-
Place your finger firmly on the black rubber pad on the battery door and slide the door to the right to open it.
-
Locate the orange battery release button beneath the battery door.
-
Slide the battery release button downward to release the battery.
-
-
-
Remove the two screws located on the left side of the camera case, using the Phillips screwdriver #00 (2.0 mm).
-
-
-
Remove the two screws on the bottom of the camera located near the battery door (Phillips #00 screwdriver) (4.0 mm).
-
-
-
Remove the screw located on the lower right side of the camera case (Phillips #00 screwdriver) (4.0 mm).
-
Remove the HDMI A/V out port cover located on the upper right side of the camera.
-
Remove the screw located just beneath the port cover removed in step 2. (Phillips #00 screwdriver) (2.0 mm).
-
-
-
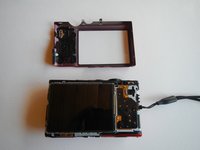
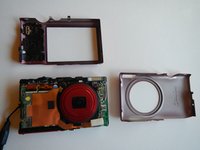
Carefully pry the case apart at the seem, using your fingers.
-


To reassemble your device, follow these instructions in reverse order.
To reassemble your device, follow these instructions in reverse order.
Cancelar: No complete esta guía.
Una persona más ha completado esta guía.
Equipo

Michigan Tech, Team 5-6, Lauer Spring 2014 Miembro de Michigan Tech, Team 5-6, Lauer Spring 2014
MTU-LAUER-S14S5G6
3 Miembros
6 Guías creadas