Saltar al contenido principal
Canon EOS Rebel T1i Front Screen Replacement

Canon EOS Rebel T1i Front Screen Replacement

Michael Peck

Michael Peck y 8 otros contribuidores

Última actualización: February 6, 2020

10 minuto
Fácil
Necesita mejores imágenes

Introducción

Ir al paso 1

This guide will take you through the steps required to change your screen and get a clear view of your picture.

Qué necesitas

  1. Canon EOS Rebel T1i Front Screen Replacement, Front Screen: paso 1, imagen 1 de 1
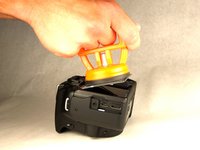
    • Clean the broken or cracked screen as best as possible.

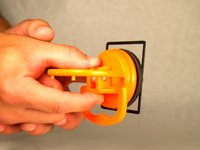
    • Place the suction cup on the damaged screen.

  2. Canon EOS Rebel T1i Front Screen Replacement: paso 2, imagen 1 de 2 Canon EOS Rebel T1i Front Screen Replacement: paso 2, imagen 2 de 2
    • While holding the suction cup flat against the camera screen, suction the two together by pinching the orange handles to meet at the center.

  3. Canon EOS Rebel T1i Front Screen Replacement: paso 3, imagen 1 de 3 Canon EOS Rebel T1i Front Screen Replacement: paso 3, imagen 2 de 3 Canon EOS Rebel T1i Front Screen Replacement: paso 3, imagen 3 de 3
    • Grab the handle of the suction cup and gently lift it up at an angle, as demonstrated in the picture.

    • Remove the plastic screen from the camera.

    • Release the broken screen by pulling down the lever of the suction cup.

Conclusión

To reassemble your device, follow these instructions in reverse order.

5 personas más completaron esta guía.

Michael Peck

Miembro Desde 04/14/14

167 Reputación

1 Guía escrita

Equipo

Cal Poly, Team 3-41, Maness Spring 2014 Miembro de Cal Poly, Team 3-41, Maness Spring 2014

CPSU-MANESS-S14S3G41

4 Miembros

10 Guías creadas

Un comentario

Be sure to measure the size of your screen before buying the suction cups. I got the heavy-duty ones and then found that they were too big for my Rebel T1i screen.

cmorris - Contestar

Agregar Comentario

Ver Estadísticas:

Ultimas 24 horas: 0

Ultimos 7 días: 15

Ultimos 30 días: 42

Todo El Tiempo: 5,655