Saltar al contenido principal
Brother MFC-490CW Scanning Glass Replacement

Brother MFC-490CW Scanning Glass Replacement

George Kielpinski

George Kielpinski y 3 otros contribuidores

Última actualización: August 13, 2024

Sin estimación
Moderado

Introducción

Ir al paso 1

The glass that you place your documents on can break or crack causing this function to be unusable. This guide will show and explain how one can isolate and then replace the scanner glass.

Qué necesitas

iFixit gana una comisión si finalizas una compra usando estos enlaces.
  1. Brother MFC-490CW Scanning Glass Replacement, Removing Scanner Header: paso 1, imagen 1 de 3 Brother MFC-490CW Scanning Glass Replacement, Removing Scanner Header: paso 1, imagen 2 de 3 Brother MFC-490CW Scanning Glass Replacement, Removing Scanner Header: paso 1, imagen 3 de 3
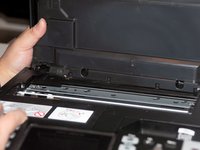
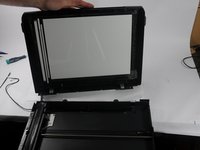
    • Twist green section to allow the scanner head to have a full range of motion.

  2. Brother MFC-490CW Scanning Glass Replacement, Removing Scan Header: paso 2, imagen 1 de 3 Brother MFC-490CW Scanning Glass Replacement, Removing Scan Header: paso 2, imagen 2 de 3 Brother MFC-490CW Scanning Glass Replacement, Removing Scan Header: paso 2, imagen 3 de 3
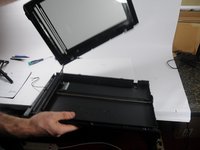
    • To remove scanner head, open it halfway as possible and slide the hinges out of place and the head will be removed.

  3. Brother MFC-490CW Scanning Glass Replacement, Remove scanner head connection to printer: paso 3, imagen 1 de 3 Brother MFC-490CW Scanning Glass Replacement, Remove scanner head connection to printer: paso 3, imagen 2 de 3 Brother MFC-490CW Scanning Glass Replacement, Remove scanner head connection to printer: paso 3, imagen 3 de 3
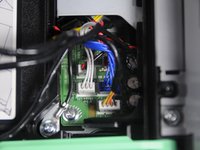
    • The panels to expose the cords will become exposed when the head is removed.

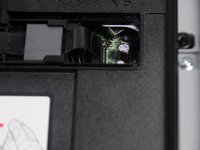
    • Pull all colored cords from the printer and unscrew the other wire to be fully removed.

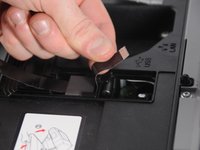
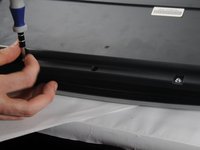
    • Pull the black tab from the printer to remove.

  4. Brother MFC-490CW Scanning Glass Replacement, Removing the bottom screws: paso 4, imagen 1 de 2 Brother MFC-490CW Scanning Glass Replacement, Removing the bottom screws: paso 4, imagen 2 de 2
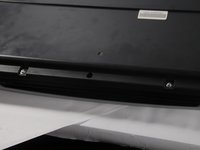
    • Once scanner is free from the printer remove all the screws on the bottom base

    • Use a #2 Philips head screw driver to remove the two 12.1mm screws.

  5. Brother MFC-490CW Scanning Glass Replacement, Exposing scanner glass: paso 5, imagen 1 de 3 Brother MFC-490CW Scanning Glass Replacement, Exposing scanner glass: paso 5, imagen 2 de 3 Brother MFC-490CW Scanning Glass Replacement, Exposing scanner glass: paso 5, imagen 3 de 3
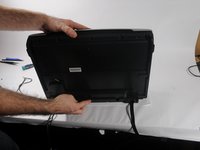
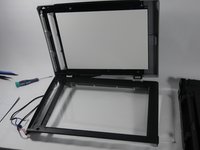
    • To separate the base from the glass hold upright and separate along the edge where you removed the screws.

    • Use hands to expose the glass.

    • Keep track flat once glass is removed as to not lose little parts.

  6. Brother MFC-490CW Scanning Glass Replacement, Replacing scanner glass: paso 6, imagen 1 de 3 Brother MFC-490CW Scanning Glass Replacement, Replacing scanner glass: paso 6, imagen 2 de 3 Brother MFC-490CW Scanning Glass Replacement, Replacing scanner glass: paso 6, imagen 3 de 3
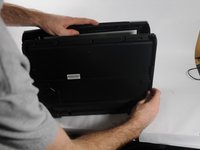
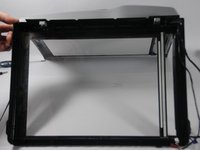
    • Disconnect the glass from the tracks.

    • Remove old or broken glass.

    • Replace with adhesive tape along the bottom of the header and reassemble.

Conclusión

To reassemble your device, follow these instructions in reverse order.

2 personas más completaron esta guía.

Equipo

UMass Dartmouth, Team 4-4, Miles Fall 2014 Miembro de UMass Dartmouth, Team 4-4, Miles Fall 2014

UMASSD-MILES-F14S4G4

3 Miembros

11 Guías creadas

0 comentarios

Agregar Comentario

Ver Estadísticas:

Ultimas 24 horas: 8

Ultimos 7 días: 25

Ultimos 30 días: 91

Todo El Tiempo: 4,534