Saltar al contenido principal
Brother CS6000i Needle Plate Replacement

Brother CS6000i Needle Plate Replacement

Ava Martinez

Ava Martinez y 2 otros contribuidores

Última actualización: December 31, 2024

15 - 20 minutos
Moderado

Introducción

Ir al paso 1

This guide will teach you how to replace the metal needle plate on the Brother CS6000i. You will need a Phillips #2 screwdriver as well as a 4mm flathead screwdriver. It will take about 15-20 minutes.

Qué necesitas

iFixit gana una comisión si finalizas una compra usando estos enlaces.
  1. Brother CS6000i Needle Plate Replacement, Body: paso 1, imagen 1 de 2 Brother CS6000i Needle Plate Replacement, Body: paso 1, imagen 2 de 2
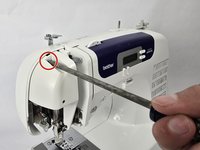
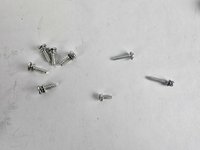
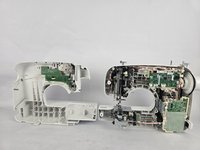
    • Remove the five 20 mm Phillips #2 screws on the back of the device.

    • Remove the single 28 mm Phillips #2 screw on the back of the device.

    • Remove the single 23 mm Phillips #2 screw on the back of the device.

  2. Brother CS6000i Needle Plate Replacement: paso 2, imagen 1 de 2 Brother CS6000i Needle Plate Replacement: paso 2, imagen 2 de 2
    • Pull the white cover off.

  3. Brother CS6000i Needle Plate Replacement: paso 3, imagen 1 de 2 Brother CS6000i Needle Plate Replacement: paso 3, imagen 2 de 2
    • Remove the final screw, a 11 mm Phillips #2.

    • After removing all eight screws, you will have five 2 mm screws, one 28 mm screw, one 23 mm screw, and one 11 mm screw, all of which are Phillips #2.

  4. Brother CS6000i Needle Plate Replacement: paso 4, imagen 1 de 3 Brother CS6000i Needle Plate Replacement: paso 4, imagen 2 de 3 Brother CS6000i Needle Plate Replacement: paso 4, imagen 3 de 3
    • Slightly pull apart the two halves of the machine, taking care not to strain the attached cables.

    • Unhook the white wires that are connected to the motherboard.

    • Fully separate the two halves.

  5. Brother CS6000i Needle Plate Replacement, Needle Plate: paso 5, imagen 1 de 2 Brother CS6000i Needle Plate Replacement, Needle Plate: paso 5, imagen 2 de 2
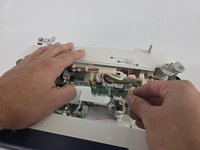
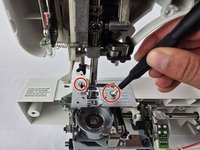
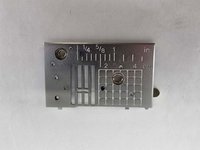
    • Remove the two screws securing the needle plate with a 4mm flathead screwdriver.

Conclusión

To reassemble your device, follow these instructions in reverse order.

Ava Martinez

Miembro Desde 10/31/24

433 Reputación

4 Guías creadas

Equipo

Cuesta, Team 20-1, Krynen Fall 2024 Miembro de Cuesta, Team 20-1, Krynen Fall 2024

CUESTA-KRYNEN-F24S20G1

Miembros de 5

8 Guías creadas

0 comentarios

Agregar Comentario

Ver Estadísticas:

Ultimas 24 horas: 2

Ultimos 7 días: 10

Ultimos 30 días: 25

Todo El Tiempo: 58