Saltar al contenido principal
Blink Video Doorbell Daughterboard Replacement

Blink Video Doorbell Daughterboard Replacement

Kayla Crai

Kayla Crai y 4 otros contribuidores

Última actualización: January 3, 2025

15 - 20 minutos
Moderado

Introducción

Ir al paso 1

Use this guide to replace the daughterboard in your Blink Video Doorbell.

Qué necesitas

Herramientas

Ver más…

iFixit gana una comisión si finalizas una compra usando estos enlaces.
  1. Blink Video Doorbell Daughterboard Replacement, Battery: paso 1, imagen 1 de 3 Blink Video Doorbell Daughterboard Replacement, Battery: paso 1, imagen 2 de 3 Blink Video Doorbell Daughterboard Replacement, Battery: paso 1, imagen 3 de 3
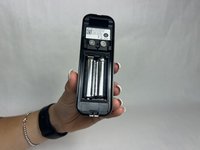
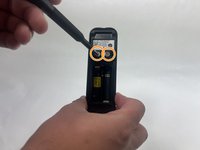
    • Push the opening key into the small opening with the two gray buttons on the bottom of the device.

    • The device will click off the mount.

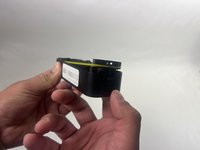
    • Push the device up from the mount and slide it off.

  2. Blink Video Doorbell Daughterboard Replacement: paso 2, imagen 1 de 3 Blink Video Doorbell Daughterboard Replacement: paso 2, imagen 2 de 3 Blink Video Doorbell Daughterboard Replacement: paso 2, imagen 3 de 3
    • Use your finger to slide the gray tab, located near the bottom of the device, upwards.

    • Remove the battery cover.

  3. Blink Video Doorbell Daughterboard Replacement: paso 3, imagen 1 de 3 Blink Video Doorbell Daughterboard Replacement: paso 3, imagen 2 de 3 Blink Video Doorbell Daughterboard Replacement: paso 3, imagen 3 de 3
    • Remove the right battery by pushing the positive end down and pulling the battery out toward yourself.

    • Repeat the procedure for the left battery.

    • Do not mix used and new batteries or batteries of different types (for example, lithium and alkaline batteries).

  4. Blink Video Doorbell Daughterboard Replacement, Back Panel: paso 4, imagen 1 de 3 Blink Video Doorbell Daughterboard Replacement, Back Panel: paso 4, imagen 2 de 3 Blink Video Doorbell Daughterboard Replacement, Back Panel: paso 4, imagen 3 de 3
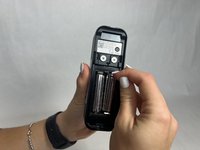
    • Remove the two 6 mm screws in the battery compartment using a JIS #1 screwdriver.

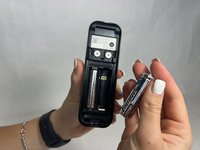
    • Remove the two 7 mm screws above the battery compartment using a JIS #1 screwdriver.

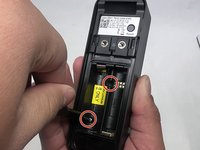
    • Starting from the bottom of the device, pry the back plate away from the rest of the doorbell.

  5. Blink Video Doorbell Daughterboard Replacement, Lens: paso 5, imagen 1 de 3 Blink Video Doorbell Daughterboard Replacement, Lens: paso 5, imagen 2 de 3 Blink Video Doorbell Daughterboard Replacement, Lens: paso 5, imagen 3 de 3
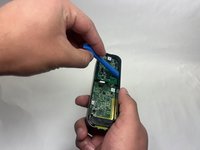
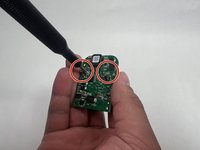
    • Remove the three 6 mm screws from the upper part of the motherboard using a JIS #1 screwdriver.

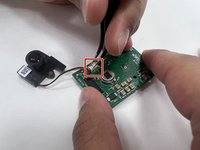
    • Use an opening tool to release the motherboard from the device.

  6. Blink Video Doorbell Daughterboard Replacement: paso 6, imagen 1 de 2 Blink Video Doorbell Daughterboard Replacement: paso 6, imagen 2 de 2
    • Carefully lift up the small daughterboard which contains the camera.

    • Remove two 5 mm screws from the back of the camera using a Phillips #0 screwdriver.

  7. Blink Video Doorbell Daughterboard Replacement: paso 7, imagen 1 de 2 Blink Video Doorbell Daughterboard Replacement: paso 7, imagen 2 de 2
    • Use tweezers to detach the white connector from the adapter on the motherboard.

    • Remove the lens.

  8. Blink Video Doorbell Daughterboard Replacement, Daughterboard: paso 8, imagen 1 de 1
    • After removing the lens, you are left with the daughterboard.

Conclusión

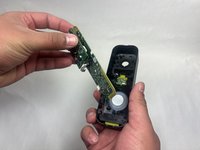
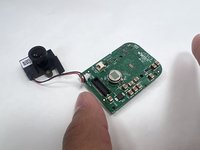
To reassemble your device, follow these instructions in reverse order.

Kayla Crai

Miembro Desde 10/18/24

495 Reputación

4 Guías creadas

Equipo

UMass Dartmouth, Team 1-1, Konn Fall 2024 Miembro de UMass Dartmouth, Team 1-1, Konn Fall 2024

UMASSD-KONN-F24S1G1

4 Miembros

5 Guías creadas

0 comentarios

Agregar Comentario

Ver Estadísticas:

Ultimas 24 horas: 0

Ultimos 7 días: 4

Ultimos 30 días: 22

Todo El Tiempo: 105