Saltar al contenido principal
Asus X550ZA-SA100603E Battery Replacement

Asus X550ZA-SA100603E Battery Replacement

Tim Linton

Tim Linton y 5 otros contribuidores

Última actualización: January 9, 2020

8 - 15 minutos
Fácil

Introducción

Ir al paso 1

If your battery does not charge or drains really fast, you may want to replace your battery. Old or faulty batteries can cause shortened battery life. This guide will show you to how to remove the battery from the laptop to replace it with a new one.

Qué necesitas

Herramientas

  1. Asus X550ZA-SA100603E Battery Replacement, Keyboard: paso 1, imagen 1 de 1
    • Using the Phillips #0 screwdriver, remove the seven 14 mm screws on the bottom of the laptop.

    • Then use the Phillips #0 to remove the three 4 mm screws on the bottom of the laptop.

  2. Asus X550ZA-SA100603E Battery Replacement: paso 2, imagen 1 de 3 Asus X550ZA-SA100603E Battery Replacement: paso 2, imagen 2 de 3 Asus X550ZA-SA100603E Battery Replacement: paso 2, imagen 3 de 3
    • Insert a plastic opening tool between the keyboard and base of the laptop to pry the keyboard away from the base. Do this around the entire perimeter of the laptop.

    • This disconnects the face of the keyboard. Gently lift the keyboard up to expose the motherboard.

    • There are still ribbon cables connecting the keyboard face to the motherboard. Do not pull the keyboard away roughly.

  3. Asus X550ZA-SA100603E Battery Replacement: paso 3, imagen 1 de 3 Asus X550ZA-SA100603E Battery Replacement: paso 3, imagen 2 de 3 Asus X550ZA-SA100603E Battery Replacement: paso 3, imagen 3 de 3
    Herramienta utilizada en este paso:
    Tweezers
    $4.99
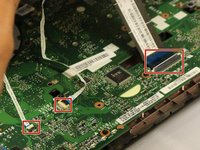
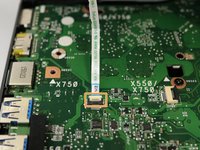
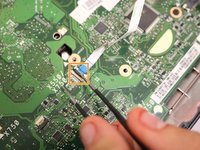
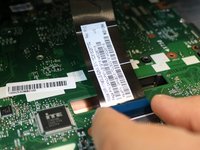
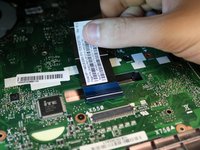
    • Gently lift the keyboard to access the three ribbon cables connected to the motherboard

    • Using precision tweezers, flip up the white and black retaining flaps on the ZIF connectors that hold the two smaller ribbon cables in place.

    • Gently pull the ribbon cables from their sockets on the motherboard.

  4. Asus X550ZA-SA100603E Battery Replacement: paso 4, imagen 1 de 3 Asus X550ZA-SA100603E Battery Replacement: paso 4, imagen 2 de 3 Asus X550ZA-SA100603E Battery Replacement: paso 4, imagen 3 de 3
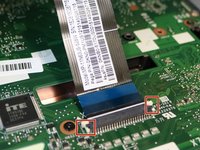
    • Push the two white clamps on the large ZIF connector towards the screen.

    • Gently remove the track pad ribbon cable from its connector.

  5. Asus X550ZA-SA100603E Battery Replacement: paso 5, imagen 1 de 1
    • Remove the keyboard.

  6. Asus X550ZA-SA100603E Battery Replacement, Battery: paso 6, imagen 1 de 2 Asus X550ZA-SA100603E Battery Replacement, Battery: paso 6, imagen 2 de 2
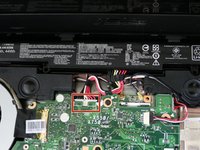
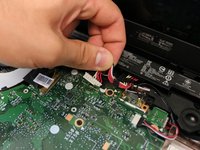
    • Disconnect the multi-wire battery plug from the motherboard.

  7. Asus X550ZA-SA100603E Battery Replacement: paso 7, imagen 1 de 3 Asus X550ZA-SA100603E Battery Replacement: paso 7, imagen 2 de 3 Asus X550ZA-SA100603E Battery Replacement: paso 7, imagen 3 de 3
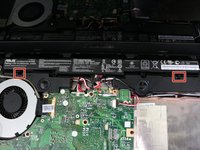
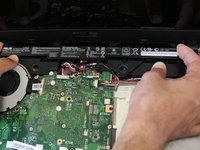
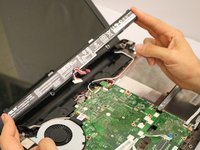
    • Pull the two tabs holding the battery in place and lift the battery up. It should remove easily.

Conclusión

To reassemble your device, follow these instructions in reverse order.

6 personas más completaron esta guía.

0 comentarios

Agregar Comentario

Ver Estadísticas:

Ultimas 24 horas: 0

Ultimos 7 días: 0

Ultimos 30 días: 40

Todo El Tiempo: 6,309